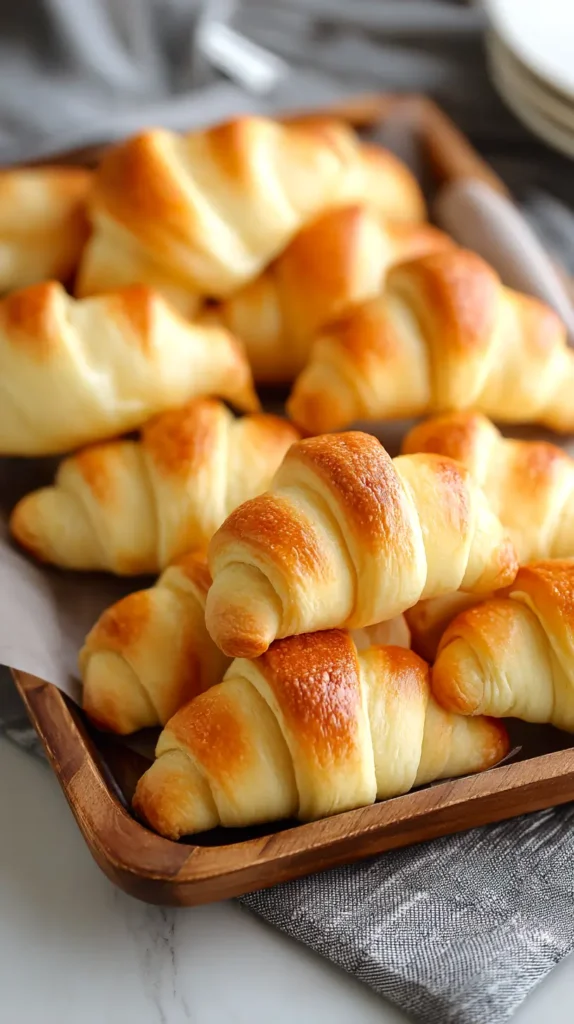
I love a recipe that starts with a familiar pop and ends without a cardboard tube. Crescent roll recipes sit in that sweet spot between comfort and control, which is why this copy-cat version exists. I wanted the flaky layers, the gentle butter aroma, and the soft pull-apart center. I also wanted to know what went in. That curiosity nudged me into testing, tweaking, and simplifying until the dough behaved. Now it behaves beautifully.
This post is for anyone who likes options. Dinner rolls can hit the table tonight. Dough also freezes well for later. Crescents, knots, or logs all work with this recipe. Most importantly, store trips stop being the default when inspiration strikes. I’ve found that homemade dough brings confidence, especially when the steps stay friendly.
I live in Florida, where humidity is a daily guest. Because of that, dough can act moody. So, this recipe accounts for warmth and moisture without fuss. It keeps timing flexible, which helps on busy days. Meanwhile, the method stays approachable, even if yeast makes you nervous.
You’ll get exact ingredients, clear measurements, and step-by-step instructions. You’ll also get smart explanations, because understanding reduces stress. Along the way, I’ll share shaping options and storage tips. I’ll keep it chatty, because cooking should never feel stiff. And yes, the rolls bake up tender, golden, and properly flaky. That matters.
If you’ve ever unrolled a tube and thought, “I could use a bit more say in this recipe,” then welcome to the right kitchen!
Some of the links on this page are affiliate links, which means that if you click on them and buy something, I might get a small commission. But don’t worry; it never costs you more. You can peek at my full disclosure if you’re curious about the fine print.
What Makes These Taste Like the Classic
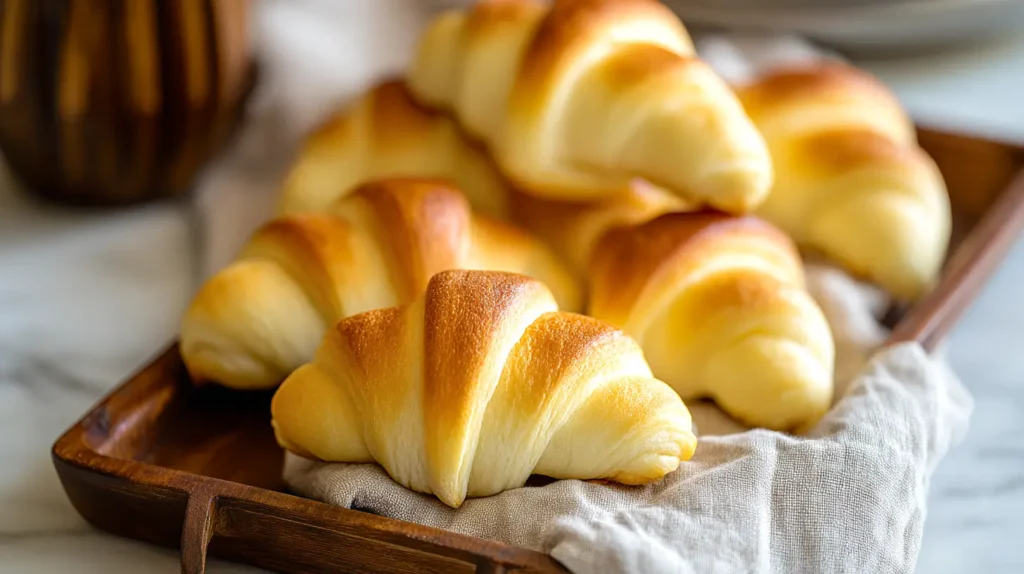
Copy-cat success starts with texture. These crescent roll recipes rely on a soft, enriched dough that stays light without turning sweet. The balance matters. Too much sugar toughens the crumb. Too little fat kills flake.
First, butter handles flavor and layers. Melted butter enriches the dough. Then, cold butter brushed between folds creates gentle lamination. That step builds the familiar pull without turning the process technical.
Next, milk softens everything. Warm milk feeds yeast while keeping the crumb tender. Water alone dries rolls faster. Meanwhile, eggs add structure and color, yet they stay subtle here.
Salt plays defense. It sharpens flavor and controls yeast speed. Because of that, the dough rises steadily instead of racing. As a result, the rolls bake evenly.
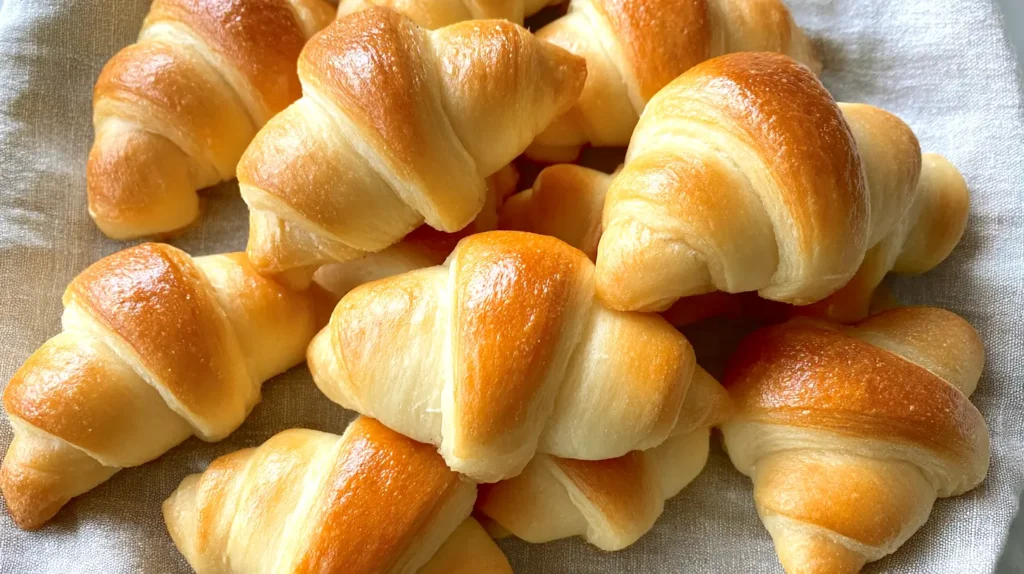
Finally, shaping seals the deal. Triangles rolled snugly create the iconic curve. However, the same dough works as knots or rounds. That flexibility matters for weeknights.
Here’s the core logic, in plain terms:
- Soft dough comes from milk, butter, and egg.
- Flake comes from folding and brushing butter.
- Lift comes from yeast, patience, and warmth.
- Flavor comes from balance, not sugar.
Because I cook in Florida, I adjust flour gently. Humid air means dough absorbs moisture slower. Therefore, I add flour last, one tablespoon at a time.
If you’ve tried crescent roll recipes before and found them bready, this version fixes that. The dough stays pillowy. The edges brown softly. And the inside tears cleanly, like the classic.
Understanding the why makes the how easier. That confidence shows in the bake.
Ingredients You Need For Copy-Cat Crescent Roll Recipes
Getting it right with dough is key! These crescent roll recipes use pantry staples with exact measurements. Gather everything first, because flow helps.
Here’s the full ingredient list:
- 3/4 cup whole milk, warmed to 110°F
- 2 1/4 teaspoons active dry yeast, one standard packet
- 3 tablespoons granulated sugar
- 1 large egg, room temperature
- 1 teaspoon fine sea salt
- 3 1/2 cups all-purpose flour, plus up to 1/4 cup for adjustments
- 6 tablespoons unsalted butter, melted and cooled
- 3 tablespoons unsalted butter, softened, for brushing layers
A few notes help here. Warm milk should feel warm, not hot. Hot milk kills yeast. Also, use unsalted butter so salt stays controlled.
If your kitchen runs warm, chill the softened butter briefly. You want it spreadable, not liquid. Meanwhile, room-temperature eggs mix cleaner.
Flour brands vary. Because of that, hold back the extra flour. Add it only if dough sticks excessively. Slight tackiness is good.
Optional finishing items:
- 1 tablespoon melted butter, for brushing after baking
- A pinch of flaky salt, optional
This dough avoids preservatives. Therefore, freshness matters. Use fresh yeast for the best rise. If yeast foams, it’s alive. If not, replace it.
I’ve found that measuring flour by spooning it into the cup helps. Level with a knife for consistency. Scooping packs of flour, which dries the dough.
Once measured, set everything within reach. Dough rewards calm, organized steps.
Step-By-Step Dough Instructions
These steps look long, yet they move quickly. Follow them once, then trust your hands. Crescent roll recipes reward rhythm.
- Combine warm milk, yeast, and sugar in a large bowl. Stir gently. Rest five minutes until foamy.
- Whisk the egg, salt, and melted butter into the yeast mixture until smooth.
- Add 3 cups of flour. Stir with a spoon until a shaggy dough forms.
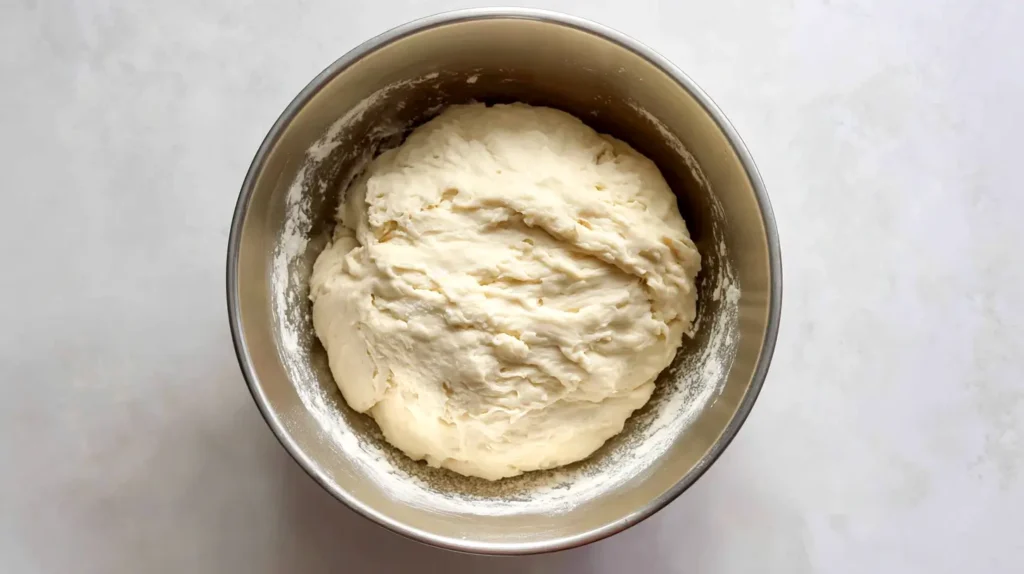
- Turn the dough onto a lightly floured surface. Knead for five minutes, adding flour as needed.
- Dough should be soft, smooth, and slightly tacky, not sticky.
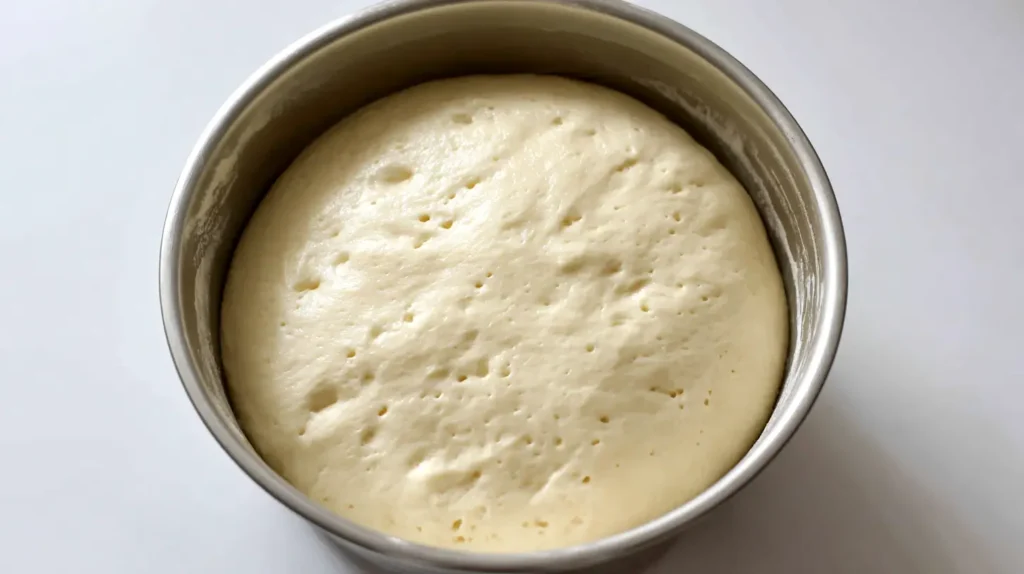
- Shape dough into a ball. Place in a greased bowl. Cover loosely.
- Let dough rise 60 to 75 minutes until doubled.
Now the layering step:
8. Punch down dough gently. Roll into a 12-inch circle.
9. Brush the surface with softened butter, covering evenly.
10. Fold dough in half, then in half again, creating a quarter circle.
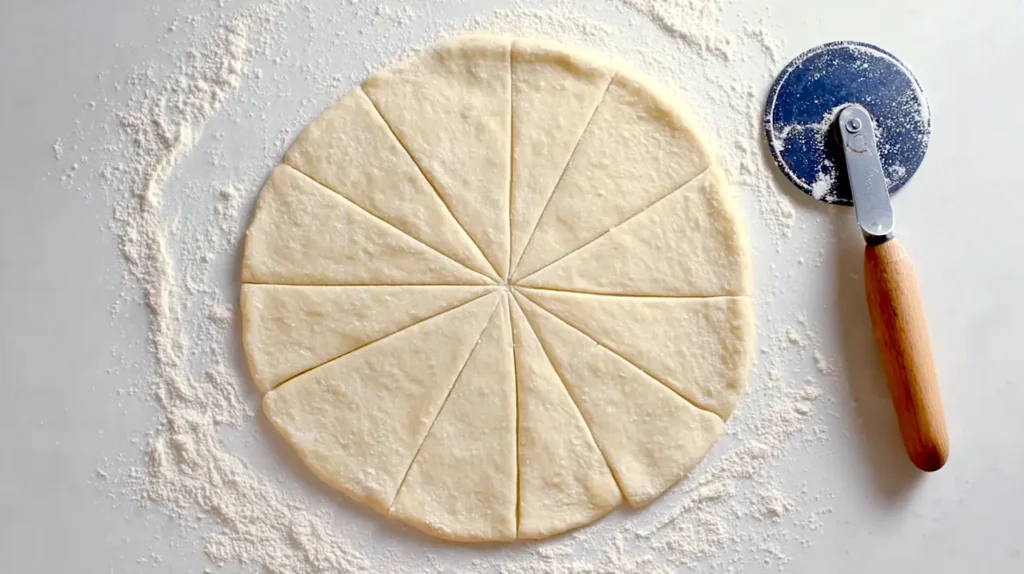
11. Roll gently into a 12-inch circle again.
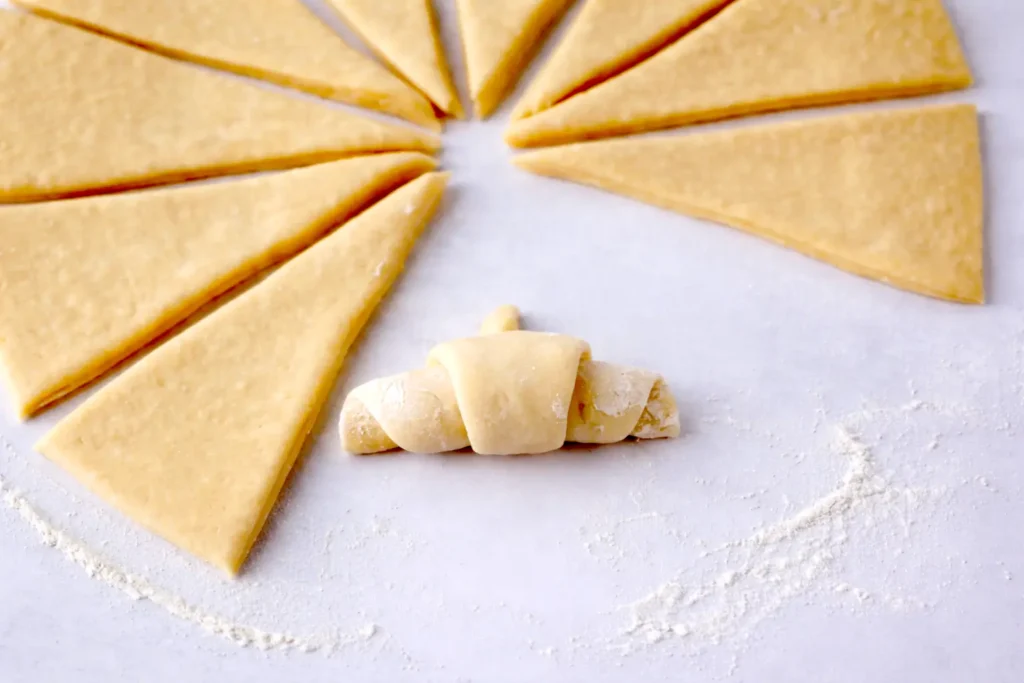
12. Cut the circle into 12 equal triangles.
Shaping and baking:
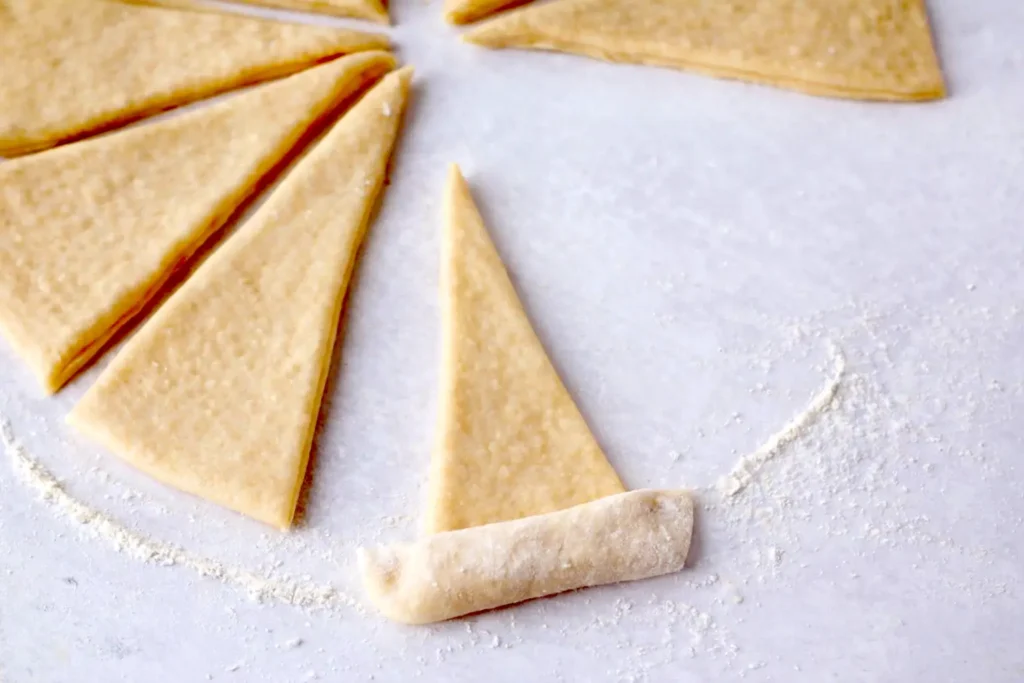
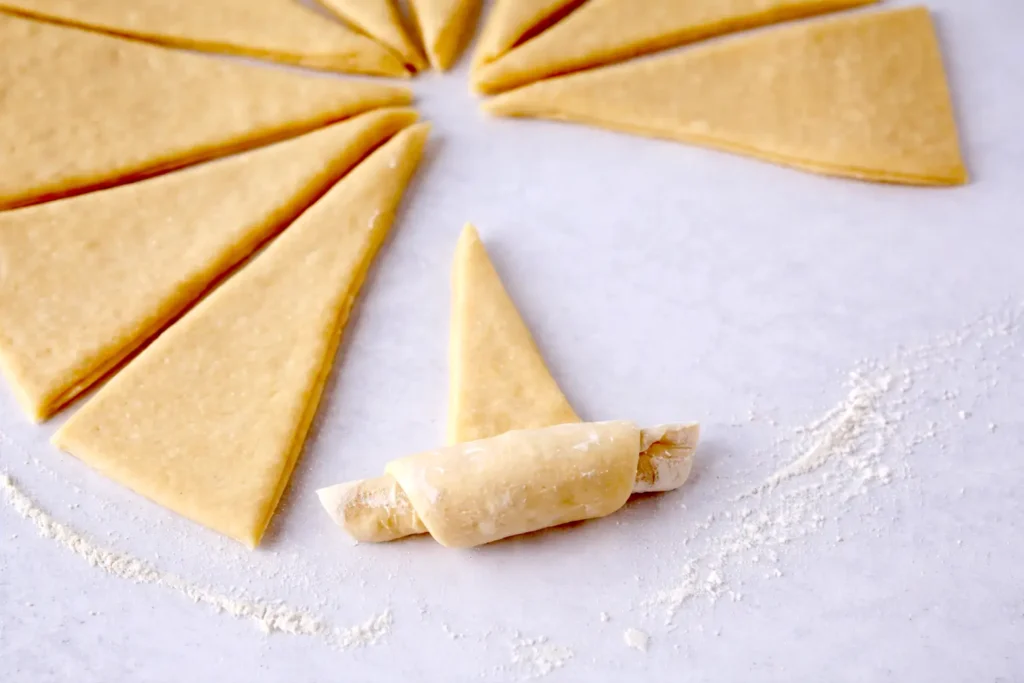
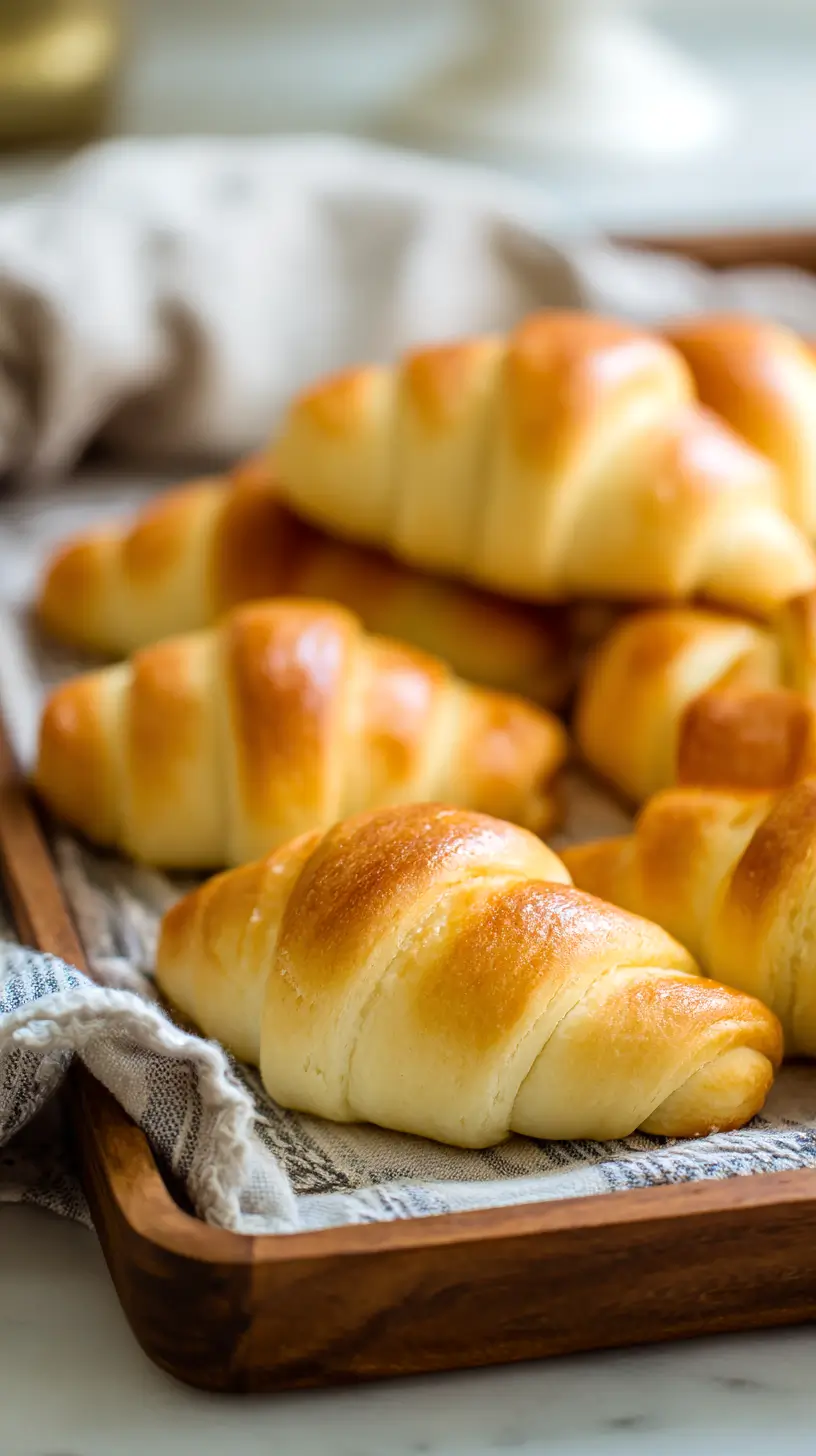
13. Roll each triangle from the wide end toward the tip.
14. Curve slightly to form crescents.
15. Place on a parchment-lined baking sheet, spaced apart.
16. Cover and rest 20 minutes while the oven heats to 375°F.
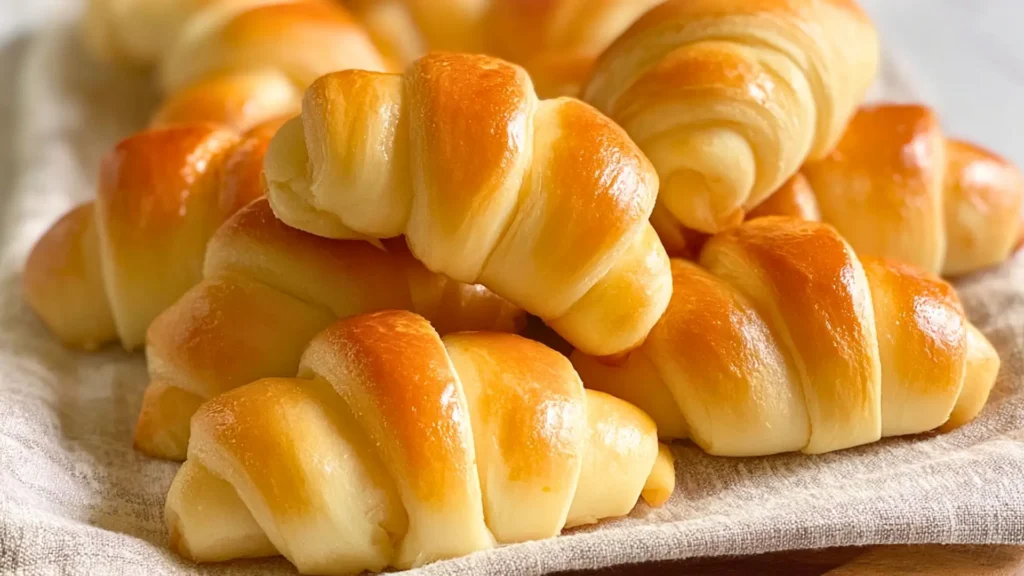
17. Bake for 11 to 13 minutes until lightly golden.
18. Brush with melted butter immediately, if desired.
Timing matters. So, keep an eye on the color, not the time! Rolls should stay pale gold.
Shaping Options That Work
Classic crescents shine, yet flexibility helps. These crescent roll recipes support many shapes without extra math. That’s freedom.
Traditional crescents come from triangles. However, dough behaves well in other forms. Use the same dough and the same bake time.
Try these options:
- Knots: Cut strips, tie loosely, then tuck ends underneath.
- Dinner rounds: Divide dough into 12 balls. Tuck seams underneath.
- Pinwheels: Spread butter, roll into a log, slice rounds.
- Stuffed rolls: Add a teaspoon of filling before rolling.
When stuffing, keep fillings dry. Shredded cheese works well. Thin ham works too. Avoid wet fillings, which leak.
Spacing matters with shapes. Rounds need more space. Knots spread slightly. Meanwhile, crescents rise upward more than outward.
Resting after shaping improves texture. That short rest relaxes gluten. As a result, rolls bake taller and softer.
If the kitchen runs warm, shorten the rest. If cool, extend by five minutes. Watch the volume, not the clock.
I’ve found that shaping feels easier with lightly oiled hands. Flour can toughen seams. Oil keeps edges soft.
No matter the shape, keep the tip tucked under. That prevents unrolling in the oven.
These options make crescent roll recipes fun and easy peasy!
Baking Tips That Keep Crescent Roll Recipes Soft
Baking seems simple, yet small details protect softness. Crescent roll recipes depend on gentle heat and timing.
First, oven temperature matters. Preheat fully to 375°F. An underheated oven dries dough. Meanwhile, an overheated oven browns too fast.
Second, use parchment paper. It prevents over-browning bottoms. Also, it helps cleanup.
Third, avoid overbaking. Pull rolls when tops turn pale gold. They continue cooking briefly in the pan.
Steam helps softness. For extra tenderness, place a small oven-safe dish of hot water on the lower rack. That moisture keeps the crust delicate.
Rotate pans halfway if your oven bakes unevenly. Do it quickly to hold heat.
After baking, brush lightly with melted butter. That seals moisture and adds shine. Use restraint, though. Too much butter softens the crust excessively.
Cooling matters too. Let rolls rest five minutes before moving. Then transfer to a rack. Trapped steam causes sogginess.
If rolls brown unevenly, tent loosely with foil for the last minutes. That trick saves color.
Living in Florida means the humidity does all the softening work for me! However, air-conditioned kitchens dry dough. Therefore, don’t skip the butter brush.
These tricks keep that classic crescent roll bite intact!
Storage And Freezing For Crescent Roll Recipes
Homemade dough gives options. Crescent roll recipes store well with smart steps. That flexibility saves time.
For same-day storage, keep baked rolls covered at room temperature. Use a clean towel or container. They stay soft 24 hours.
For longer storage, refrigerate baked rolls up to three days. Rewarm gently at 300°F for five minutes.
Freezing baked rolls works well:
- Cool completely.
- Wrap tightly in foil.
- Freeze up to two months.
- Reheat wrapped at 325°F for 10 minutes.
Freezing unbaked dough offers even more control:
- Shape rolls fully.
- Freeze on a tray until firm.
- Transfer to freezer bags.
- Bake from frozen, adding three minutes.
Do not thaw frozen unbaked rolls. Baking from frozen preserves rise.
If dough sticks during freezing, dust lightly with flour before freezing. Avoid excess flour.
Label bags with dates. Freshness matters.
I’ve found that freezing dough reduces stress on busy days. Dinner rolls appear without effort.
These steps make crescent roll recipes easy-peasy, not fussy!
Mistakes To Avoid When Making Homemade Crescent Rolls
I’ve found that most issues with crescent roll recipes don’t come from big, dramatic errors. They usually come from small, quiet choices that snowball. Dough pays attention. It reacts in real time. Knowing what to avoid keeps everything calm and cooperative.
Overheating the milk is one of the easiest ways to sabotage the whole process. Milk should feel warm and comforting, not aggressive. If you wouldn’t comfortably leave your finger in it, the yeast won’t survive. When yeast doesn’t foam, it isn’t being shy. It’s finished.
Adding too much flour too early causes more problems than people realize. Dough often looks stickier before it smooths out. I’ve learned to trust the kneading stage before reaching for more flour. Too much flour leads to dense rolls, which defeats the point of making crescent roll recipes at home.
Skipping rest time makes dough tense and uncooperative. Resting allows the gluten to relax, which makes shaping easier and the final texture softer. Even short pauses matter more than they seem.
Using butter that’s too warm quietly erases flake. Soft butter creates layers. Melted butter disappears into the dough and takes that signature pull-apart texture with it. If butter drips instead of spreading, it’s too warm.
Rolling too loosely causes crescents to unravel during baking. I always roll snugly and tuck the tip underneath. That small move keeps the shape intact in the oven.
Overbaking for color is tempting but risky. Pale golden is the goal. Dark brown usually means the centers dried out. Pulling them early and brushing with butter finishes them gently, which is exactly what great crescent roll recipes should do.
Copycat Crescent Rolls
Ingredients
Method
- Pour the warm milk into a large mixing bowl.
- Add the yeast and granulated sugar.
- Stir gently and let rest for 5 minutes until foamy.
- Whisk in the egg, fine sea salt, and melted butter until smooth.
- Add 3 cups of the flour and stir until a shaggy dough forms.
- Turn the dough out onto a lightly floured surface.
- Knead the dough for 5 minutes, adding additional flour only if needed.
- Continue kneading until the dough is soft, smooth, and slightly tacky.
- Shape the dough into a ball.
- Place the dough in a lightly greased bowl and cover loosely.
- Let the dough rise for 60 to 75 minutes until doubled in size.
- Gently punch down the dough.
- Roll the dough into a 12-inch circle on a lightly floured surface.
- Brush the surface evenly with the softened butter.
- Fold the dough in half, then fold in half again to form a quarter circle.
- Roll the dough gently back into a 12-inch circle.
- Cut the circle into 12 equal triangular wedges.
- Roll each triangle from the wide end toward the tip.
- Curve each roll slightly to form a crescent shape.
- Place the shaped crescents on a parchment-lined baking sheet, spacing them apart.
- Cover loosely and let rest for 20 minutes.
- Preheat the oven to 375°F while the rolls rest.
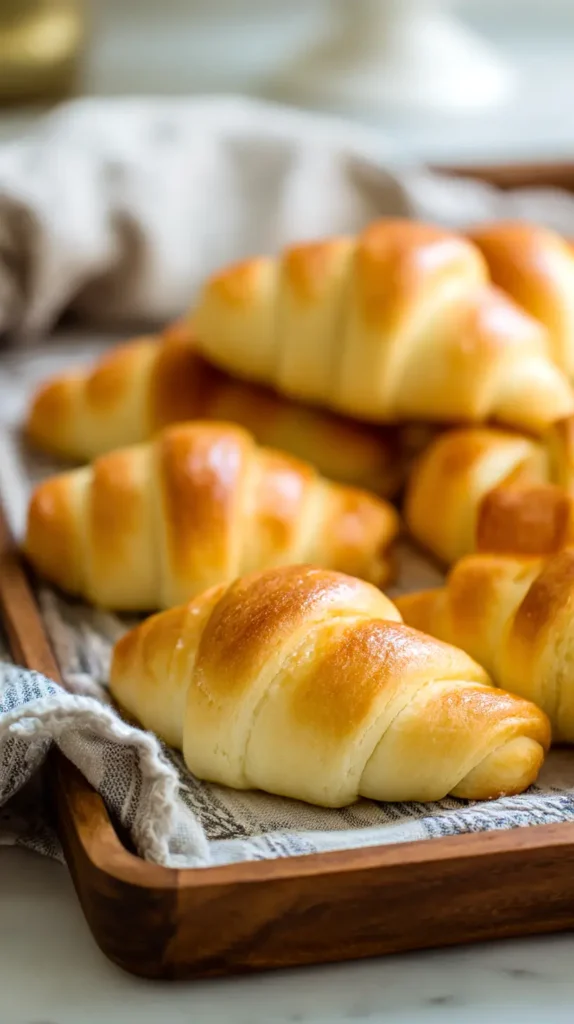
- Bake the rolls for 11 to 13 minutes until lightly golden.
- Remove from the oven and brush with melted butter, if desired.
- Sprinkle lightly with flaky salt, if using.
Tried this recipe?
Let us know how it was!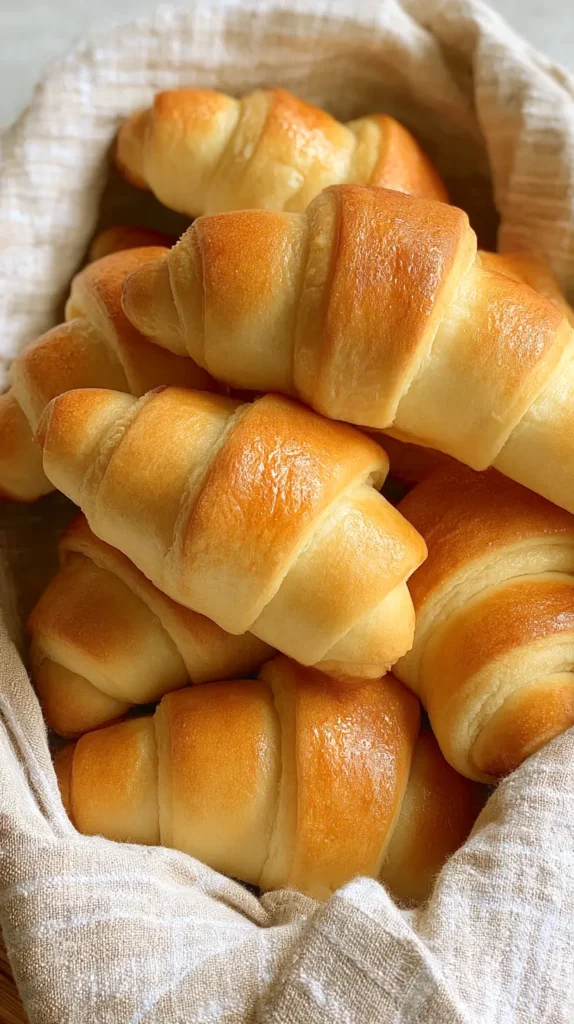
Why This Copy-Cat Beats Store-Bought Crescent Roll Recipes
Convenience has a place. However, control tastes better. Crescent roll recipes made at home offer clarity.
First, ingredients stay simple. No stabilizers. No mystery oils. Just basics.
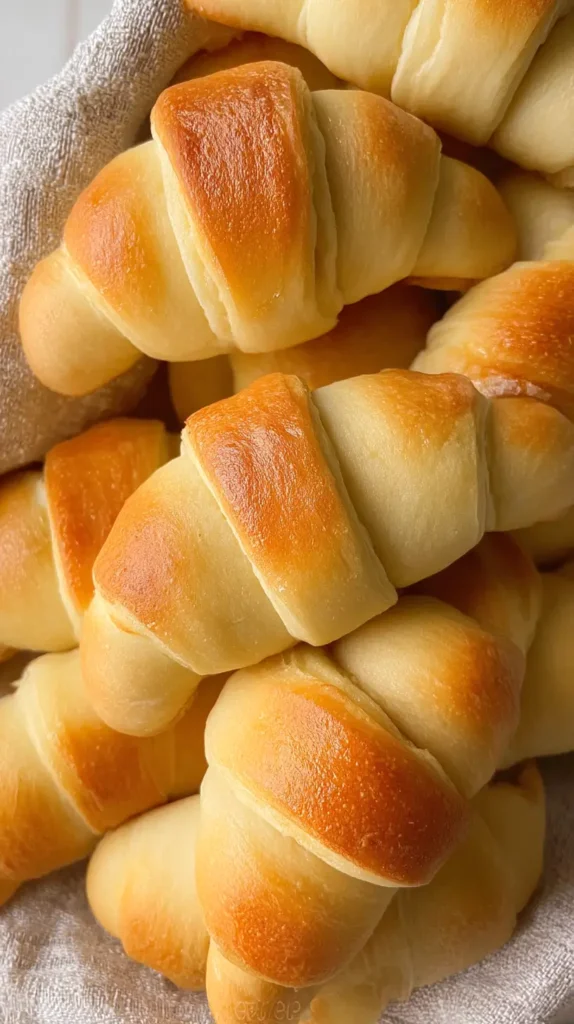
Second, texture improves. Homemade dough tears cleanly instead of stretching oddly. That bite matters.
Third, flavor feels balanced. Butter tastes like butter. Salt tastes intentional.
Fourth, flexibility wins. You choose shapes, sizes, and timing. Tubes choose for you.
Finally, confidence grows. Dough stops feeling intimidating. That confidence spills into other bakes.
I won’t pretend homemade always saves time. Sometimes it doesn’t. However, it saves frustration when plans change.
If the store runs out, you’re covered. If cravings hit late, you’re covered. That independence feels good.
If you’re on the hunt for solid crescent roll recipes, this one definitely deserves a spot in your collection! It works, adapts, and recognizes your efforts.
Final Thoughts On Homemade Crescent Roll Recipes
Dough you can count on just feels right, doesn’t it? Crescent roll recipes like this one bring calm into the kitchen. They don’t rush you. They work with you.
I like knowing I can bake these anytime. That option matters on ordinary days. It also matters on celebratory ones.
Living in Florida means weather shifts constantly. This dough forgives that. It rises without drama. It bakes evenly.
I’ve found that once you bake a copy-cat roll successfully, fear fades. Yeast becomes friendly. Butter becomes purposeful.
This recipe doesn’t replace convenience forever. Instead, it adds choice. Choice feels empowering.
If you love saving ideas, this is a Pinterest-worthy bake. It pins well, because it delivers.
Use it as written. Then tweak shapes later. Keep notes. Make it yours.
Homemade crescent roll recipes remind me that small skills build confidence. That confidence makes cooking lighter.
Seriously, there’s nothing like digging into a warm roll you made yourself. It never gets old!