I’m going to say this upfront, because it saves time. Chocolate chocolate chip cookies should taste like chocolate, not sweet dough with scattered chips. That expectation matters more than most baking advice. I’ve found that disappointment usually comes from cookies that promise richness but deliver sugar instead. People want comfort, but they also want payoff. This recipe focuses on both.
Some cookie recipes ask for faith. Others ask for patience. This one asks for attention. I tend to notice that the best results come from balance and timing, not tricks. “Why doesn’t mine taste like the bakery version?” usually has a simple answer. The chocolate flavor never developed properly.
Living in Orlando means butter softens quickly and ovens run warm, so recipes need to work under real conditions. I don’t want guesswork when the kitchen already moves fast. Instead, I want cookies that keep their shape, bake evenly, and stay soft in the center. These chocolate chocolate chip cookies hold up in everyday kitchens. That reliability matters when time feels tight.
I’m not interested in romantic baking language. I’m interested in results. Every ingredient here serves a clear purpose. Each step exists for a reason. There’s no filler and no “trust the vibes” energy. (That approach never works for me.) I want dough that stays thick, cookies that cool correctly, and chocolate flavor that comes through clearly. If that sounds like your kind of baking, you’re in the right place.
This recipe doesn’t aim to be clever. It aims to work.
Some of the links on this page are affiliate links, which means I may earn a small commission if you purchase through them. It never costs you extra. You can always peek at my full disclosure if you’d like the details.
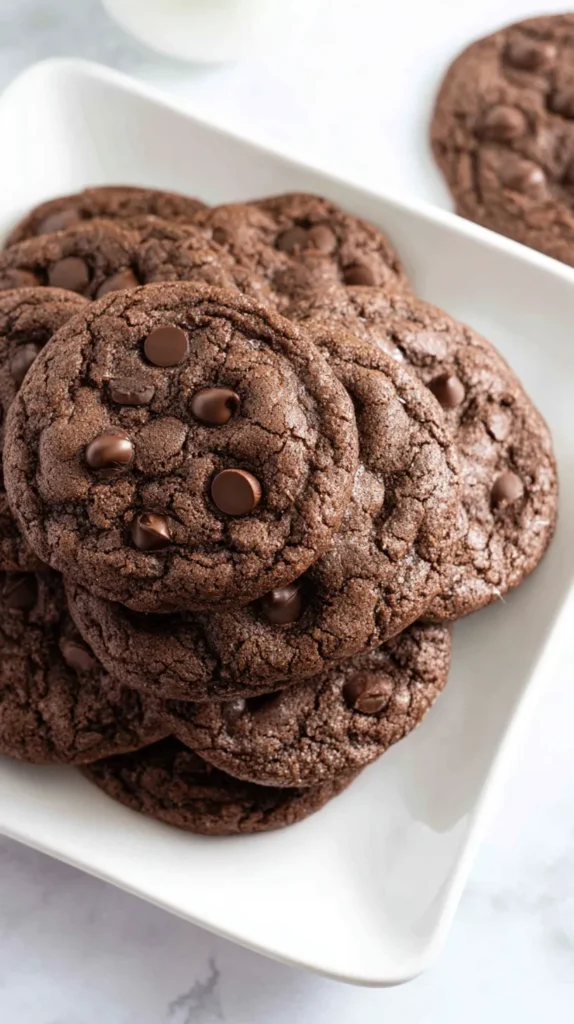
Ingredients That Make Chocolate Chocolate Chip Cookies Worth Baking
Let’s talk ingredients, because this is where most cookie recipes quietly fall apart. Simple doesn’t mean careless. Instead, it means choosing items that consistently produce the result you expect. I’ve found that when measurements and quality line up, everything else becomes easier.
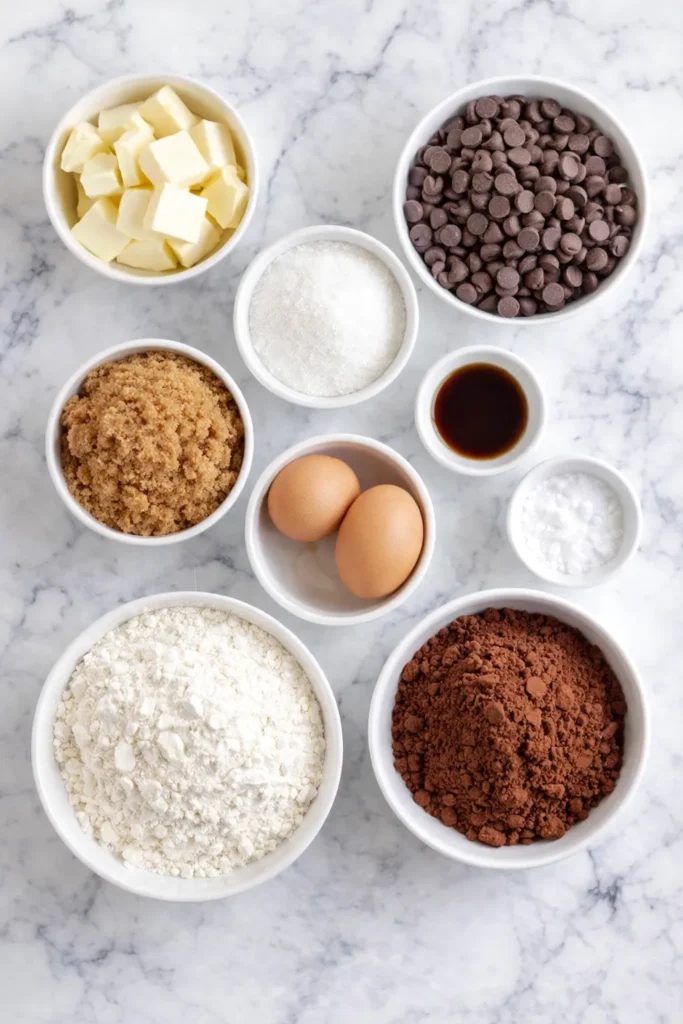
You’ll need one cup of unsalted butter, softened but not melted. Butter temperature affects spread more than most people realize. Use one cup of packed brown sugar and one-half cup of granulated sugar. Brown sugar keeps the centers soft, while white sugar helps the edges set. That contrast matters more than precise baking time.
Add two large eggs at room temperature, then include two teaspoons of vanilla extract. Room temperature eggs mix evenly, which prevents dense spots later. Vanilla doesn’t overpower here. Instead, it rounds out the overall flavor. (That balance matters more than extra chocolate.)
For dry ingredients, combine two cups of all-purpose flour, three-quarters cup Dutch-process cocoa powder, one teaspoon baking soda, and one teaspoon fine sea salt. Whisking matters. Cocoa clumps easily, and uneven mixing causes dry patches. Dutch-process cocoa creates a deeper chocolate base for chocolate chocolate chip cookies. Regular cocoa still works, but the result tastes lighter.
Finish with two cups of chocolate chips or chunks.
• Use chips for cleaner edges and even distribution
• Use chunks for larger melted sections
• Avoid low-quality chocolate with waxy coatings
I tend to choose based on how the cookies will be served. For gatherings, chips stay neater. For casual baking, chunks look more relaxed.
Good ingredients don’t require tricks. However, they do require attention. When measurements stay accurate, the dough behaves predictably. That consistency saves time and frustration later.
Mixing The Dough Without Overthinking It
Cookie dough doesn’t need ceremony, and it definitely doesn’t need stress. Instead, it needs steady movement and a little restraint. I’ve found that most cookie problems start with mixing too fast or too long. Slow and controlled works better here.
Start by creaming the butter with both sugars until the mixture looks light and cohesive. This step takes about two minutes, so patience helps. Overmixing introduces too much air, which causes uneven spread later. After that, add the eggs one at a time, mixing just until incorporated. Then pour in the vanilla and pause for a second. “That looks right,” is usually the goal.
In a separate bowl, whisk together the flour, cocoa powder, baking soda, and salt. This step prevents dry pockets, which show up after baking. Cocoa powder clumps easily, so thorough whisking matters more than people expect. Once combined, gradually add the dry ingredients to the wet mixture. Keep the mixer on low speed. Stop as soon as the flour disappears.
At this point, the dough should look thick and uniform. That thickness matters for structure and bake consistency. If the dough seems loose, butter temperature usually explains it. Warm butter changes everything, especially with chocolate-heavy doughs.
Fold in the chocolate chips by hand, not with the mixer. This spreads things out nicely without making the dough work too hard. I tend to slow down here on purpose. Mixing stops when the chips spread evenly, not when the dough looks polished.
For chocolate chocolate chip cookies, restraint during mixing matters as much as ingredient quality. When the dough stays controlled, the bake stays predictable. Being predictable? Total time-saver and frustration-buster!
Chilling The Chocolate Chocolate Chip Cookie Dough (Yes, It Matters)
I know chilling dough sounds optional, especially when time feels tight. However, this step changes the outcome more than almost any other. Cocoa-based dough behaves differently than vanilla dough. Cocoa absorbs moisture slowly, so resting time matters. I’ve found that skipping the chill usually leads to cookies spreading too fast.
Cover the dough tightly and refrigerate it for at least one hour. Two hours works better if your kitchen runs warm. Overnight chilling also works well when planning ahead. During this time, the flour hydrates evenly and the butter firms up. That combination keeps the dough from losing structure in the oven. Without chilling, cookies often bake flat and uneven.
While the dough chills, preheat your oven to 350°F. Line baking sheets with parchment paper instead of greasing them. Grease encourages extra spread, which causes thin edges. These cookies already spread enough on their own. I tend to notice that parchment creates more consistent results, especially batch to batch.
Chilled dough also improves baking control. Scoops hold their shape longer on the pan. Cookies bake at a steadier pace. Centers stay soft without sacrificing edges. That balance matters with chocolate-heavy doughs. The structure supports the richness instead of fighting it.
I’ve also found that chilling helps the flavor develop more fully. The chocolate base tastes deeper after resting, not sharper. (That difference surprises people.) This step doesn’t add work. It adds predictability. When baking chocolate chocolate chip cookies, predictability saves time and frustration.
If you ever wonder why bakery cookies look thicker, chilling explains most of it. Professional kitchens rarely skip this step. At home, the same logic applies. Waiting now prevents disappointment later. This is a quiet step, but it earns its place every time.
Scooping And Spacing For Bakery-Style Cookies
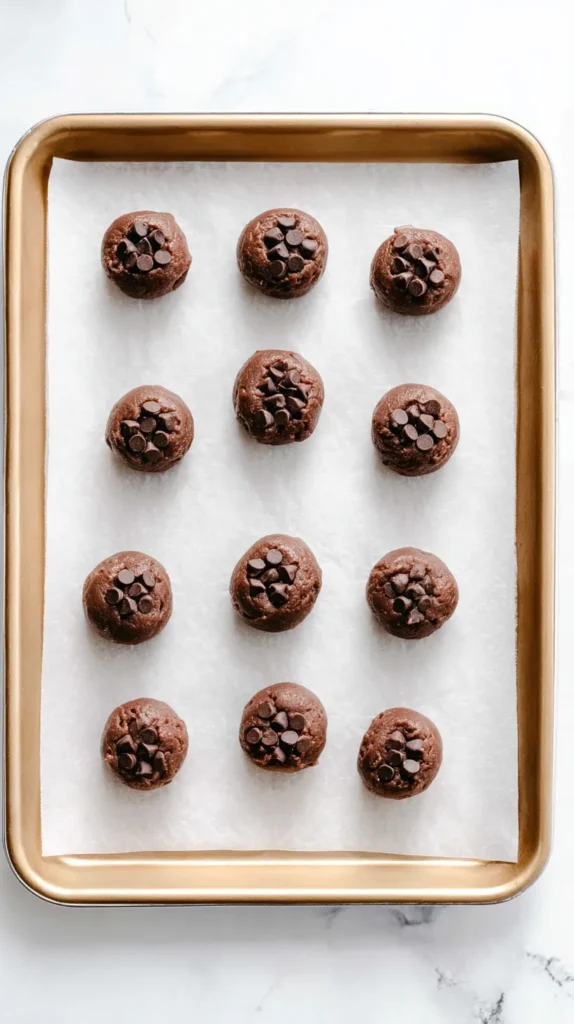
Scooping sounds basic, yet it controls how these cookies bake. I use a medium cookie scoop that holds about two tablespoons. That size creates even portions, which matters for timing. After scooping, I roll the dough gently between my palms. However, I don’t compress it tightly. Packed dough bakes dense, and that texture isn’t the goal.
Spacing matters just as much as scoop size. Place each dough ball about three inches apart on the baking sheet. Crowding causes steam instead of proper baking. As a result, edges soften and lose structure. When cookies have room, heat circulates evenly. That circulation helps the edges set while centers stay soft.
If thicker cookies sound appealing, keep the dough balls tall. Don’t flatten them before baking. Height slows the spread and supports structure. On the other hand, if wider cookies work better for your pan, press them down slightly. I tend to choose based on the look I want that day. “Do I want height or width?” answers that quickly.
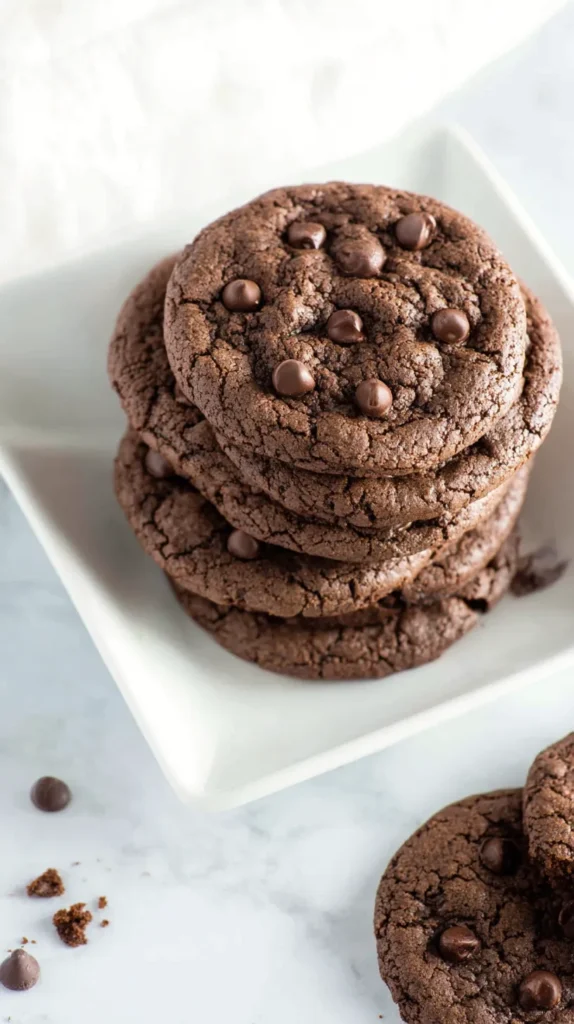
Before baking, press a few extra chocolate chips into the tops. This step looks optional, but it changes presentation. Visible chocolate signals richness right away. It also helps identify doneness later, which saves guessing. I’ve found this especially helpful with chocolate chocolate chip cookies, since darker dough hides cues.
Bake one tray at a time on the center rack. Although it takes longer, consistency improves. Halfway through baking, rotate the pan for even heat. That small movement prevents hot spots from deciding the outcome.
I tend to notice that cookies baked this way cool more evenly. Edges set without hardening. Centers stay soft without collapsing. Those results don’t come from luck. They come from spacing, portioning, and patience working together.
Baking Time That Actually Works
Baking time matters more than almost any other step. I don’t rely on the clock alone, because ovens vary. Instead, I watch the edges first, then the surface. For this recipe, the range stays between 10 and 12 minutes. That window works consistently when the dough is properly chilled.
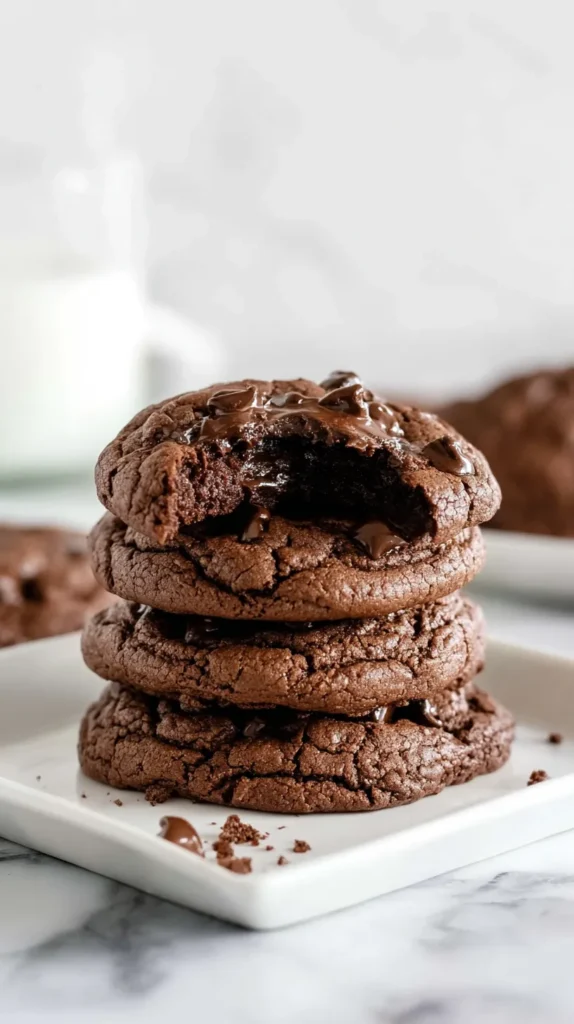
When the edges look set and slightly matte, the cookies are ready to leave the oven. Meanwhile, the centers should still look a little underdone. That contrast matters. If the entire cookie looks finished in the oven, it won’t stay soft later. I’ve found that trusting visual cues prevents overbaking more reliably than adding extra minutes.
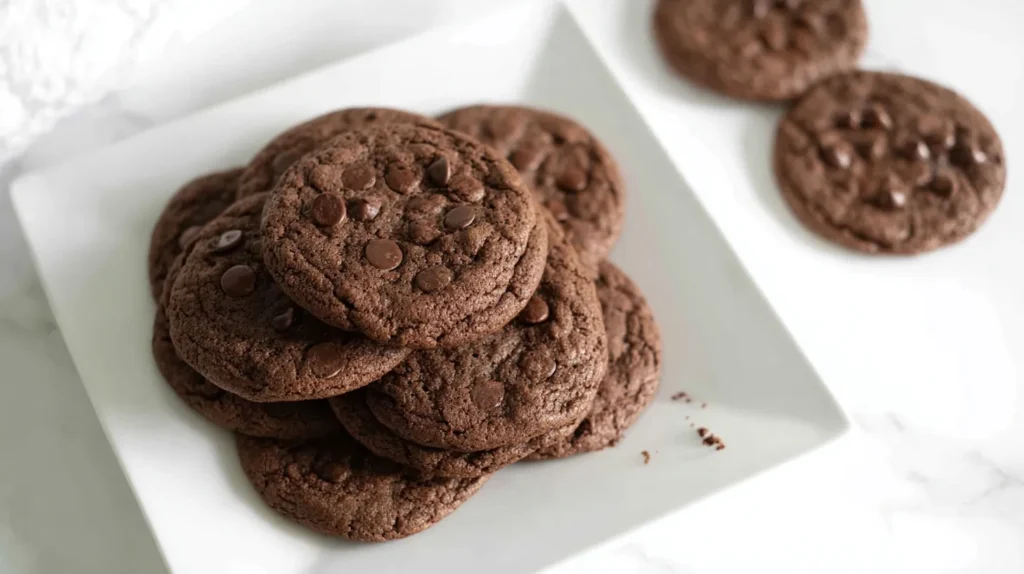
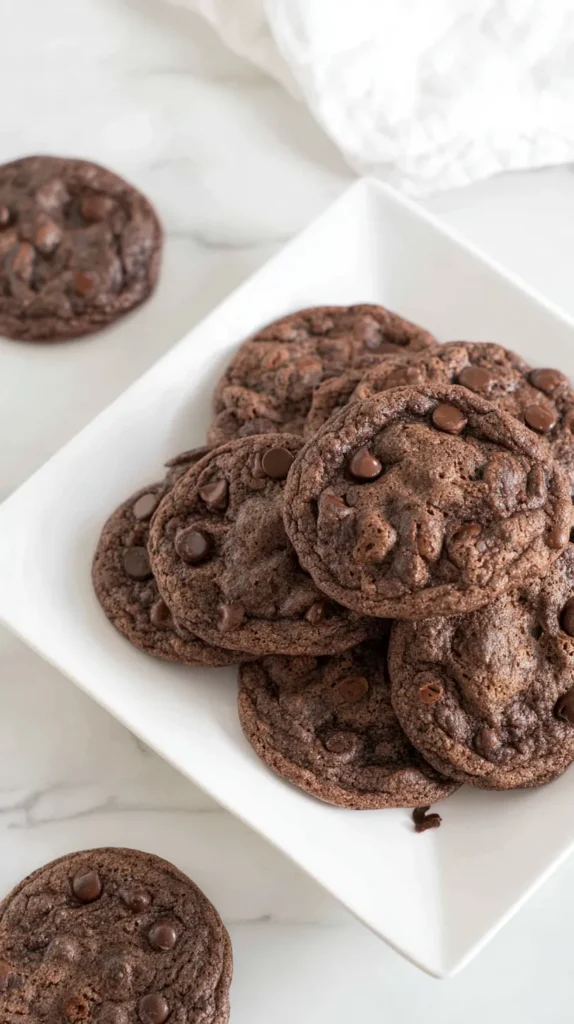
Pulling cookies early protects the center texture. Waiting until they look fully baked usually leads to dry results. Chocolate chocolate chip cookies need contrast between edges and centers to taste right. Crunch everywhere misses the point. Soft centers paired with set edges create balance, which matters with chocolate-heavy dough.
After removing the pan from the oven, let the cookies rest right where they are. This pause should last about five minutes. During that time, heat from the pan finishes the bake gently. Structure sets without additional drying. That timing matters more than people expect.
Once five minutes pass, transfer the cookies to a wire rack. Cooling on a rack prevents trapped steam underneath. Steam softens edges and affects texture later. I tend to move them carefully, since they firm up quickly during this stage. “Now they’re ready,” is usually obvious.
Because this dough runs dark, visual cues take practice. However, consistency builds quickly. After a few batches, timing becomes second nature. Baking chocolate chocolate chip cookies this way removes guesswork. Predictable results reduce wasted batches and save time. That reliability makes this step worth paying attention to every single time.
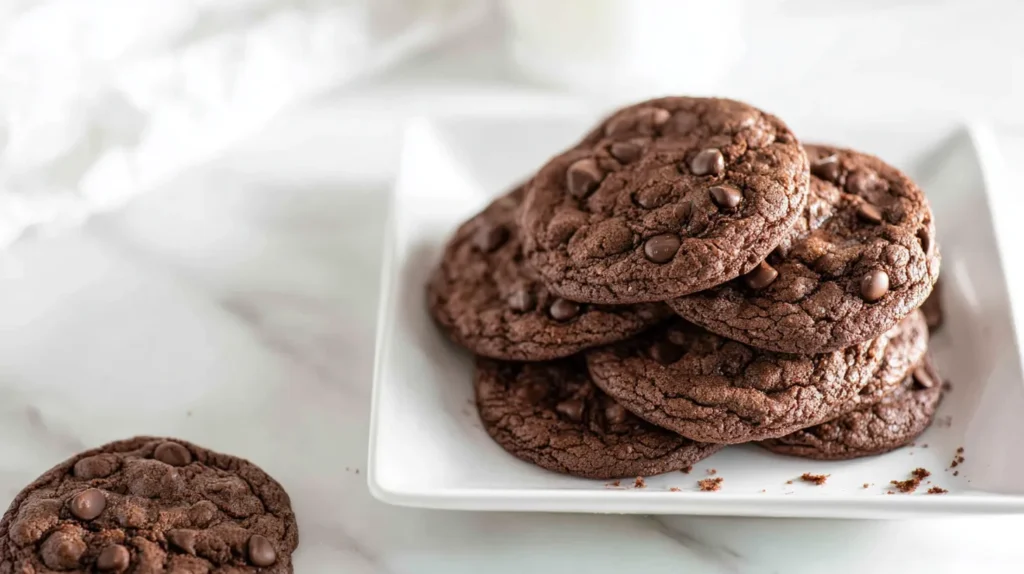
Chocolate Chocolate Chip Cookies Recipe
This is the part everyone scrolls for, so I won’t complicate it. I’ve found that when the basics stay solid, the cookies do too. Read it once, then bake without overthinking.
Ingredients
You’ll need one cup of unsalted butter, softened but not melted.
Use one cup of packed brown sugar and one-half cup of granulated sugar.
Grab two large eggs and let them come to room temperature.
Measure out two teaspoons of vanilla extract.
For the dry ingredients, use two cups of all-purpose flour, three-quarters cup Dutch-process cocoa powder, one teaspoon baking soda, and one teaspoon fine sea salt.
Finish with two cups of chocolate chips or chunks, depending on how bold you want the chocolate to look.
That’s it. No extras. No swaps hiding in the fine print.
Instructions
Start by creaming the butter with both sugars until the mixture looks light and smooth. This takes about two minutes, so don’t rush it. Then add the eggs one at a time, mixing just until combined. Pour in the vanilla next and pause. (This is where things usually look right.)
In a separate bowl, whisk together the flour, cocoa powder, baking soda, and salt until evenly mixed. Cocoa clumps easily, so take the extra few seconds here. Gradually add the dry ingredients to the wet mixture, mixing on low speed. Stop as soon as the flour disappears.
Fold in the chocolate chips by hand. The dough should look thick and uniform. If it seems loose, the butter was probably too warm. Cover the bowl and chill the dough for at least one hour.
When ready to bake, preheat the oven to 350°F and line baking sheets with parchment paper. Scoop the dough into two-tablespoon portions and roll gently into balls without packing them tightly. Space the dough balls about three inches apart.
Bake one tray at a time for 10 to 12 minutes, rotating halfway through. Pull the cookies when the edges look set and the centers still look slightly soft. Let them rest on the pan for five minutes, then transfer to a wire rack.
That’s the whole process. No guessing. No drama.
Storage And Make-Ahead Options
Storage matters more than people expect, especially after the bake goes right. I’ve found that proper storage protects texture and saves time later. This section keeps things practical and flexible, not precious.
Once the cookies cool completely, store them in an airtight container at room temperature. That setup keeps moisture balanced without turning edges soft. Under normal conditions, they stay good for about three days. If your kitchen runs warm, move them sooner rather than later. Heat shortens shelf life.
For longer storage, freezing works well when done correctly. Wrap baked cookies tightly before freezing. Use parchment between layers to prevent sticking. Thaw them at room temperature, not in the microwave. Microwaves change texture too fast. With proper wrapping, frozen cookies hold quality for up to three months.
Make-ahead dough saves the most time, especially on busy days. I tend to prep dough when the kitchen is already active. That habit pays off later.
Here’s what works best for freezing dough:
• Scoop dough into portions before freezing
• Place scoops on a lined tray and freeze until solid
• Transfer frozen dough balls to freezer bags
• Label bags with date and bake temperature
Bake frozen dough directly from the freezer. Add about one extra minute to the bake time. Don’t thaw first. Thawing causes excess spread. Frozen dough bakes more evenly and keeps shape better.
I’ve found that this method works especially well for chocolate chocolate chip cookies. Cocoa-based dough holds structure better when frozen. That predictability helps when baking for gatherings or last-minute plans.
Storage choices don’t need to feel complicated. The goal stays simple. Keep texture consistent. Save time when possible. Reduce waste. When cookies store well, baking feels easier to repeat.
Good storage turns one baking session into several wins. That efficiency matters, especially when schedules run tight.
Common Mistakes To Avoid
Most cookie problems repeat themselves, which actually helps. I’ve found that once you spot patterns, fixes become obvious. This section exists to save batches, time, and frustration. None of these mistakes mean you failed. They usually mean one small detail slipped past unnoticed.
Flat cookies almost always trace back to butter temperature or skipped chilling. Warm butter spreads too fast in the oven. Skipping chill time makes that worse. As a result, the dough loses structure early. Dry cookies usually point to too much flour. Scooping directly from the bag packs it down. That extra flour absorbs moisture quickly. Bitter cookies often come from low-quality cocoa or the wrong cocoa type. Greasy cookies usually show up after over-creaming butter and sugar.
I tend to notice that timing issues cause more trouble than ingredient swaps. Watching the oven matters more than trusting the clock. Chocolate dough hides visual cues, so awareness helps.
Here are the most common mistakes and how to correct them:
• Butter was too warm before mixing
• Dough skipped or shortened chill time
• Flour was packed instead of spooned
• Cocoa quality didn’t match expectations
• Cookies baked until they looked finished
Each issue has a simple fix. Let butter soften naturally, not near heat. Chill the dough fully, even when rushed. Spoon flour into the cup and level it gently. Choose cocoa with a clean ingredient list. Pull cookies when edges set, not when centers look firm.
For chocolate chocolate chip cookies, contrast matters. Edges should set first. Centers should finish gently after baking. That balance depends on restraint, not extra time.
I’ve found that slowing down during prep prevents rushing later. Small choices early affect results more than fancy techniques. “What changed this time?” usually answers the question.
Mistakes don’t ruin baking. However, ignoring patterns repeats them. Once you know what to watch, confidence builds quickly. That confidence leads to consistent results, even on busy days.

Chocolate Chocolate Chip Cookies
Ingredients
Method
- In a large bowl, cream the softened butter with the brown sugar and granulated sugar until light and fully combined.
- Add the eggs one at a time, mixing just until incorporated after each addition.
- Stir in the vanilla extract until the mixture looks smooth.
- In a separate bowl, whisk together the flour, cocoa powder, baking soda, and salt until evenly combined.
- Gradually add the dry ingredients to the wet ingredients, mixing on low speed and stopping as soon as no flour streaks remain.
- Fold in the chocolate chips or chunks by hand until evenly distributed.
- Cover the dough and refrigerate for at least one hour.
- Preheat the oven to 350°F and line baking sheets with parchment paper.
- Scoop the dough into two-tablespoon portions and gently roll into balls without compressing.
- Place the dough balls about three inches apart on the prepared baking sheets.
- Bake one tray at a time for 10 to 12 minutes, rotating the pan halfway through baking.
- Remove the cookies when the edges are set and the centers still appear slightly soft.
- Let the cookies rest on the baking sheet for five minutes before transferring to a wire rack to cool completely.
Tried this recipe?
Let us know how it was!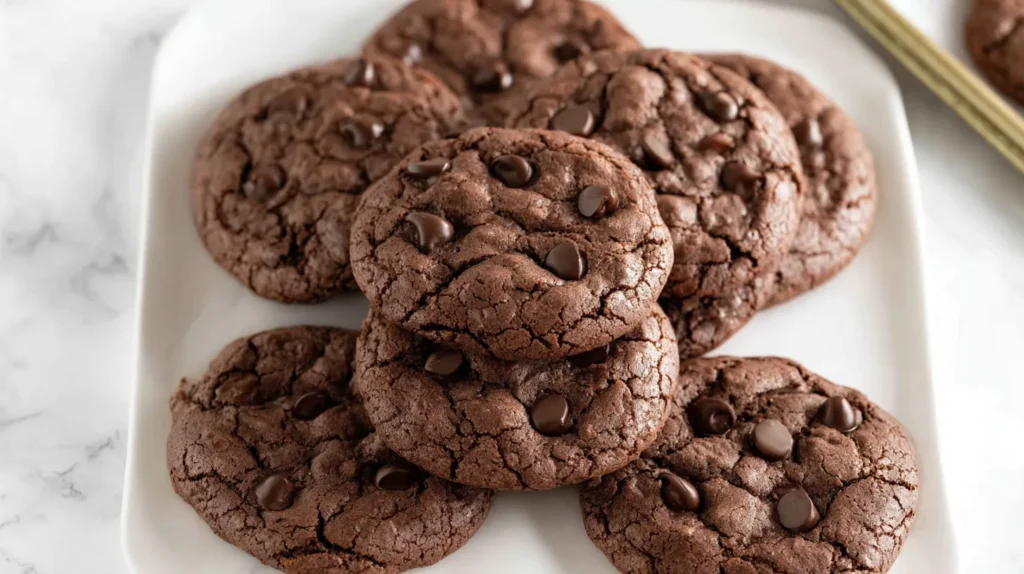
Final Thoughts
I don’t bake to impress people, and I never chase perfection in the kitchen. Instead, I bake because reliable recipes remove stress. I’ve found that confidence grows when results repeat. That matters more than novelty. Good cookies earn trust through consistency, not surprise.
Over time, I’ve noticed that simple recipes age better than trendy ones. They fit into busy days without drama. They don’t require special moods or extra patience. “This will work,” becomes the quiet expectation. That mindset changes how baking fits into real life.
Living in Orlando has taught me to respect heat, humidity, and timing more than instructions alone. Kitchens behave differently here. This recipe accounts for that reality without making adjustments complicated. I appreciate when food fits the environment instead of fighting it.
Sometimes baking happens for people. Other times, it happens for peace. Both reasons count. I tend to bake when schedules feel packed and decisions feel loud. Familiar steps bring order back. (That calm matters more than presentation.)
I’ve found that chocolate chocolate chip cookies belong in the reliable category. They don’t need reinvention or extra flair. They need balance, timing, and restraint. When those line up, the outcome speaks clearly.
If you save recipes on Pinterest, this one deserves space. It earns repeats without demanding attention. That quiet usefulness keeps it relevant long after trends move on.
I don’t expect every bake to feel special. However, I do expect it to work. This recipe meets that expectation. When baking supports your day instead of complicating it, the experience changes. That’s why I keep coming back to this one.