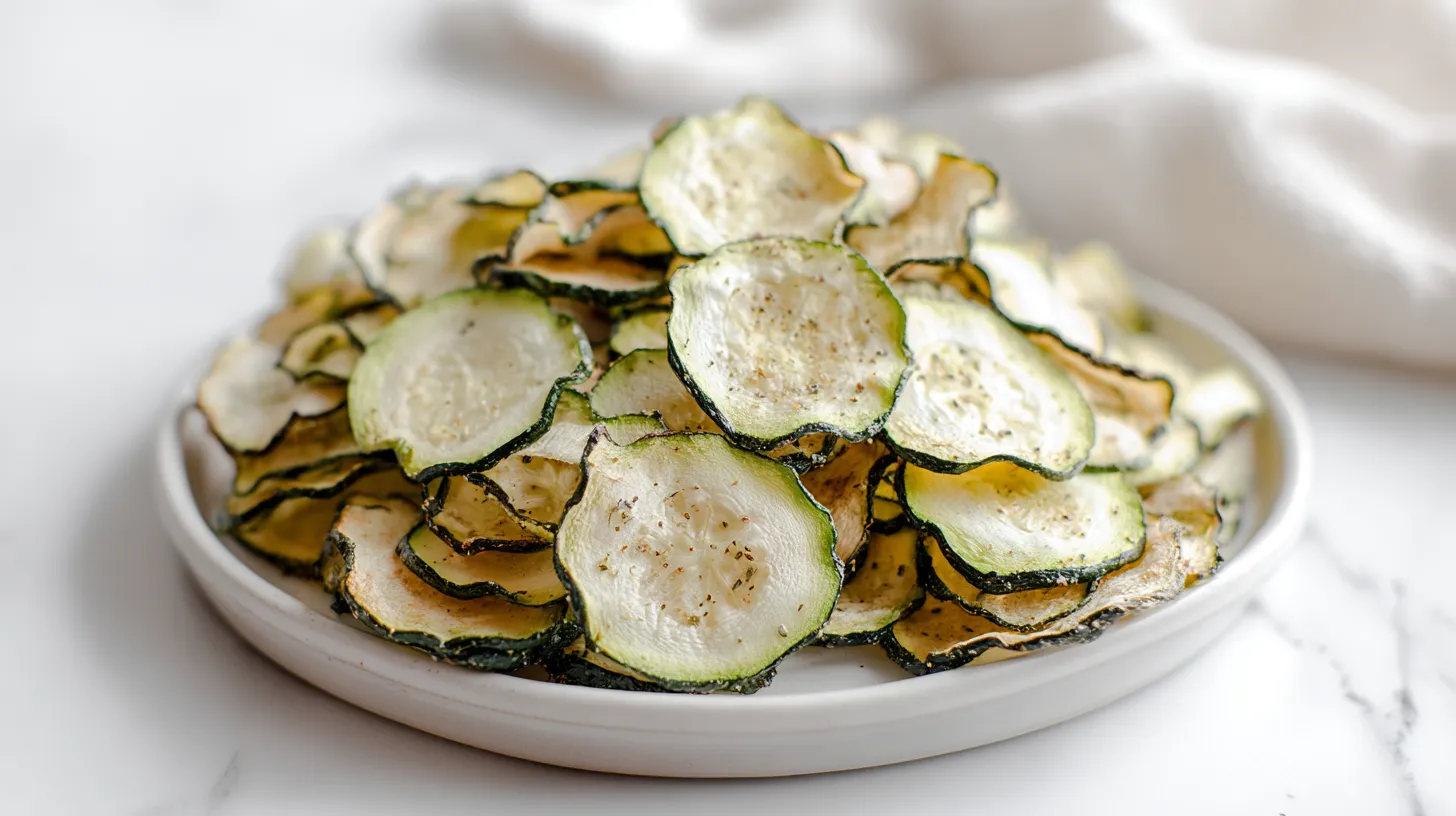
There’s something funny about cucumber chips. They sound either brilliant or deeply suspicious, with almost no middle ground. I get it, because cucumbers usually sit quietly on the side, not center stage as the crunchy snack.
Still, that’s exactly why I like them. They bring that fresh, salty, crunchy thing people want, but with a lighter edge. Once sliced thin, seasoned well, and baked until dry, they stop seeming weird and start seeming smart.
I’ve found that snack cravings usually want one of two things. They want loud crunch or mindless nibbling. These hit both, which is handy. Plus, they look like the kind of thing someone “discovered,” even though they’re very simple.
As a mom in Orlando, I’m always into snacks that don’t sit heavy in hot weather. A cold cucumber is already useful here. Turn it into something crisp and savory, and now I’m paying attention.
The best part, though, isn’t even the crunch. It’s how many little choices you get to make along the way. Salty or tangy. Plain or garlicky. Oven or air fryer. Super crisp or slightly chewy at the center. That’s where this gets good, and it’s also where people usually get tripped up.
Because yes, cucumber chips can go wrong. They can turn limp, bland, or weirdly watery if you rush them. Done right, they have a light, snacky charm that keeps you reaching back into the bowl. And the small trick that changes everything comes earlier than most people think.

A few links on this page are affiliate links, so if you click and buy, I might earn a small commission. It never costs you more, and it helps support the site. You can read my full disclosure if you’re into the fine print.
Why Cucumber Chips Work Better Than They Should
I tend to notice that people hear “cucumber chips” and picture sadness on a sheet pan. Fair. Cucumbers hold a ton of water, and water loves ruining crispy plans. That sounds like a problem, because it is. But it’s also the whole point.
Once you work with that water instead of fighting it, these get surprisingly good. Thin slices lose moisture, the edges tighten, and the flavor starts concentrating. Suddenly, the same cucumber that seemed too plain has real presence. Not dramatic presence. Just enough to keep things interesting.
That’s the part I like most. These don’t try to copy potato chips perfectly. They do their own thing. You still get crunch, but it’s lighter, cleaner, and a little fresher. So if you’re expecting a deep-fried diner basket, this won’t be that. If you want a crisp snack that doesn’t weigh you down, now we’re talking.
Another bonus shows up later. Cucumber chips take seasoning well, but not every seasoning. Heavy blends can bury them. Strong oil can make them soggy. Too much salt pulls out even more water. So the trick isn’t loading them up. The trick is giving them just enough.
That’s where the smart part lives. A little olive oil helps. A measured hand with salt matters. Garlic powder and onion powder add flavor without making things messy. Black pepper gives a quiet kick. Then the cucumber still tastes like cucumber, which is a good thing.
People often assume “healthier snack” means giving something up. I don’t think that’s true here. I think it means trading one kind of crunch for another. And once you get that, the whole recipe starts making a lot more sense.

Cucumber Chips Ingredients, Seasonings, And Recipe Basics
Before I heat the oven, I like getting the whole situation straight. These aren’t hard, but they do reward a little order. Nothing fancy. Just a tiny bit of setup so the final batch doesn’t turn into salty cucumber paper.
Here’s the base recipe I use for cucumber chips:
- 2 large English cucumbers
- 1 tablespoon olive oil
- 3/4 teaspoon kosher salt, divided
- 1/2 teaspoon garlic powder
- 1/2 teaspoon onion powder
- 1/4 teaspoon black pepper
Here’s the quick recipe snapshot:
- Servings: 4 light snack portions
- Prep time: 20 minutes
- Bake time: 2 to 3 hours
- Cooling time: 10 minutes
- Oven temperature: 225°F
English cucumbers work best for me. They have thinner skin, smaller seeds, and less watery drama. Regular cucumbers can work, too, but they usually need more blotting. That’s not tragic. It’s just annoying.
Olive oil matters, but don’t get carried away. You want a light coating, not a slick shine. Too much oil blocks drying, and then you’re stuck with floppy slices. Nobody wants that surprise.
Salt needs some restraint as well. I use part of it early to draw out moisture. Then I use the rest for flavor. That split makes a difference. If you dump all the salt on at once, the slices can go from promising to swampy.
You can swap the seasonings a bit later. Dill is great. Ranch powder works if you keep it light. Smoked paprika adds warmth. Parmesan sounds tempting, but it can brown too fast here. Save the big experiments for batch two. Your first round should stay simple and sharp. It keeps the flavor cleaner, too.

The Best Cucumber For Chips And The Slice That Changes Everything
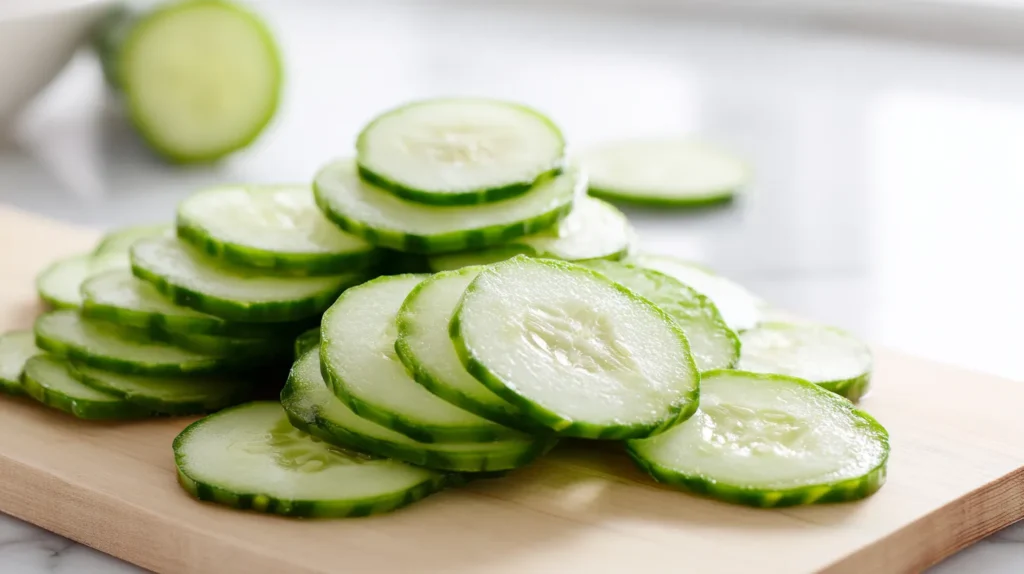
This is where the recipe either gets smart or gets irritating. The cucumber matters, yes, but the slice matters more. If the pieces are too thick, you’ll wait forever and still get bendy centers. If they’re wildly uneven, the pan turns into chaos.
I’ve found that 1/8-inch slices hit the sweet spot. They dry out without disappearing. Thinner slices can crisp faster, but they also go from perfect to overdone in a blink. Thicker slices stay pleasant only if you like a little chew. Some people do. I’m not judging. I’m just not pretending it’s the same snack.
A mandoline makes this easier. It also demands respect, so use the guard. A sharp knife works, too, but it takes more focus. Either way, try for consistency. That one boring word matters more than almost anything else here.
English cucumbers still win my vote. Their seed area stays smaller, and the centers dry more evenly. Regular cucumbers can leave you with wetter middles, especially if they’re large. Persian cucumbers work, though they’re tiny, so slicing enough can feel like a personal challenge.
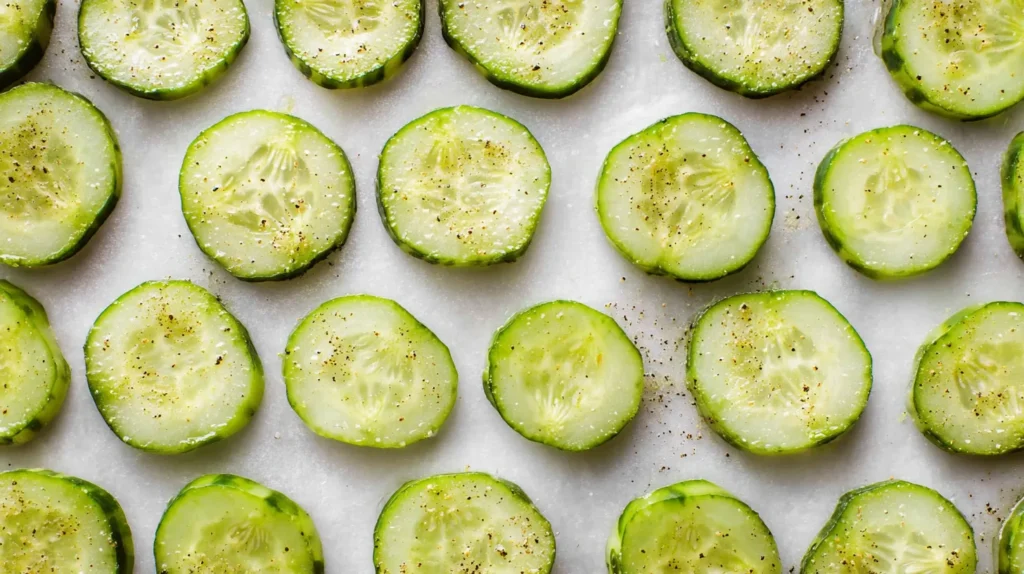
Another thing helps more than people expect. After slicing, lay the rounds on paper towels and sprinkle them lightly with some salt. Then let them sit for 15 minutes. The water comes up fast. Blot both sides well before oil touches them. That step sounds minor. It is not.
A lot of recipes rush from cutting board to oven. I wouldn’t. That early moisture is the whole battle. Handle it first, and the rest gets easier. Skip it, and you’ll keep opening the oven door wondering why your “chips” are still acting like salad.


How To Make Cucumber Chips Without The Limp Surprise
Now for the part people always want first, even though it makes more sense here. Once your slices are salted and blotted, the rest moves in a calm, tidy way. That said, timing still matters, and so does patience.
Here’s the step-by-step process for cucumber chips:
- Heat the oven to 225°F.
- Line two large baking sheets with parchment paper.
- Slice the cucumbers into 1/8-inch rounds.
- Sprinkle 1/4 teaspoon of the salt over the slices.
- Let them sit on paper towels for 15 minutes.
- Blot both sides very well until the surface looks dry.
- Toss the slices with olive oil, garlic powder, onion powder, pepper, and remaining salt.
- Arrange them in a single layer on the baking sheets.
- Bake for 1 hour and 15 minutes.
- Flip each slice, rotate the pans, and keep baking 45 to 75 minutes.
- Pull the crisp ones as they’re ready.
- Cool the batch for 10 minutes so they firm up more.
That “pull the crisp ones” step matters. Not every slice finishes at the same time. Seedier pieces lag behind. Edge pieces often finish sooner. So don’t wait for every round to match perfectly. That path leads straight to overbaked sadness.
Use your eyes more than the clock. Look for dry surfaces, slightly shrunk edges, and a firmer center. Then let them cool before judging. Warm cucumber chips can seem softer than they really are.
If you want the air fryer version, use 250°F and work in batches. Start checking around 20 minutes, then every 5 minutes after. Air fryers brown faster, which sounds fun until they tip too far.


Tips That Save The Whole Batch
This is the section I wish people read before blaming the recipe. Cucumber chips aren’t hard, but they do have a personality. Not in a cute food way. In a “small mistakes show up fast” way.
I keep a few rules in my head every time:
- Dry the slices more than you think you need to.
- Keep the oil light.
- Don’t crowd the pans.
- Flip with care, because half-dried slices can stick.
- Remove finished pieces early instead of waiting on the slow ones.
- Let them cool completely before storing.
That cooling part trips people up. Fresh from the oven, some slices still seem slightly flexible. Then they sit for a few minutes and crisp further. So don’t panic too early and throw them back in for another half hour.
Storage matters, too. These are best the day you make them. That’s the truth. Still, you can keep leftovers in an airtight container with a paper towel for a few hours. If they soften, a short trip back into a low oven can revive them.
Here’s the big reframe, though. People assume crispness is the only success marker. I don’t buy that. A batch with mostly crisp edges and lightly chewy centers can still be very good. It depends on what you want. Snacky and light counts.
Seasoning deserves another note. Add stronger blends after the first batch, not before. Start plain and smart. Once you know your oven’s timing, then get bolder. Cucumber chips don’t need chaos. They need a little attention and a decent plan.
One more tip belongs here. Let the trays cool for a minute before lifting stubborn slices. They release better, and you won’t tear them.

Common Cucumber Chips Mistakes And Easy Fixes
Let’s get into the little disasters, because they happen. The good news is most of them start small. The even better news is they’re usually fixable, or at least preventable next time.
If your cucumber chips turn out soggy, one of three things usually happened:
- The slices were too thick.
- The cucumbers stayed too wet before baking.
- The pan got crowded.
If the flavor seems flat, the seasoning probably needed help:
- Add a pinch more salt after baking, not before.
- Try a tiny dusting of dill or ranch powder.
- Finish with black pepper while they’re warm.
And if some burn before others crisp, the batch likely had uneven slices:
- Use a mandoline for better consistency.
- Pull ready pieces early.
- Rotate pans halfway through baking.
A weirdly bitter batch can come from oversized cucumbers with heavy seeds. That’s why English cucumbers work so well. They cut down on surprises. And in this recipe, fewer surprises are a gift.
Another common mistake sneaks in at the end. People store them while they’re still warm. That traps steam, which takes all your careful work and undoes it in the container. Cool them fully first. Then store them loosely if possible.
One more thing deserves a defense. Salting the slices first does not “ruin” them. Some people skip it because they think it makes cucumbers mushy. For salads, maybe. For cucumber chips, it helps pull out moisture before the oven does the rest.
So yes, the recipe looks simple on paper. It is simple. But simple recipes love details. That’s why one batch tastes crisp and clever, while another tastes like a side dish gone sideways.
Questions I’d Ask Before Making These Again
Can I make cucumber chips ahead of time?
Yes, but same-day is best. They lose crispness as they sit. I’d make them a few hours ahead, not the night before.
Do I need to peel the cucumbers?
No. I leave the peel on. It helps the slices hold shape, and it adds color. Just wash them well first.
Can I use regular cucumbers?
Yes, though English cucumbers give better texture. If you use regular ones, blot extra well and expect a slightly wetter center.
Why are my cucumber chips still soft?
Usually the slices were too thick, too wet, or pulled too early. Cooling also matters, because they crisp more afterward.
Can I use a dehydrator instead?
Absolutely. That method works beautifully. Follow your machine’s directions, but keep the slices thin and evenly spaced.
What seasonings taste best?
Garlic powder, onion powder, dill, black pepper, and ranch seasoning all work well. Start lightly. Cucumber can disappear under heavy spice.
Do these taste like potato chips?
No, and that’s important. They scratch the crunchy snack itch, but they stay lighter and fresher.
Can I make them in the air fryer?
Yes, and they’re faster there. Still, you’ll need small batches and frequent checks, because they brown quickly.
How do I store leftovers?
Cool them fully, then keep them in an airtight container with a paper towel. Re-crisp in a low oven if needed.
That last question says a lot. People want cucumber chips to behave like bagged snacks. They don’t. They behave like homemade food, which I happen to like. And that small difference changes how I think about the whole recipe. That matters more than people think.

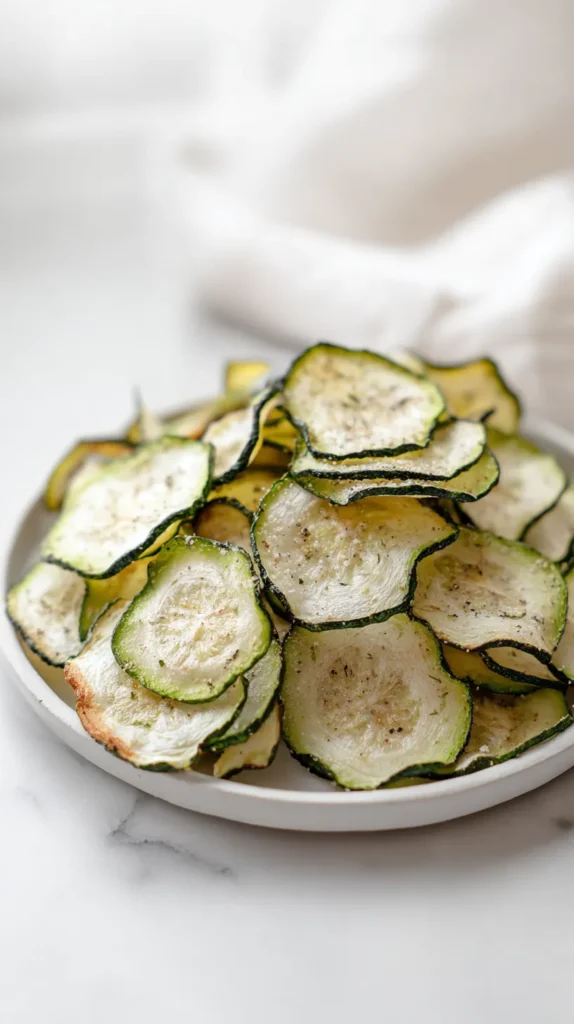
Cucumber Chips
Ingredients
Method
- Heat the oven to 225°F.
- Line two large baking sheets with parchment paper.
- Slice the cucumbers into 1/8-inch rounds.
- Sprinkle 1/4 teaspoon of the salt over the slices.
- Let them sit on paper towels for 15 minutes.
- Blot both sides very well until the surface looks dry.
- Toss the slices with olive oil, garlic powder, onion powder, pepper, and remaining salt.
- Arrange them in a single layer on the baking sheets.
- Bake for 1 hour and 15 minutes.
- Flip each slice, rotate the pans, and keep baking 45 to 75 minutes.
- Pull the crisp ones as they’re ready.
- Cool the batch for 10 minutes so they firm up more.
Tried this recipe?
Let us know how it was!What To Serve With Them So They Don’t Just Sit There
I love a snack that can pull double duty. Cucumber chips work alone, sure, but they also shine next to lunch. They sit nicely beside sandwiches, wraps, or a quick snack plate.
Here are my favorite ways to serve them:
- With hummus for a cool, savory contrast
- Next to turkey wraps or chicken salad sandwiches
- Alongside burgers instead of fries
- Paired with tuna salad lettuce cups
- With whipped feta or herbed cream cheese
- On a snack board with olives, crackers, and sliced peppers
They also make a fun little topper. Crush a few over tomato soup, avocado toast, or a cottage cheese bowl. That sounds slightly random, but it works. The crunch wakes things up without taking over.
If I’m serving people, I keep the rest simple. Cucumber chips look best when they’re not fighting for attention. Put them in a shallow bowl, add a creamy dip nearby, and let the texture do the talking. No giant garnish moment needed.
For dinner, they’re good with grilled chicken or salmon when you want something crisp without another heavy side. For a snack plate, I’d add grapes, cheese cubes, and a handful of nuts. For lunch, I’d pair them with turkey roll-ups, fruit, and iced tea.
This is also where the recipe starts pulling more than one job. It’s a snack, yes. But it’s also a side, a topper, and a little conversation starter. People notice them. Then they ask questions. Then suddenly the bowl is much emptier than it was five minutes earlier.
That’s why serving matters here. The right pairing makes them look intentional, not like some lonely experiment sitting off to the side.
The Crunchy Little Twist I’d Happily Make Again
Some recipes win by being flashy. This one wins by being unexpectedly smart. That might be my favorite kind. Cucumber chips don’t walk in with big fried energy or a pile of cheese. They show up lighter, crisper, and a little more clever than people expect.
I like food that surprises me without turning into a project. This recipe does that. It asks for a little patience, but not a dramatic afternoon. Once you know the rhythm, it stops being fussy and becomes one of those “make these again” recipes.
Living in Orlando has made me very loyal to cool, crisp snacks that still have personality. Heavy food has its place. So does a giant bakery cookie. But sometimes I want something salty and fresh that doesn’t sit like a brick. This fits that mood beautifully.
I’ve found that the best Pinterest-friendly recipes usually have a tiny twist. Not a gimmick. Just something that makes people stop and look twice. Cucumber chips do that. They sound a little improbable, and then they work. That’s catnip for curious readers and snacky people alike.
More than anything, I like that they leave room for preference. Crisp edges, chewy middles, extra dill, plain salt, oven, air fryer. You get options without losing the plot. That’s my kind of recipe.
If a humble cucumber can become the snack everyone keeps side-eyeing, maybe quiet little recipes deserve more credit.