I have a soft spot for chocolate bark, and I am not pretending otherwise. This dessert looks impressive and takes very little effort. That combination matters in real life. Across seasons and moods, chocolate bark fits without extra planning. I have found that it solves more dessert problems than almost anything else I make.
Some days call for big baking energy. Other days call for melted chocolate and a decent attitude. This recipe works for both. A solid base does the work, and everything else becomes optional. Festive, dramatic, pastel, or bold all fit without changing the method. Fancy tools are not needed. Extra dishes are not invited. The process stays simple, and the results still look planned.
I like desserts that hold up well. I also like desserts that do not create more work. Chocolate bark spreads, sets, and breaks clean. That is the full job. No drama shows up. Waiting does not drag. Guessing never enters the picture.
Living in Florida means gatherings pop up without warning. Pool weather does that. Neighbors text at 4 p.m. with we’re grilling. Kids appear with sign-up sheets like it is their job. Chocolate bark fits every one of those moments without stress. Travel is easy, and heat causes fewer issues than frosting ever did. Even last-minute trays still look intentional.
This post gives you the base chocolate bark recipe with exact measurements and clear steps, then shows you seasonal versions using the same method. No strange ingredients show up. Complicated techniques stay out. Overthinking is not required. One smart recipe handles the work.
Dessert should be easier than we make it, and it should never be boring.
Some of the links on this page are affiliate links, which means that if you click on them and buy something, I might get a small commission. But don’t worry; it never costs you more. You can peek at my full disclosure if you’re curious about the fine print.
The Ultimate Chocolate Bark Recipe That Never Fails
This is the foundation for every version in this post. Once you know this method, the rest becomes simple. I have found that keeping the base consistent saves time and prevents mistakes.
Grab yourself sixteen ounces of some top-notch chocolate! That can be milk, semi-sweet, dark, or white. Chop it into small, even pieces so it melts smoothly. If you want a softer finish, add half a teaspoon of coconut oil or any neutral oil. That part is optional, but helpful.
Line a rimmed baking sheet with parchment paper. Make sure it lies flat so the chocolate spreads evenly. Add the chopped chocolate to a microwave-safe bowl. Microwave in thirty-second bursts, stirring well after each round. Continue stirring until most of the chocolate has melted, then stir until it is completely smooth. Gentle heat gives better texture.
Once melted, pour the chocolate onto the parchment. Use a spatula to spread it into an even layer about a quarter inch thick. While the chocolate is still warm, sprinkle on about a quarter cup of toppings. That can be sprinkles, crushed candy, nuts, or dried fruit. Press them lightly so they stick.
Place the tray in the refrigerator for twenty to thirty minutes until fully set. Once firm, lift the parchment and break the chocolate into pieces. Store in an airtight container at room temperature.
This method stays the same every time. The toppings are what change.
Things that make a difference:
- Use real chocolate, not candy coating, for better texture
- Chop evenly so melting stays consistent
- Stir between every heating round
- Spread to an even thickness for clean breaks
- Press toppings lightly so they stay put
Once this feels easy, everything else becomes flexible. That is the power of a solid base.
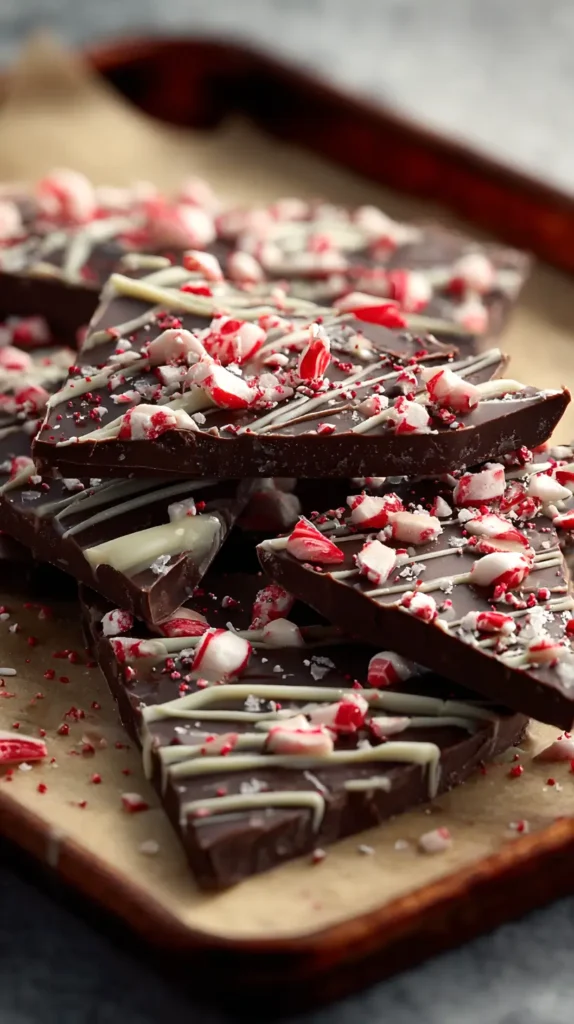
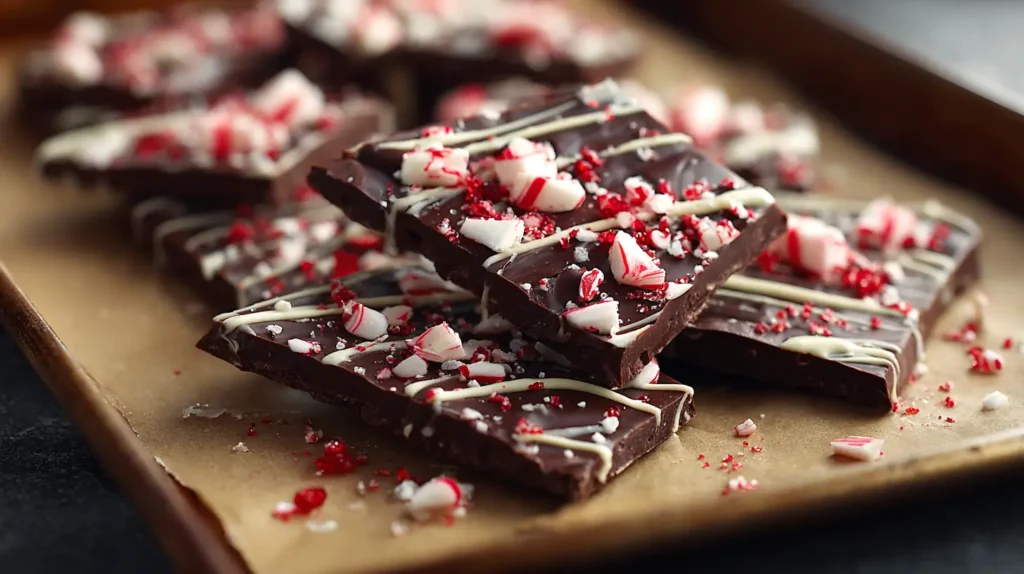
Festive Peppermint Chocolate Bark with a Sprinkle of Holiday Cheer
December treats should be all about the fun, not the fuss! This version does exactly that. I have found that peppermint adds contrast without overpowering the chocolate.
Start with sixteen ounces of chopped semi-sweet or dark chocolate. Melt it using the same thirty-second method. Spread it onto parchment in an even layer. While it is still warm, scatter one third cup of crushed candy canes across the surface. Then add two tablespoons of red and white holiday sprinkles.
Press everything gently so it settles into the chocolate. Refrigerate until firm, then break into pieces.
The balance matters here. Too much peppermint can overwhelm. Too little looks unfinished. Crush the candy canes into small pieces, not dust. That gives crunch without streaking. Also, use fresh candy canes for best texture.
Helpful details:
- One third cup of crushed peppermint gives even coverage
- Two tablespoons of sprinkles adds color without clutter
- Light pressure helps toppings stay in place
- Full chilling prevents cracking
If you want extra contrast, drizzle two ounces of melted white chocolate over the top before chilling. Keep the drizzle thin so it does not take over.
This Christmas chocolate bark works on cookie trays, in gift bags, and on kitchen counters that attract people. It looks intentional without effort, which is always the goal.
The Freeze-Then-Top Technique
Most people add toppings while the chocolate is still fully liquid, and that works, but it is not always the cleanest option. I have found that a short chill before topping changes everything. This method gives you sharper edges, clearer layers, and better control over where things land.
After you pour and spread your melted chocolate, slide the tray into the refrigerator for about three minutes. Do not walk away. Do not start a load of laundry. You are looking for barely set, not firm. The surface should look matte instead of glossy, but it should still give slightly when touched.
At that point, pull the tray out and add your toppings. Because the chocolate has started to set, nothing sinks. Sprinkles stay where you place them. Candy pieces do not drift. Nuts do not slide into corners. Everything stays exactly where you put it, which makes the finished chocolate bark look intentional instead of accidental.
This also gives you better color separation when you are working with light chocolate and dark toppings. The contrast stays crisp. The lines stay clean. The final pieces look sharper when broken.
Another benefit is texture. Since toppings sit on the surface instead of being partially submerged, you get a more noticeable crunch in every bite. That small change makes a big difference, especially with pretzels, candy pieces, and cookies.
Timing matters here. Wait too long, and the toppings will not stick. Go too soon, and you are back to floating pieces. Three minutes is the sweet spot in most refrigerators, although very cold fridges may need closer to two.
This technique works with every seasonal version. It also works when you want to spell words, make patterns, or create sections without using dividers. Once you try it, regular pouring starts to feel messy.
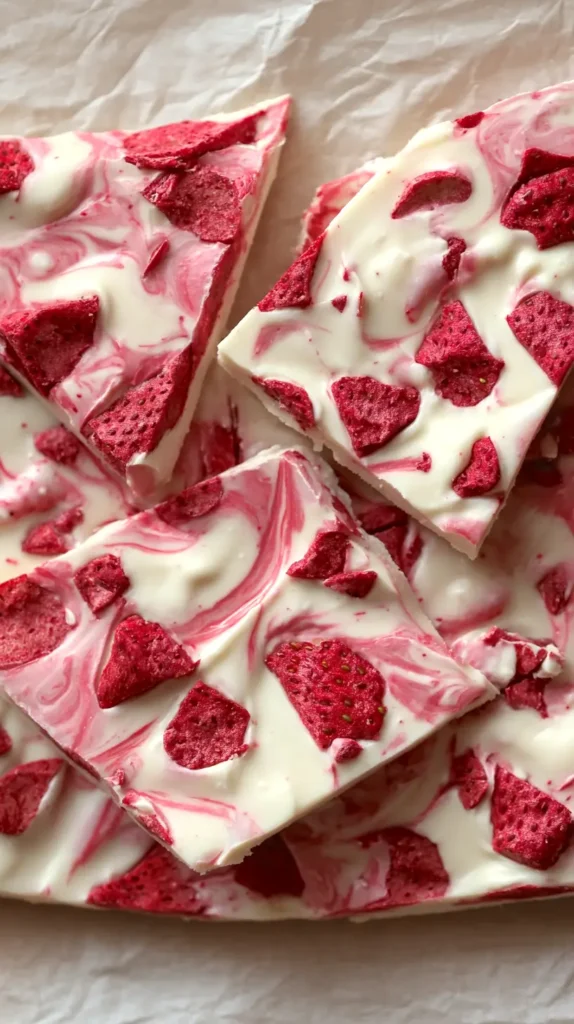
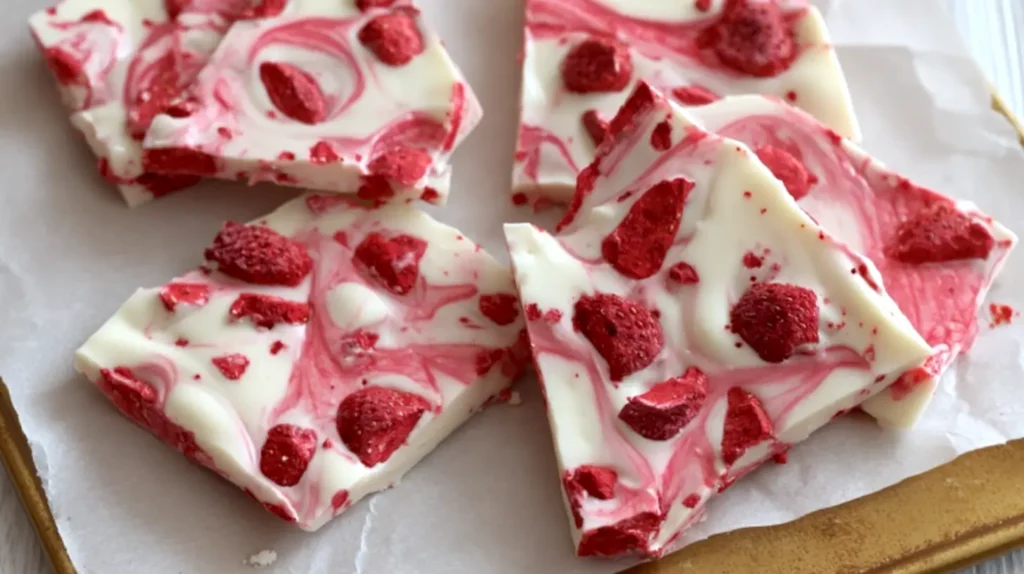
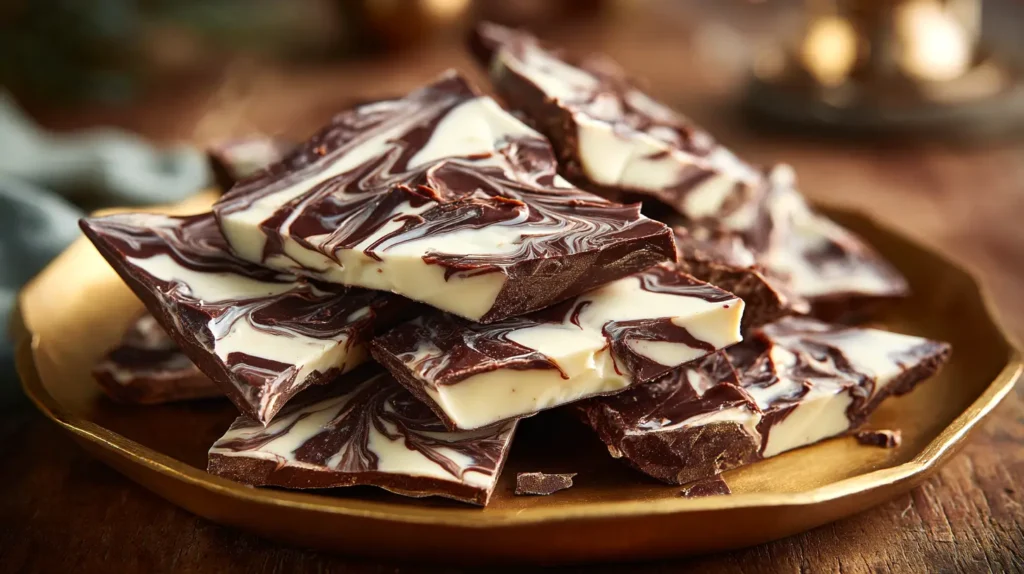
Valentine’s Day Chocolate Bark with Strawberries and Pink Swirls
This version leans soft and romantic without being fussy. It also photographs well, which never hurts. I have found that a pink swirl makes everything look planned.
Start with sixteen ounces of white chocolate, chopped. Melt it gently using the same method. Spread it onto parchment. While the chocolate is warm, sprinkle half a cup of freeze-dried strawberries over the surface. Then melt two ounces of pink candy melts or tinted white chocolate.
Drizzle the pink chocolate across the top. Use a toothpick to gently swirl the colors. Do not overmix. Less movement keeps the pattern clean. Refrigerate until set, then break into pieces.
Freeze-dried strawberries matter here. Fresh ones release moisture and cause texture issues. The freeze-dried version adds flavor without ruining the base.
Keep these points in mind:
- Use freeze-dried strawberries, not fresh
- Half a cup gives good coverage without crowding
- Swirl gently for defined color lines
- Chill fully before breaking
If you want extra sparkle, add heart sprinkles while the chocolate is still warm. This Valentine chocolate bark works for Galentine nights, classroom treats, and small gatherings.
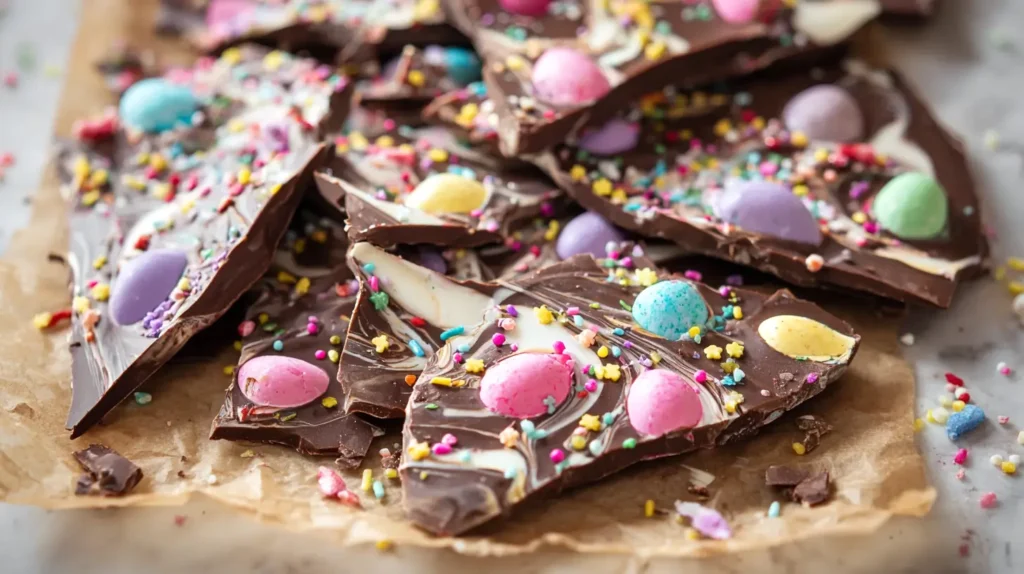
Pastel Easter Vibes with Candy Eggs
Easter desserts should look cheerful, not complicated. This version does the visual work for you. I have found that pastel candy carries the theme without extra effort.
Use sixteen ounces of milk or white chocolate, depending on preference. Melt and spread as usual. Add a third cup of mini candy eggs and two tablespoons of pastel sprinkles while the mixture is still warm. Press lightly so they stay put.
For extra color, drizzle a small amount of melted purple or blue candy melts across the top. Keep the drizzle thin and loose. Chill until firm, then break.
Spacing matters here. Spread the eggs evenly so every piece gets color. Avoid piling them in the center. Also, resist overloading the surface. Too many candies make breaking messy.
Helpful reminders:
- One third cup of eggs gives even coverage
- Two tablespoons of sprinkles adds color without clutter
- Thin drizzles keep the look clean
- Full chilling prevents uneven breaks
This Easter chocolate bark works for baskets, brunch tables, and teacher gifts. It looks festive without trying too hard.
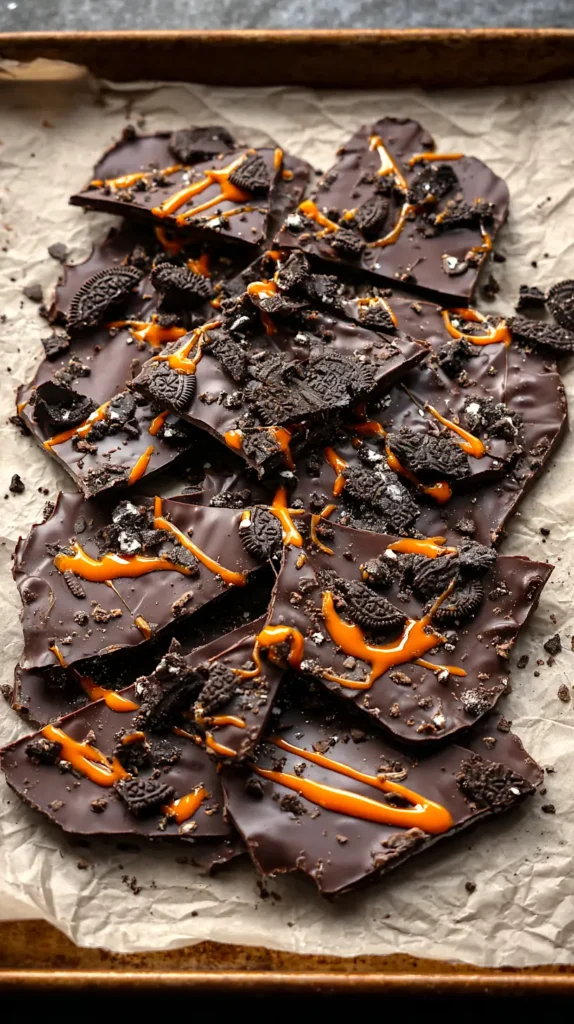
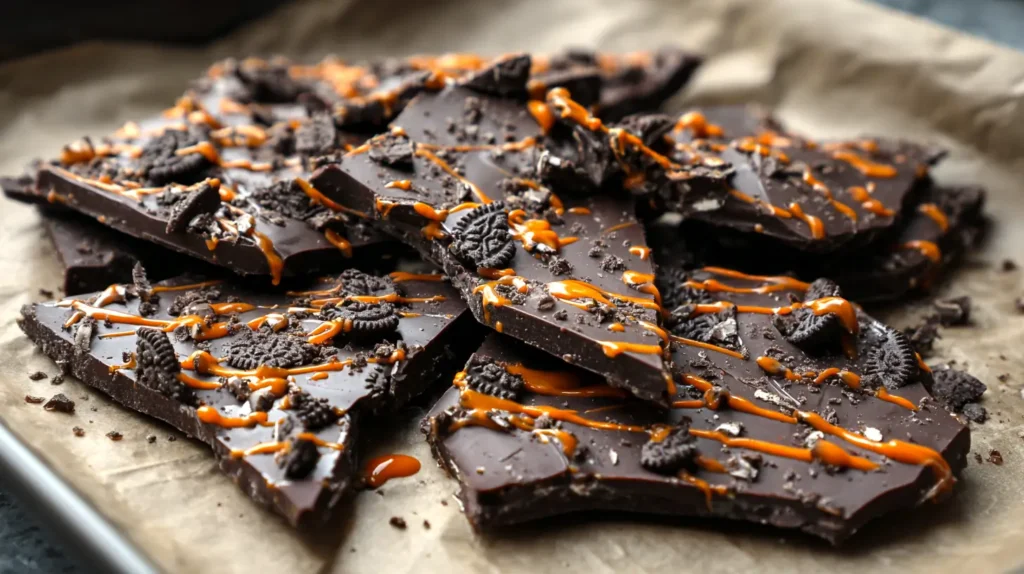
Spooky Oreo Treats with a Zesty Orange Drizzle
This one brings contrast and crunch. It also looks bold without effort. I have found that dark chocolate makes the colors stand out.
Start with sixteen ounces of dark chocolate. Melt and spread it onto parchment. While warm, sprinkle half a cup of chopped Oreo cookies over the surface. Then melt two ounces of orange candy melts and drizzle across the top.
Use a toothpick to lightly drag through the drizzle if you want a marbled look. Chill until firm, then break.
Crush the cookies into chunks, not crumbs. That keeps texture interesting. Also, break apart any large filling clumps before adding.
Important notes:
- Half a cup of cookie pieces gives strong texture
- Two ounces of drizzle is plenty for color
- Light swirling keeps lines defined
- Chill fully before breaking
This Halloween chocolate bark works for party trays and treat bags. It stays simple but still looks themed.
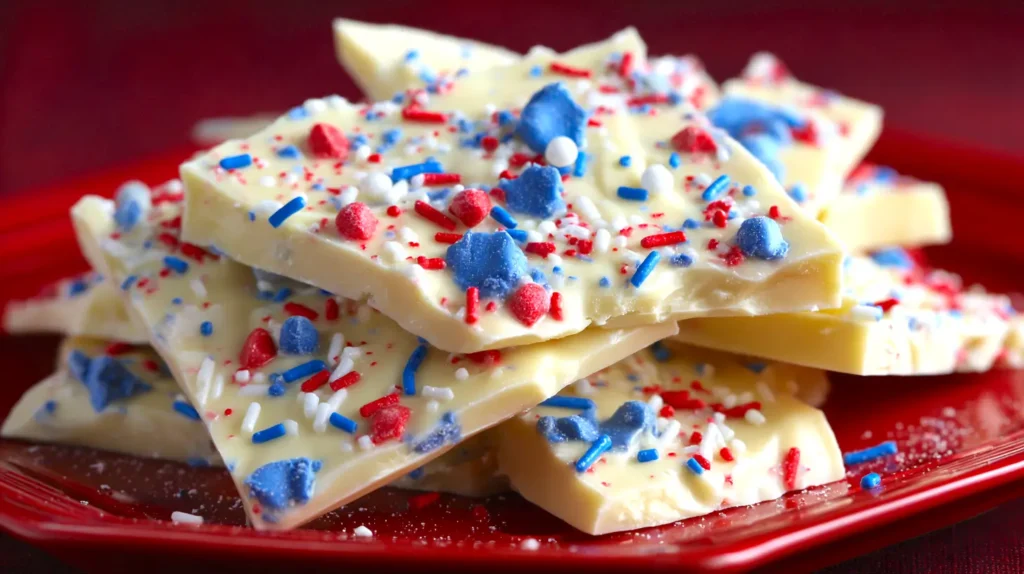
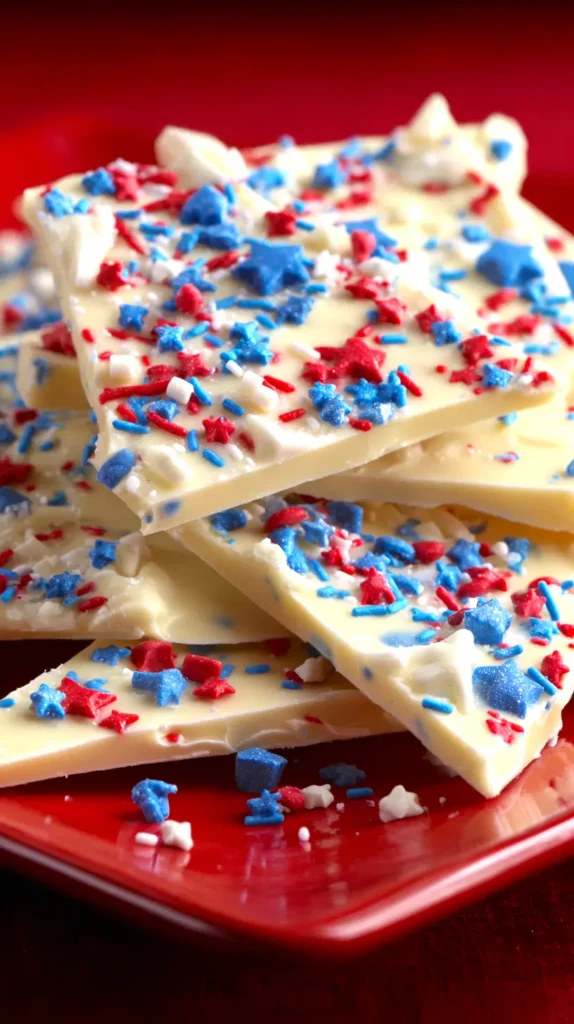
Fourth Of July Chocolate Bark With Red White And Blue Crunch
This version is bright and bold, just like summer gatherings. I have found that white chocolate makes the colors pop.
Melt sixteen ounces of white chocolate and spread it onto parchment. While warm, sprinkle one third cup of red, white, and blue sprinkles over the surface. Add two tablespoons of blue candy pieces.
For extra contrast, drizzle a little melted dark chocolate across the top. Chill until firm, then break.
Balance matters here. Too many candies can make breaking messy. Keep spacing even so each piece looks intentional.
Helpful tips:
- One third cup of sprinkles gives good coverage
- Two tablespoons of candies adds texture without overload
- Thin drizzle lines keep the look clean
- Full chilling prevents cracking
This Fourth of July chocolate bark travels well and holds up in heat better than frosted desserts.
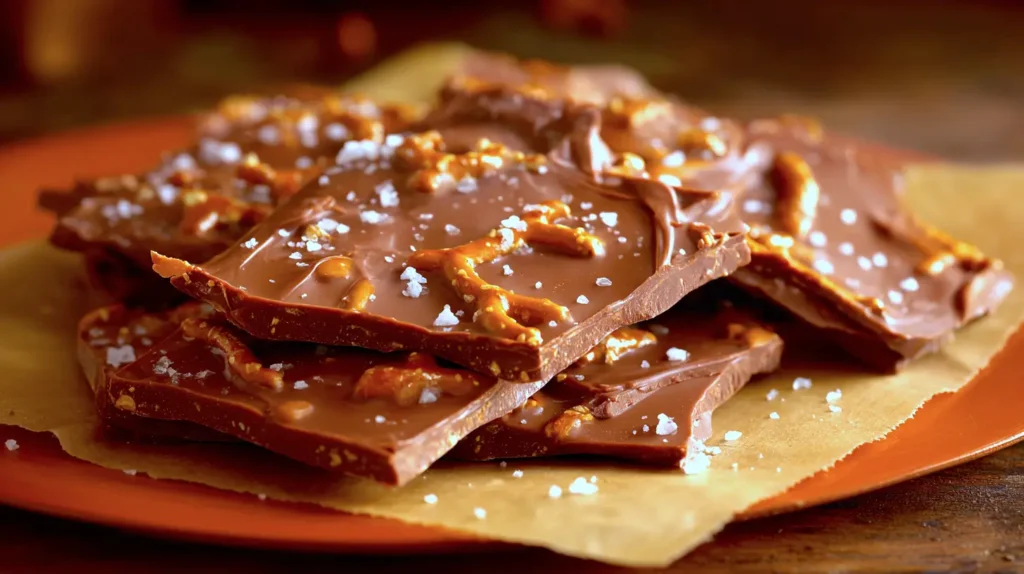
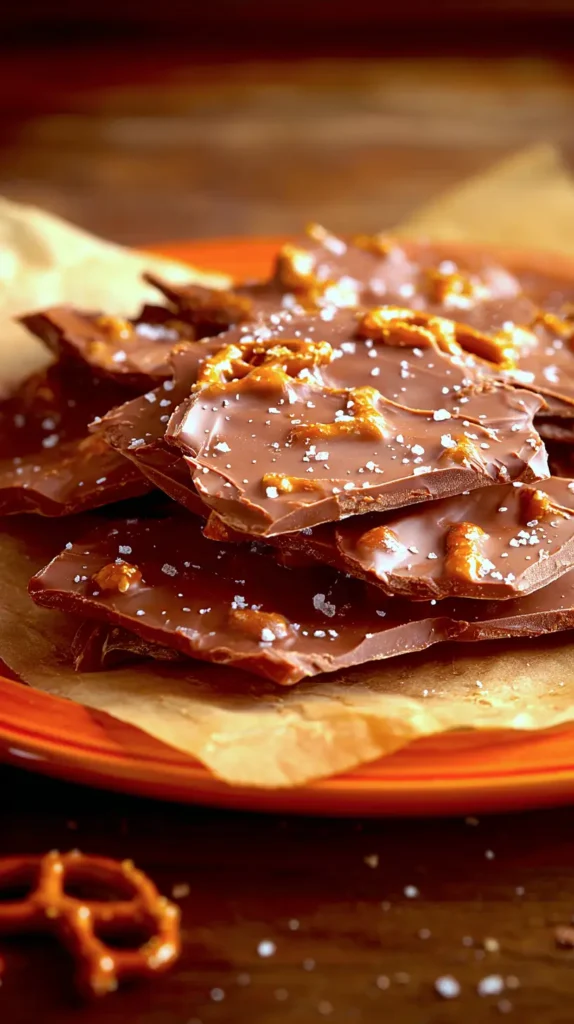
Fall Chocolate Bark With Pretzels And Caramel Bits
Fall desserts should lean cozy without being heavy. This version brings crunch and contrast. I have found that pretzels balance sweetness well.
Melt sixteen ounces of milk chocolate and spread it onto parchment. While warm, scatter one third cup of crushed pretzels over the surface. Add two tablespoons of caramel bits and a light pinch of flaky salt.
Press gently so everything sticks. Chill until firm, then break.
Crush the pretzels into medium pieces, not dust. That keeps texture strong. Also, use caramel bits, not sauce. Sauce adds moisture and causes problems.
Keep in mind:
- One third cup of pretzels gives even crunch
- Two tablespoons of caramel bits adds contrast
- Light salt enhances flavor without overpowering
- Full chilling keeps breaks clean
This fall chocolate bark works for gatherings, gift boxes, and late-night snacking.
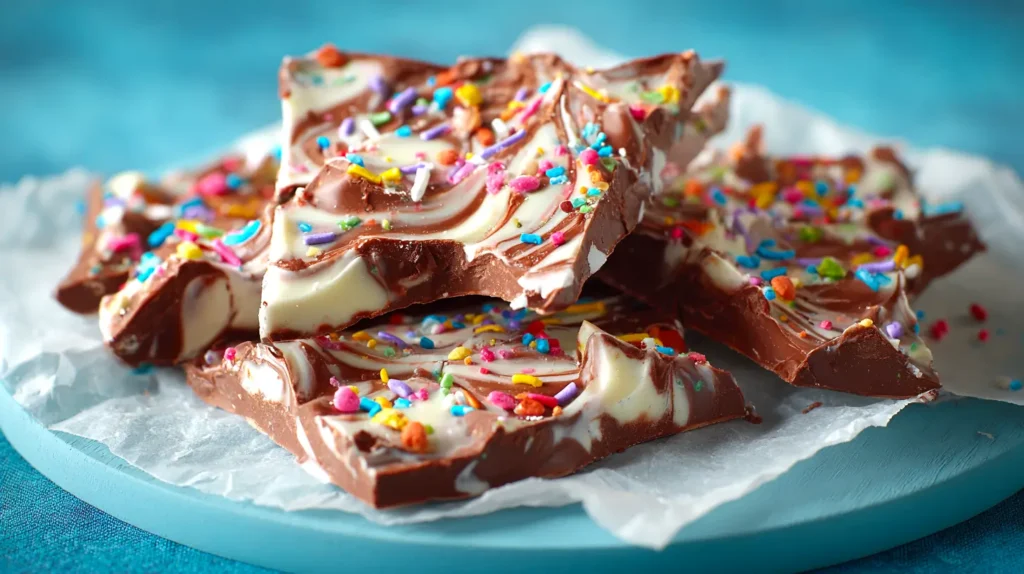
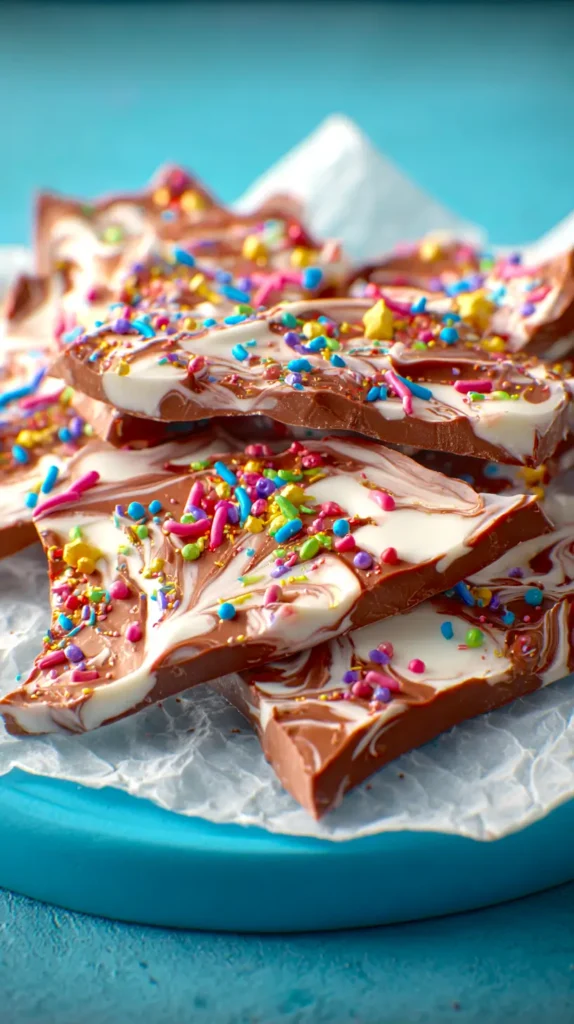
Birthday Chocolate Bark With Rainbow Sprinkles And Candy Pieces
This one is pure fun. It does not pretend otherwise. I have found that birthdays call for color, not subtlety.
Melt sixteen ounces of milk or white chocolate and spread it onto parchment. While warm, add one third cup of rainbow sprinkles and two tablespoons of mini candy pieces. Press lightly. Chill until firm, then break.
Spacing matters here. Spread the candy evenly so each piece looks intentional. Avoid dumping everything in one spot.
Helpful notes:
- One third cup of sprinkles gives full coverage
- Two tablespoons of candy adds texture without clutter
- Light pressure keeps toppings in place
- Chill fully before breaking
This birthday chocolate bark works for party trays, favor bags, and surprise treats. It looks cheerful without extra work.
The Base Chocolate Bark Recipe You Will Use For Every Version
This is the chocolate bark recipe I actually trust. It melts, spreads, sets, and holds up well. That is all I ask from a dessert.
Let’s start with what you need, because guessing is not cute in the kitchen.
Ingredients
- 16 ounces chocolate (milk, semi-sweet, dark, or white), chopped
- 1/2 teaspoon coconut oil or neutral oil (optional, but helpful)
- 1/4 cup toppings of choice (sprinkles, crushed candy, chopped nuts, dried fruit)
Now the actual steps, in real order, with no mystery.
- Line a rimmed baking sheet with parchment paper and make sure it lies flat. This matters more than people admit. Wrinkles cause uneven spreading. Uneven spreading causes ugly breaks. We are avoiding that.
- Add the chopped chocolate and the 1/2 teaspoon oil, if using, to a microwave-safe bowl. The oil helps the chocolate melt smoother and look a little shinier, but it is optional.
- Microwave the chocolate for 30 seconds. Remove it and stir well. Microwave for another 30 seconds and stir again. Keep repeating in 30-second intervals, stirring every time, until about 90 percent of the chocolate is melted. Then stop heating and stir until completely smooth. This prevents scorching and keeps the texture clean.
- Pour the melted chocolate onto the prepared baking sheet. Use a spatula to spread it into an even layer about 1/4 inch thick. Try to keep the edges fairly straight so the pieces break nicely later.
- While the chocolate is still warm, sprinkle the 1/4 cup of toppings evenly over the surface. Do not dump them in the center. Spread them out so every piece gets some personality.
- Gently press the toppings into the chocolate with your fingertips or the back of the spatula. This helps them stick and keeps them from falling off when you break the bark.
- Transfer the baking sheet to the refrigerator and chill for 20 to 30 minutes, or until the chocolate is completely set. If you rush this, the pieces bend instead of break, and nobody enjoys that.
- Once firm, lift the parchment paper and place the chocolate on a cutting board. Break it into pieces by hand for a rustic look, or use a sharp knife if you want cleaner edges.
- Store the finished chocolate bark in an airtight container at room temperature for up to 5 days, or in the refrigerator for up to 2 weeks.
A few things that always help:
- Chop the chocolate evenly so it melts at the same speed
- Stir every single time you heat it
- Keep the layer even so it breaks clean
- Press toppings lightly so they stay put
- Chill fully before breaking
This base chocolate bark is the backbone of every seasonal version. Once this part feels easy, everything else becomes decoration, not stress.

Chocolate Bark
Ingredients
Method
- Line a rimmed baking sheet with parchment paper and make sure the parchment lies flat.
- Add the chopped chocolate and the 1/2 teaspoon oil, if using, to a microwave-safe bowl.
- Microwave the chocolate for 30 seconds.
- Remove the bowl and stir well.
- Microwave for another 30 seconds.
- Remove and stir again.
- Continue heating in 30-second intervals, stirring every time, until about 90 percent of the chocolate is melted.
- Stop heating and stir until the chocolate is completely smooth.
- Pour the melted chocolate onto the prepared baking sheet.
- Use a spatula to spread the chocolate into an even layer about 1/4 inch thick.
- While the chocolate is still warm, sprinkle the 1/4 cup of toppings evenly over the surface.
- Spread the toppings out so they are not concentrated in the center.
- Gently press the toppings into the chocolate with your fingertips or the back of the spatula.
- Transfer the baking sheet to the refrigerator.
- Chill for 20 to 30 minutes, or until the chocolate is completely set.
- Lift the parchment paper and place the chocolate on a cutting board.
- Break the bark into pieces by hand for a rustic look or use a sharp knife for cleaner edges.
- Store the chocolate bark in an airtight container at room temperature for up to 5 days.
- Store in the refrigerator for up to 2 weeks if needed.
Tried this recipe?
Let us know how it was!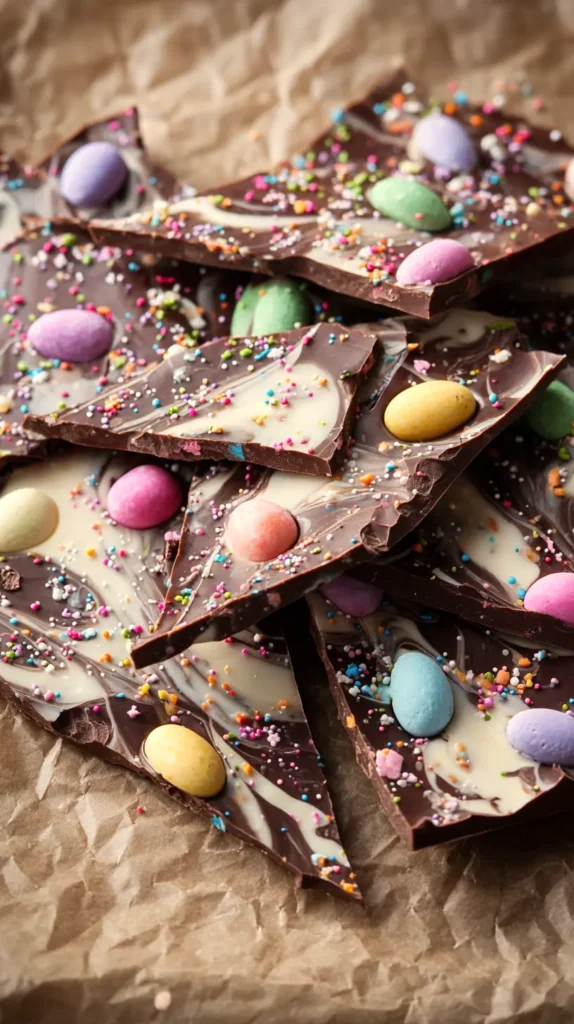
Last Few Sweet Thoughts
Chocolate bark keeps showing up for me because it solves problems quietly. No planning needed, and it won’t steal your focus. It just clicks! I have found that having one dependable dessert option lowers stress more than almost anything else.
Every version in this post starts with the same base. That is the secret. Once you know the method, the rest becomes creative play. Change the colors. Change the toppings. Keep the process. That is how chocolate bark stays flexible.
Since I live in Florida, gatherings pop up without warning. Pool weather does that. I like having something I can make fast and still feel good about bringing. This recipe delivers every time.
It also photographs well, which helps when you are sharing ideas on Pinterest. Clean lines and bright toppings always stand out. That makes it easy to save, share, and repeat.
Chocolate bark does not need hype. It earns its place. It’s fast, adaptable, and definitely keeps its form! Those are strong qualities in a dessert.
If you keep one thing from this post, let it be this. The base matters. Once you master it, everything else becomes easy. That is the kind of kitchen confidence I like.
And yes, I will keep making this on random Tuesdays. That is not changing.