Heart cookies make me irrationally happy, and I refuse to apologize for that. Red velvet makes them feel bold instead of cutesy. Together, they hit that sweet spot of fun and grown.
Most Valentine baking swings hard into pastel chaos. Red velvet skips the sugar-rush vibe and brings real flavor. I’ve found that people take a cookie more seriously when it tastes rich. That feels fair, honestly.
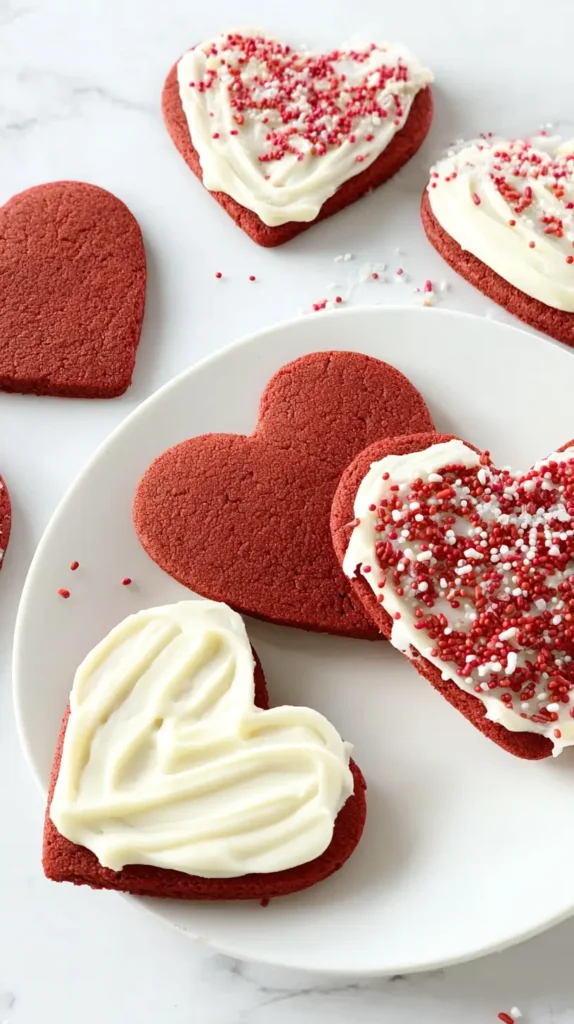
This is a full, real recipe for red velvet, heart-shaped cookies. You’ll get the exact ingredients, the method, the shaping tips, and the bake timing. You’ll also get the little choices that keep them soft.
Some cookie recipes act like you have unlimited patience. I do not. I always notice when a recipe adds steps just to sound fancy. These heart cookies stay simple on purpose.
Living in Orlando means February still feels like spring half the time. Warm weather makes frosting messy and chocolate cranky. So I lean toward cookies that travel well and hold shape. Red velvet hearts do that job beautifully.
You’ll make a tender cookie with a slight chew. Subtle cocoa keeps the flavor balanced. That dry, cakey mess gets avoided entirely.
I’m going to be a little opinionated as we go. That is part of the fun. If you want bakery vibes without bakery drama, this is your lane.
Some of the links on this page are affiliate links, which means I may earn a small commission if you purchase through them. It never costs you extra. You can always peek at my full disclosure if you’d like the details.
Heart Cookies Ingredients That Matter
Red velvet lives and dies by balance. Cocoa should add depth without turning the cookie brown. Buttermilk should add tang without making the dough sticky.
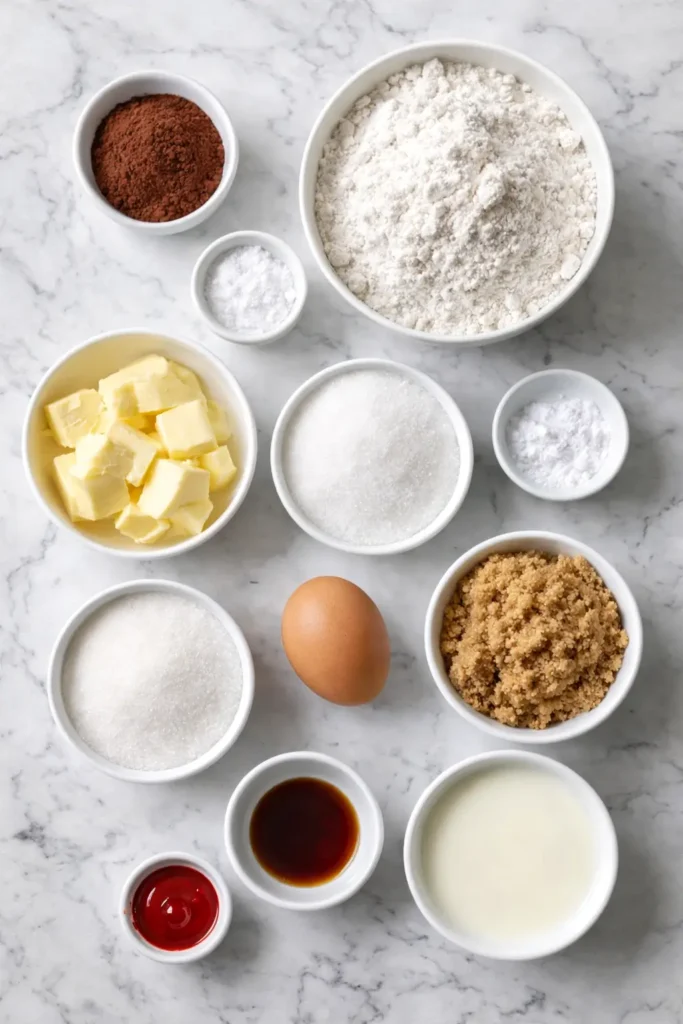
Here is the ingredient list with amounts for heart cookies that stay soft:
- 2 1/4 cups all-purpose flour
- 2 tablespoons unsweetened natural cocoa powder
- 1 teaspoon baking soda
- 1/2 teaspoon fine salt
- 3/4 cup unsalted butter, softened
- 3/4 cup granulated sugar
- 1/2 cup packed light brown sugar
- 1 large egg, room temperature
- 2 teaspoons vanilla extract
- 1/2 cup buttermilk, room temperature
- 1 tablespoon red gel food coloring, or 2 tablespoons liquid coloring
That flour amount keeps the shape clean. Natural cocoa keeps the flavor classic. Baking soda reacts with buttermilk, so the texture stays tender.
Butter and sugars do the heavy lifting for chew. Brown sugar adds moisture, which helps heart cookies stay soft longer. Vanilla rounds the edges, so the tang never tastes sharp.
Gel coloring gives strong red without thinning the dough. Liquid coloring works, but it can soften the dough slightly. I’ve found that chilling matters more when you use liquid.
Buttermilk is the signature, so do not swap plain milk. Real buttermilk gives the right bite. If you only have milk, use a measured substitute.
Use 1/2 cup milk plus 1 1/2 teaspoons white vinegar. Stir it, then wait five minutes. That mix behaves close enough for heart cookies.
Heart Cookies Dough That Rolls Without Cracking
Start with a clean setup, because sticky dough punishes messy counters. Mix flour, cocoa, baking soda, and salt in one bowl. Keep that bowl ready, since the wet mix moves fast.
Cream softened butter with both sugars until fluffy. Aim for two minutes, not twenty seconds. That air helps the cookie bake up tender.
Add the egg and vanilla, then mix until smooth. Stir in the red coloring until the color looks even. Scrape the bowl, because streaks can happen.
Pour in buttermilk and mix on low. Alternate the dry ingredients in two or three additions. Stop once the flour disappears, since overmixing makes tough cookies.
This dough should feel soft but not wet. It should pull away from the bowl slightly. It should also hold a finger dent without sticking badly.
If the dough feels sticky, chill it before you panic. Refrigerate it for 30 minutes, covered. That rest makes heart cookies easier to roll.
If the dough feels dry, check your flour measuring. Spoon flour into the cup, then level it. Packed flour makes the dough crumbly.
I always notice people skip scraping the bowl. That mistake leaves butter pockets and flour pockets. Those pockets crack the surface during rolling.
Once the dough looks smooth, split it in half. Flatten each half into a thick disk. Wrap both disks tightly, then chill.
Give the dough at least one hour. Longer chilling helps clean edges on heart cookies. Two hours feels ideal if you can swing it.
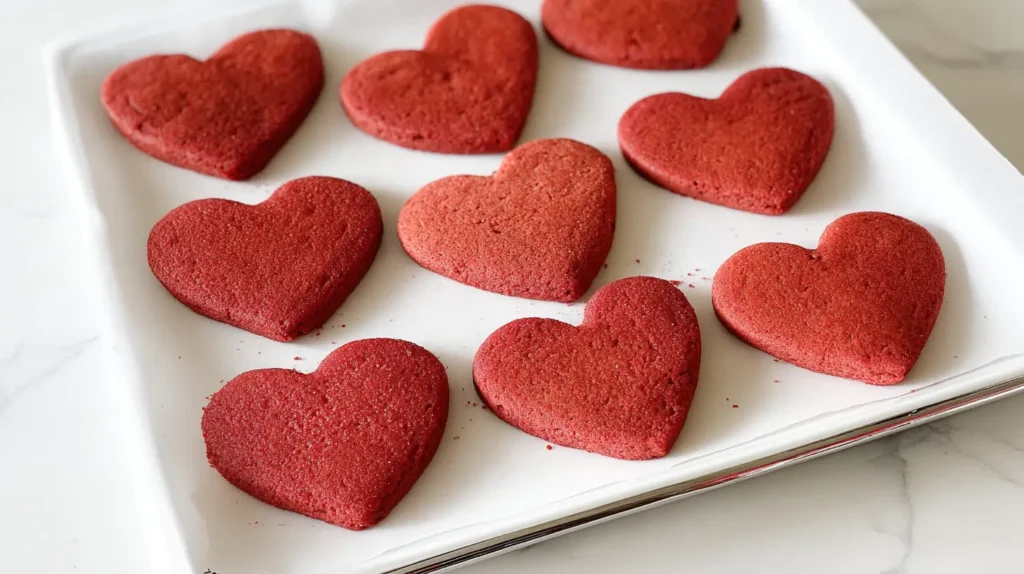
Shaping Heart Cookies With Clean Edges
Cold dough makes clean shapes. Warm dough makes sad, puffy hearts. So keep one disk chilled while you roll the other.
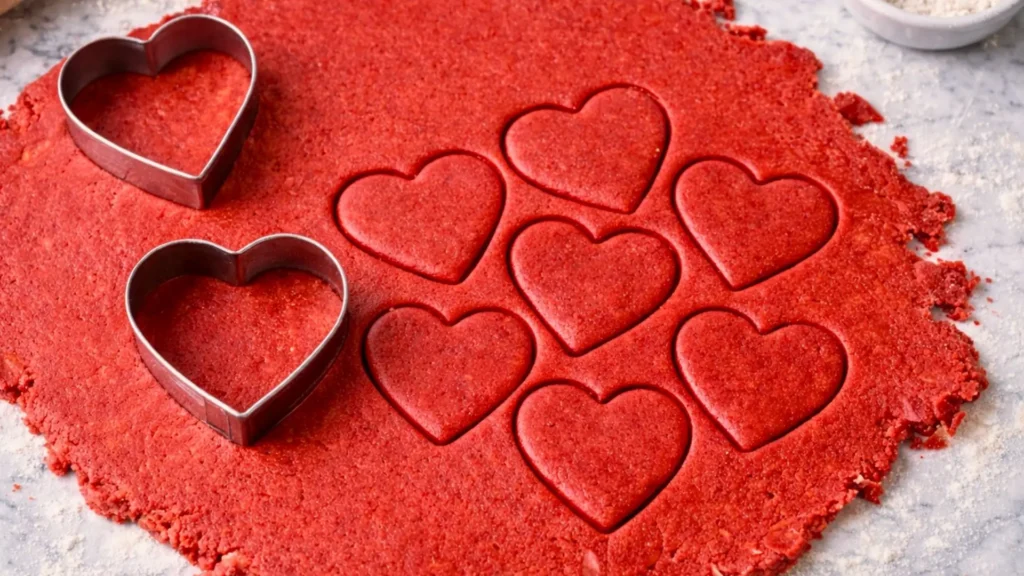
Dust your surface lightly with flour. Roll the dough to about 1/4 inch thick. Thicker cookies stay softer, which fits red velvet perfectly.
Press the heart cutter straight down. Lift it straight up, since twisting distorts edges. Slide a thin spatula under each cut if needed.
Place the hearts on a parchment-lined baking sheet. Keep about one inch between cookies. That spacing prevents edge merging during baking.
Re-roll scraps gently, but avoid aggressive kneading. Excess handling warms the dough and toughens texture. Limit re-rolls to two rounds for best heart cookies.
Chill the cut hearts for 15 minutes before baking. That step locks in the shape. It also reduces spread, so the hearts stay crisp at the edges.
Here are quick shaping tips that actually help:
- Dip the cutter in flour if the dough sticks
- Use parchment under the dough for easy lifting
- Chill the sheet if the dough feels soft
- Keep thickness consistent for even baking
I’ve found that uneven thickness causes uneven color. Thin parts turn darker and lose red tone. Even rolling keeps heart cookies looking bakery-level.
If you want extra definition, use a smaller cutter inside. Cut a tiny heart window from half the cookies. Bake them, then sandwich later. That move feels fancy without extra work.

Baking Heart Cookies So They Stay Soft
Preheat the oven to 350°F. Use the center rack for even heat. Line baking sheets with parchment, not grease.
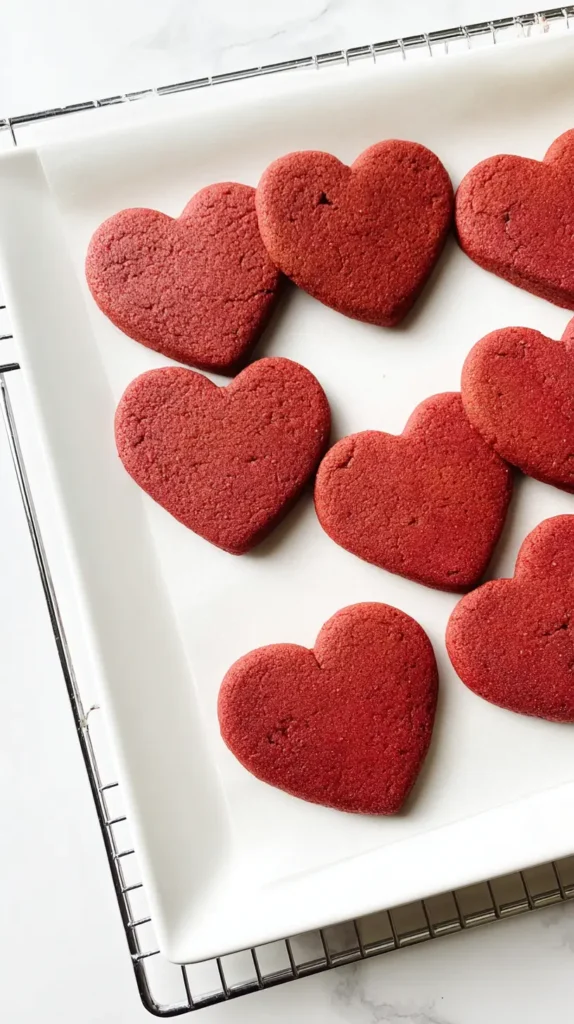
Bake the chilled hearts for 8 to 10 minutes. Pull them when edges look set. The centers should still look slightly soft.
Let the cookies rest on the sheet for five minutes. Move them to a rack after that. Cooling on the sheet finishes the bake gently.
Overbaking ruins red velvet fast. You lose moisture, then the cocoa tastes harsh. Soft heart cookies need a slight underbake.
Oven hot spots exist in every kitchen. Rotate the pan halfway through baking. That small step keeps the color even across the tray.
Expect the tops to look matte, not glossy. Look for edges that hold when nudged lightly. Avoid waiting for browning, since red velvet hides it.
Here is a simple timing guide:
- 1/4 inch thickness: 8 to 10 minutes
- Slightly thicker: 10 to 11 minutes
- Mini hearts: 6 to 7 minutes
I always notice people slam hot cookies onto a plate. That traps steam and makes them soggy. A rack keeps the bottom clean and tender.
If you plan to frost, cool them fully first. Warm cookies melt icing into a sad puddle. Patience helps heart cookies look sharp.
Yield depends on cutter size. A 3-inch heart usually makes about 24 cookies. A smaller cutter can make 36 or more.
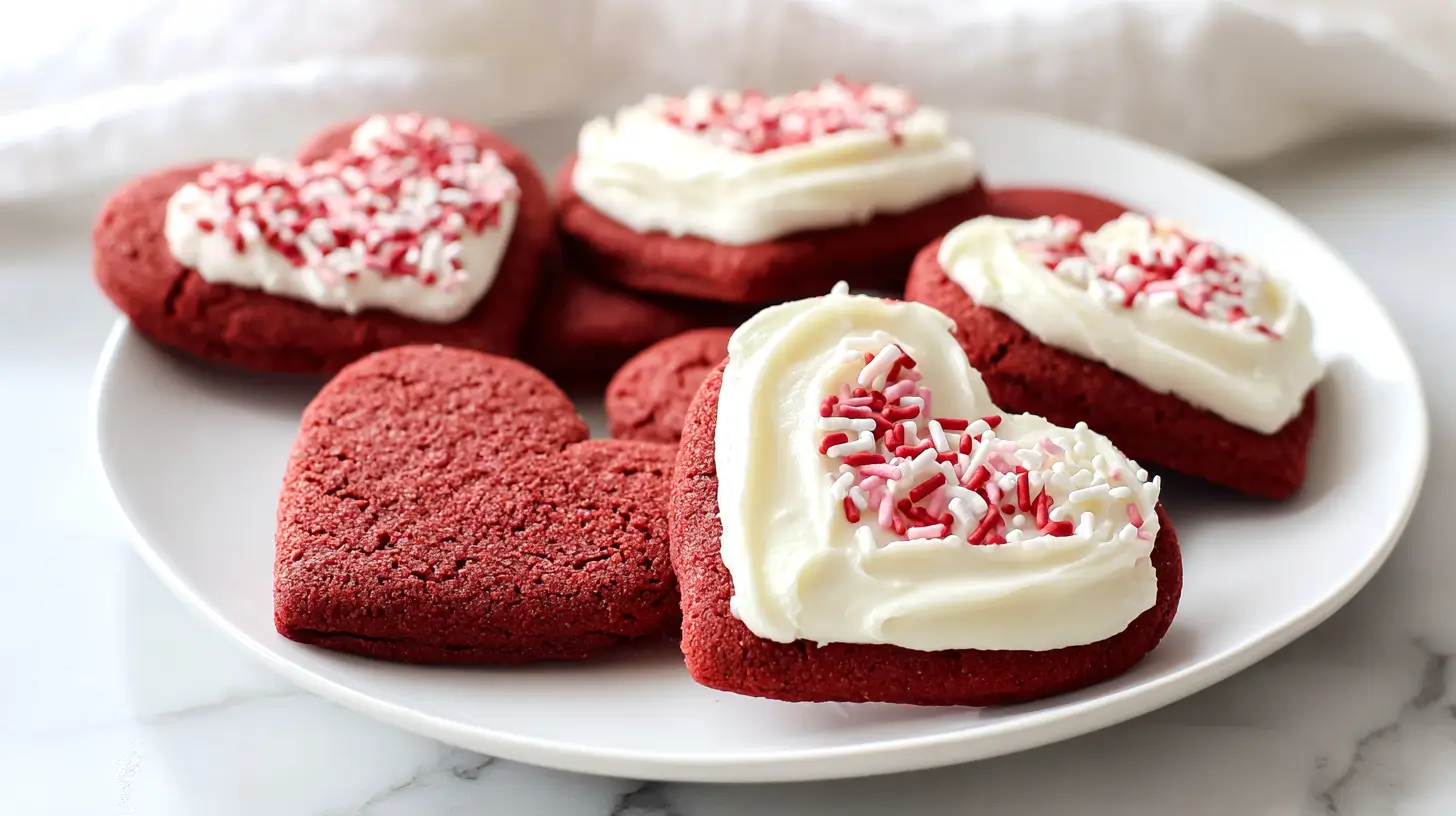
Decorating Options That Look Cute Without Chaos
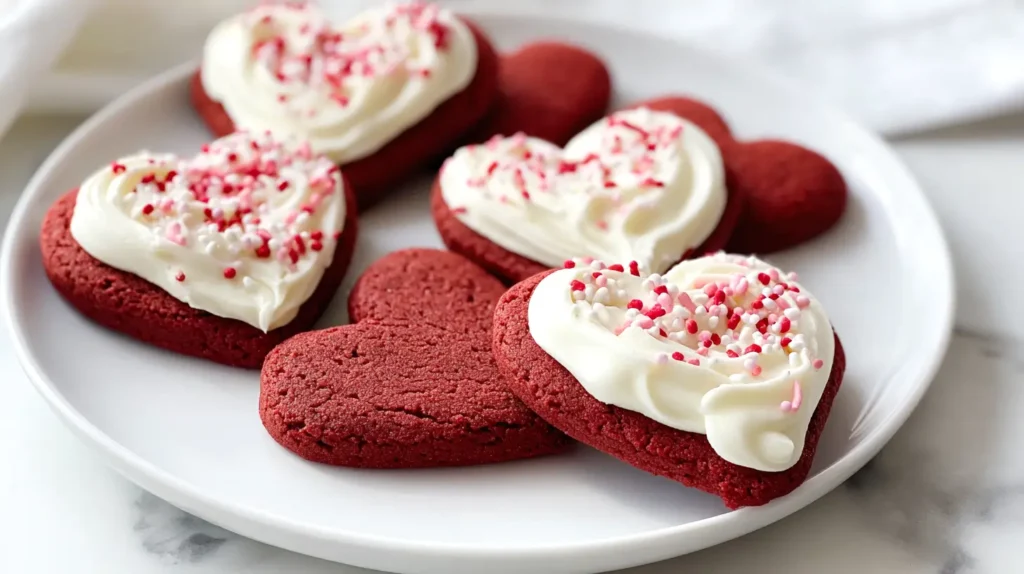
Red velvet already brings drama, so keep the decoration simple. I like a clean finish with one strong detail. Too many toppings make heart cookies feel messy.
Cream cheese frosting is the classic move. Use it if you want that familiar red velvet vibe. Keep it thick, so it pipes cleanly.
Here is a quick frosting that holds shape:
- 4 ounces cream cheese, softened
- 4 tablespoons unsalted butter, softened
- 2 cups powdered sugar
- 1 teaspoon vanilla extract
- Pinch of salt
Beat cream cheese and butter until smooth. Add sugar in stages, then vanilla and salt. Chill frosting 10 minutes if it feels loose.
Buttercream also works when you need stability. I’ve found it travels better in warm weather. That matters if you pack heart cookies for school events.
Try these decoration ideas that stay realistic:
- Thin zigzag drizzle with white chocolate
- Small piped border around the heart edge
- Light sanding sugar on wet frosting
- One candy heart pressed in the center
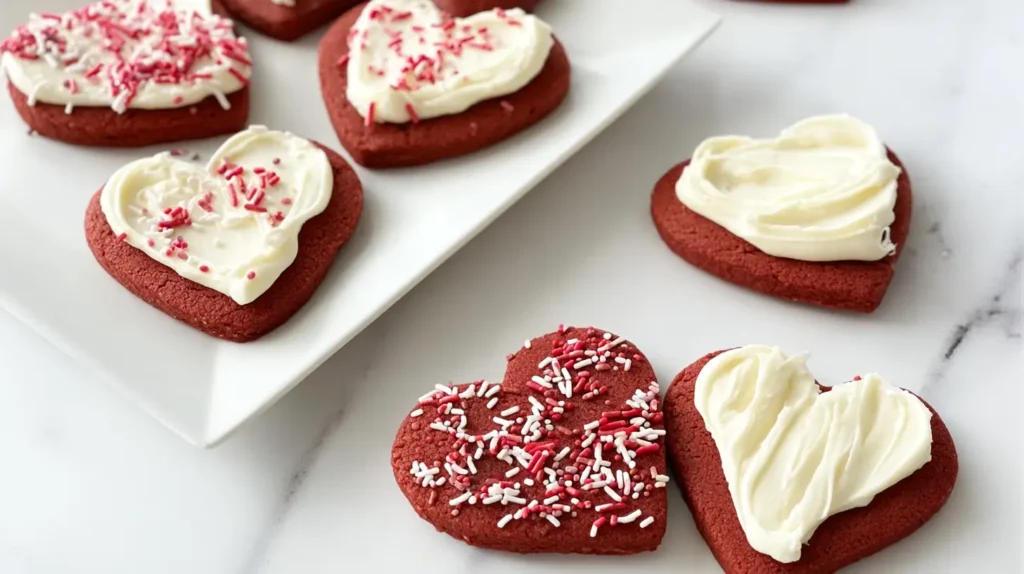
- Simple sandwich cookies with frosting inside
If you drizzle chocolate, let cookies cool completely. Melted chocolate should look silky, not thick. Use a spoon or piping bag for control.
Skip heavy sprinkles if you want clean lines. Hard sprinkles can crack a soft cookie bite. Softer sanding sugar keeps texture pleasant.
A sandwich version feels extra special. Spread frosting on one cookie, then top with another. Press gently, so the edges stay neat.
Make-Ahead, Storage, And Freezer Tips
Make-ahead baking saves sanity. I always notice life gets loud right before holidays. So plan for calm, not chaos.
Refrigerate the dough disks up to 48 hours. Let the dough sit at room temperature for 10 minutes before rolling. That brief rest prevents cracking.
Freeze dough for longer storage. Wrap each disk tightly, then place in a freezer bag. Label it, because mystery dough is never fun.
Freeze cut shapes too, which is my favorite trick. Place cut hearts on a sheet, then freeze until firm. Store frozen heart cookies dough pieces in a bag.
Bake from frozen at 350°F. Add one to two minutes to the bake time. Keep an eye on edges, since timing varies.
Store baked cookies in an airtight container. Use parchment between layers to protect frosting. Keep them at room temperature for two days.
Refrigerate frosted cookies for up to five days. Bring them to room temperature before serving. Cold frosting tastes muted, so warming helps flavor.
Here are quick storage reminders:
- Unfrosted cookies freeze well for two months
- Frosting freezes best when piped after thawing
- Airtight containers prevent drying
- A slice of bread can soften cookies overnight
That bread trick works, but do not overdo it. One slice is enough for a whole container. Too much moisture makes heart cookies gummy.
For gifting, pack them in single layers. Use parchment to separate rows. Add a small note, because people love a baking brag.
Fixes For Common Heart Cookies Problems
Every cookie problem has a cause. Most fixes are simple. So do not throw out the batch.
If the dough cracks while rolling, it is too cold or too dry. Let it rest for five minutes, then roll again. Add a tiny dusting of flour only if needed.
If the dough sticks, it is too warm. Chill it for 15 minutes. Use parchment under the dough for easier lifting.
If cookies spread too much, chill longer before baking. Check butter softness, since overly soft butter causes spread. Also confirm your oven temperature with a thermometer.
If cookies taste bland, add a pinch more salt. Increase vanilla by 1/2 teaspoon if you want warmth. Do not add extra cocoa, since it can dull the red.
If the color looks weak, switch to gel coloring. Use natural cocoa, not Dutch-process, for classic red velvet tone. Too much cocoa muddies the color.
If cookies bake up cakey, you may have overmixed. Cream butter and sugars well, but mix flour gently. Stop the moment the dough looks combined.
Here are simple upgrades that stay true:
- Add 1/2 teaspoon espresso powder for deeper cocoa notes
- Use a heart stamp to press a subtle design
- Make mini heart cookies for party platters
- Sandwich with frosting for a bakery look
I’ve found that timing matters most for softness. Pull cookies early, then cool them properly. That one habit fixes half of cookie disappointment.

Red Velvet Heart Cookies
Ingredients
Method
- Combine the flour, cocoa powder, baking soda, and salt in a medium bowl and whisk until evenly mixed.
- In a large bowl, cream the softened butter, granulated sugar, and brown sugar together until light and fluffy, about two minutes.
- Add the egg and vanilla extract to the butter mixture and mix until smooth and fully combined.
- Add the red food coloring and mix until the dough is evenly colored, scraping down the bowl as needed.
- Pour in the buttermilk and mix on low speed until incorporated.
- Add the dry ingredients to the wet mixture in two to three additions, mixing on low speed just until the flour disappears.
- Divide the dough in half, shape each portion into a thick disk, wrap tightly, and refrigerate for at least one hour.
- Preheat the oven to 350°F and line baking sheets with parchment paper.
- Roll one chilled dough disk on a lightly floured surface to about 1/4 inch thickness.
- Cut out heart shapes using a heart-shaped cookie cutter and transfer the cookies to the prepared baking sheet, spacing them about one inch apart.
- Gather and reroll scraps gently, limiting rerolling to no more than two times.
- Chill the cut cookies on the baking sheet for 15 minutes before baking.
- Bake for 8 to 10 minutes, until the edges are set and the centers still look slightly soft.
- Allow the cookies to cool on the baking sheet for five minutes, then transfer them to a wire rack to cool completely.
Tried this recipe?
Let us know how it was!
Last Few Ideas and Thoughts
I treat Valentine’s baking like a mood boost, not a life project. Red velvet feels festive without feeling childish. That is why I come back to heart cookies every year.
Some days call for big gestures. Other days call for a cookie that looks like you tried. This recipe gives you that tried-but-not-stressed energy.
I’ve found that a heart shape changes how people react. Smiles come faster, which always amuses me. Reaching follows quickly. Extra effort gets credited automatically.
Living in Orlando means my kitchen stays warm most of the year. That warmth makes me appreciate cookies that hold up in transit. These still look good on a plate.
I like packing a few in a container and calling it a gift. I also like keeping half for myself, because I am not a martyr. Balance feels healthy.
Pinterest always turns Valentine’s food into a sparkle contest. Meanwhile, these cookies win with flavor and texture. That is the kind of win I actually care about.
If you bake them, keep them slightly underdone. Let them cool fully. Then enjoy the moment when someone says they taste like real red velvet.