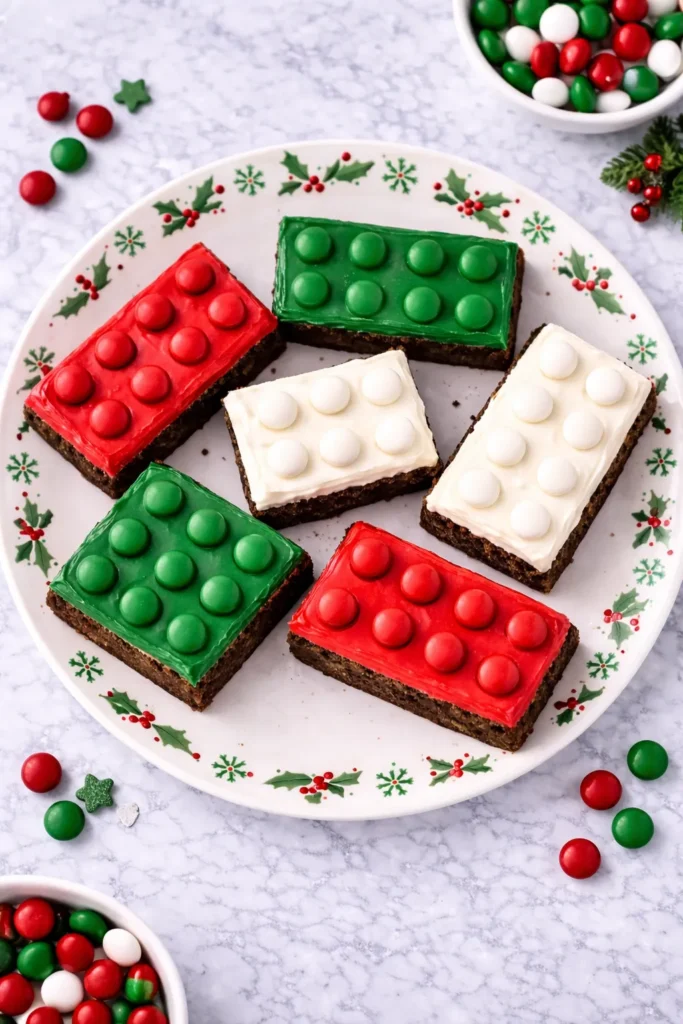
I get why Lego brownies stop people mid-scroll. They’re bright, silly, a little extra, and somehow still wildly cute. One second you’re looking for an easy brownie idea, and the next you’re staring at frosted rectangles thinking, Well, that’s annoying. Now I need to make those.
What I love most is that they look way fussier than they are. That’s the sweet spot for me. I want something that makes people think I had a plan, even if the plan was mostly chocolate, colored frosting, and a solid attitude. These hit that note perfectly.
I’ve found that colorful desserts can go sideways fast. They either look too messy, too fake, or too precious to bother with. These don’t. They land right in that happy middle where they’re playful without being a headache. Also, they’re brownies, which already gives them an unfair advantage over almost every party treat on the table.
As a mom in Orlando, I also respect any dessert that looks like a party before anyone even cuts into it. Bright colors just do something down here. They look right at home next to pool parties, birthday chaos, and a kitchen that suddenly has three people asking when dessert is ready.
This version starts from scratch, because boxed brownies can be good, but homemade brownies have that deeper, richer thing going on. The edges matter more. The center matters more. Even the smell has better manners. And once the frosting goes on top with those candy dots, the whole thing turns into the kind of dessert people talk about longer than you’d expect. Which, honestly, is exactly the point.
A few links on this page are affiliate links, so if you click and buy, I might earn a small commission. It never costs you more, and it helps support the site. You can read my full disclosure if you’re into the fine print.
Why Lego Brownies Work Way Better Than They Should
There are desserts that are pretty, and then there are desserts that make people grin before they even taste them. Lego brownies absolutely belong in that second group. They have that goofy, cheerful energy that makes a tray look instantly more fun, even before anyone realizes it’s a scratch-made brownie situation under all that color.
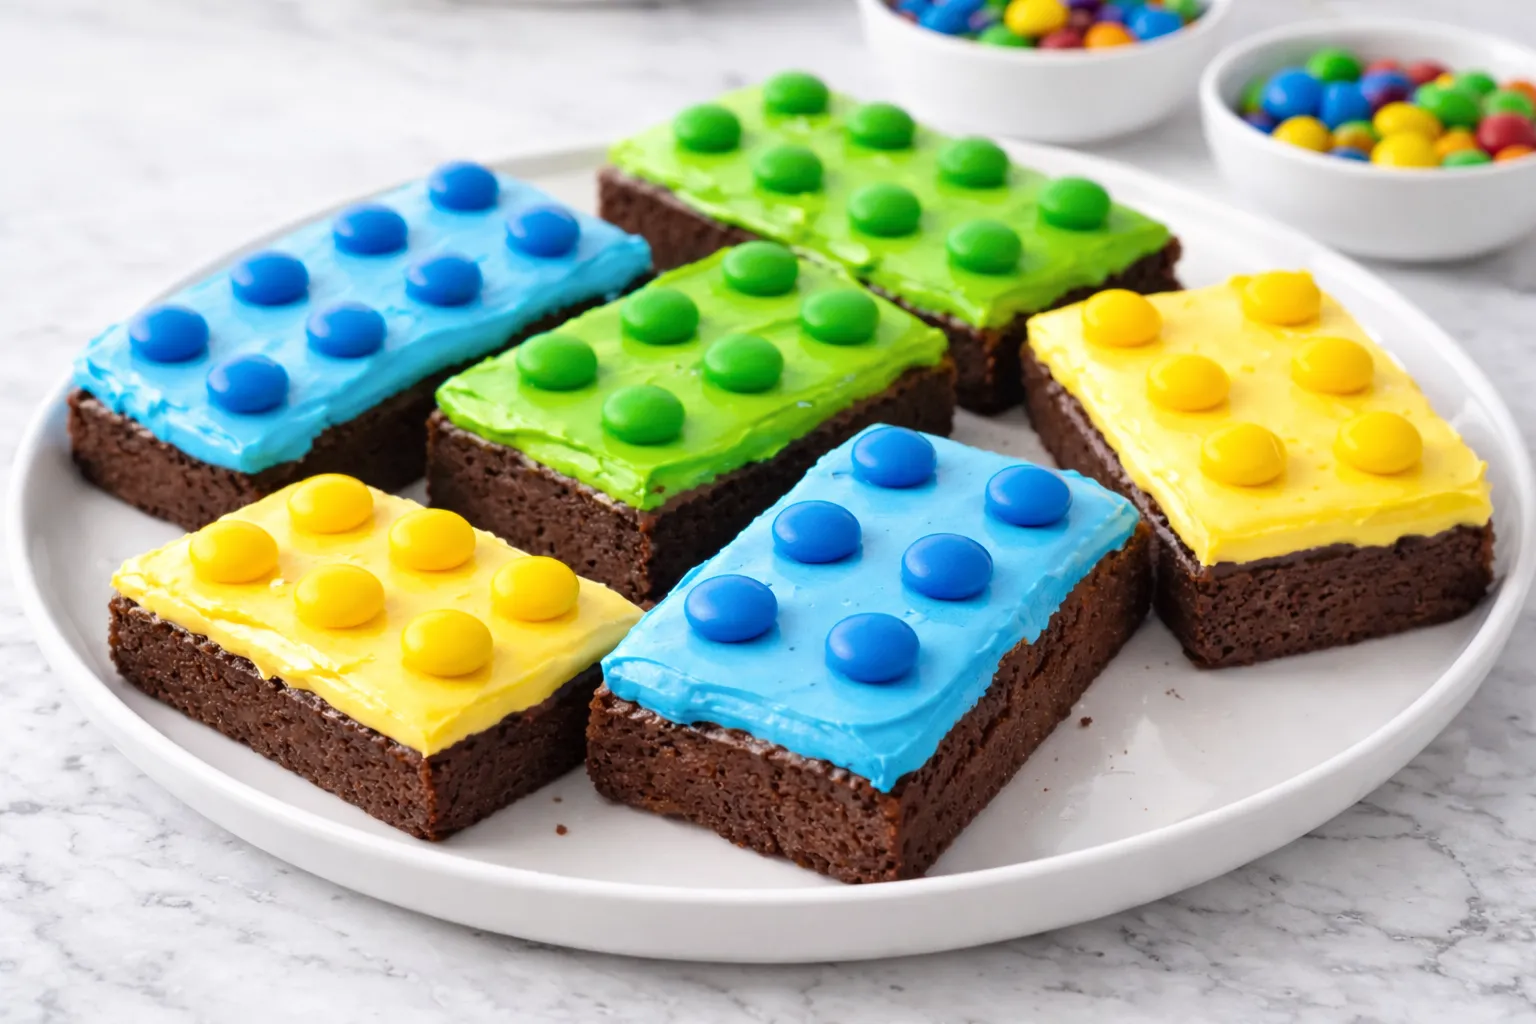
The clever part is the shape. That’s it. You’re not making custom molds. You’re not sculpting anything dramatic. Basically, you’re baking one pan of brownies, cutting rectangles, spreading on bright frosting, and adding candy pieces in neat little rows. Suddenly, the whole thing looks like something from a bakery case that charges too much and acts mysterious about butter.
I tend to notice that desserts do better when they have one strong visual idea. Not five. Not a whole monologue. One idea. Here, the idea is obvious from two feet away. Block-shaped brownies with candy studs. Done. It reads fast, which matters at parties.
That’s also why I like these for birthdays, classroom celebrations, game nights, and themed movie nights. They look festive without needing a full cake commitment. Some days I want a cute dessert. Other days I want a cute dessert that doesn’t involve stacking layers and pretending I enjoy crumb coats.
And here’s the reframe people miss: these aren’t really about being perfect. Clean edges help, yes. Straight candy placement helps too. Still, the charm comes from the bright, playful look. A tiny wobble in the frosting won’t ruin anything. In fact, if they’re too polished, they almost lose the joke.
That’s the magic trick here. Not actual magic. Just brownies with good instincts.

The Ingredients That Matter
A lot of cute desserts hide behind decoration. These can’t. The frosting grabs attention first, but the brownie underneath still needs to be worth eating. That means rich chocolate flavor, a soft center, and edges sturdy enough to hold their shape once you cut and frost them.
Here’s what I use for the brownies:
- 1 cup unsalted butter
- 2 cups granulated sugar
- 1 cup light brown sugar, packed
- 4 large eggs
- 1 tablespoon vanilla extract
- 1 cup unsweetened cocoa powder
- 1 teaspoon salt
- 1 teaspoon baking powder
- 1 cup all-purpose flour
- 1 cup semi-sweet chocolate chips
For the frosting and topping:
- 1 cup unsalted butter, softened
- 4 cups powdered sugar
- 2 to 3 tablespoons heavy cream or milk
- 1 teaspoon vanilla extract
- Gel food coloring in blue, green, and yellow
- 1 to 2 bags plain M&M’s, sorted by color if possible
Now, a couple things matter more than people think. First, use gel food coloring, not the watery stuff. Liquid coloring can thin frosting and make bright shades weirdly streaky. Second, don’t skip the brown sugar. It gives the brownies that deeper, slightly chewy bite that keeps them from tasting flat under sweet frosting.
Chocolate chips are optional in theory, but in real life, I want them there. They melt into little rich pockets that make each bite better. Meanwhile, the salt matters because all that sweetness needs a grown-up in the room.
You could use candy melts or another round candy on top. Still, classic M&M’s work beautifully because they’re the right size and already have that toy-block look. Sometimes the obvious choice wins for a reason.
The Brownie Base For Lego Brownies Starts Here
This batter is simple, but it rewards basic patience. Not gourmet patience. Just enough patience to stop rushing the melted butter stage like it insulted you personally. Once that part is right, the rest moves fast.
Start by preheating your oven to 350°F. Line a 9×13-inch metal baking pan with parchment paper, leaving a little overhang. Grease the paper lightly too. Brownies are lovable. Brownies are also clingy.
Then make the batter:
- Melt 1 cup butter in a saucepan or microwave-safe bowl.
- Whisk in the granulated sugar and brown sugar until glossy.
- Add the eggs one at a time, mixing well after each.
- Stir in the vanilla extract.
- Sift in the cocoa powder, salt, and baking powder.
- Fold in the flour just until combined.
- Stir in the chocolate chips.
The batter will be thick. That’s good. Thick batter usually means serious brownies, not sad cake pretending to be one. Spread it evenly into the prepared pan, and smooth the top with a spatula.
Bake for 28 to 34 minutes. I usually start checking at 28. A toothpick should come out with moist crumbs, not wet batter. That difference matters. Pulling brownies too late is how you end up with a dry, tragic sheet of disappointment wearing bright frosting like a disguise.
Let the pan cool completely. Then chill it for at least 45 minutes before cutting. I know. Waiting is irritating. Still, chilled brownies cut into cleaner rectangles, and cleaner rectangles are what sell the whole Lego brownies look.
That’s the delayed payoff here. Fresh brownies smell incredible, but cold brownies behave better. Cute desserts are rarely built on impulse alone.
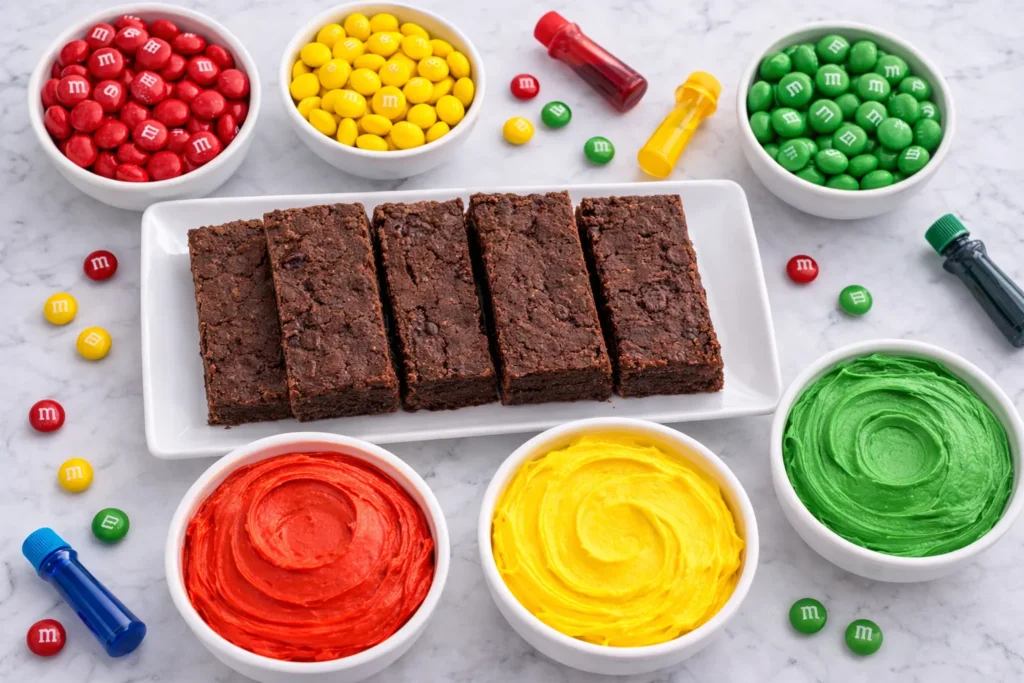
The Frosting Is Where Things Get Bright Fast
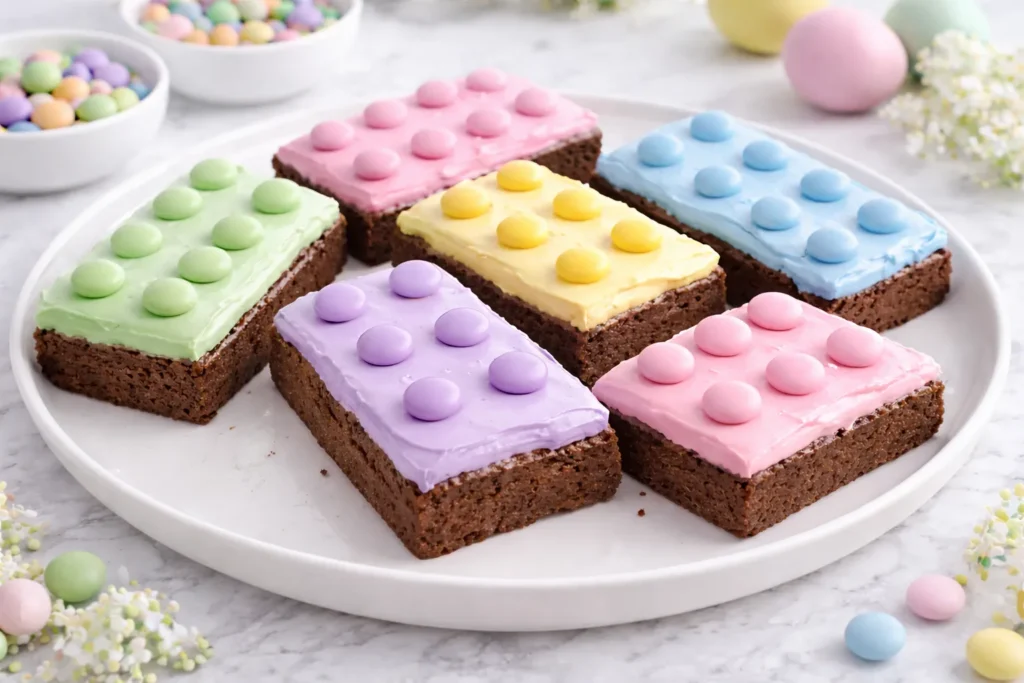
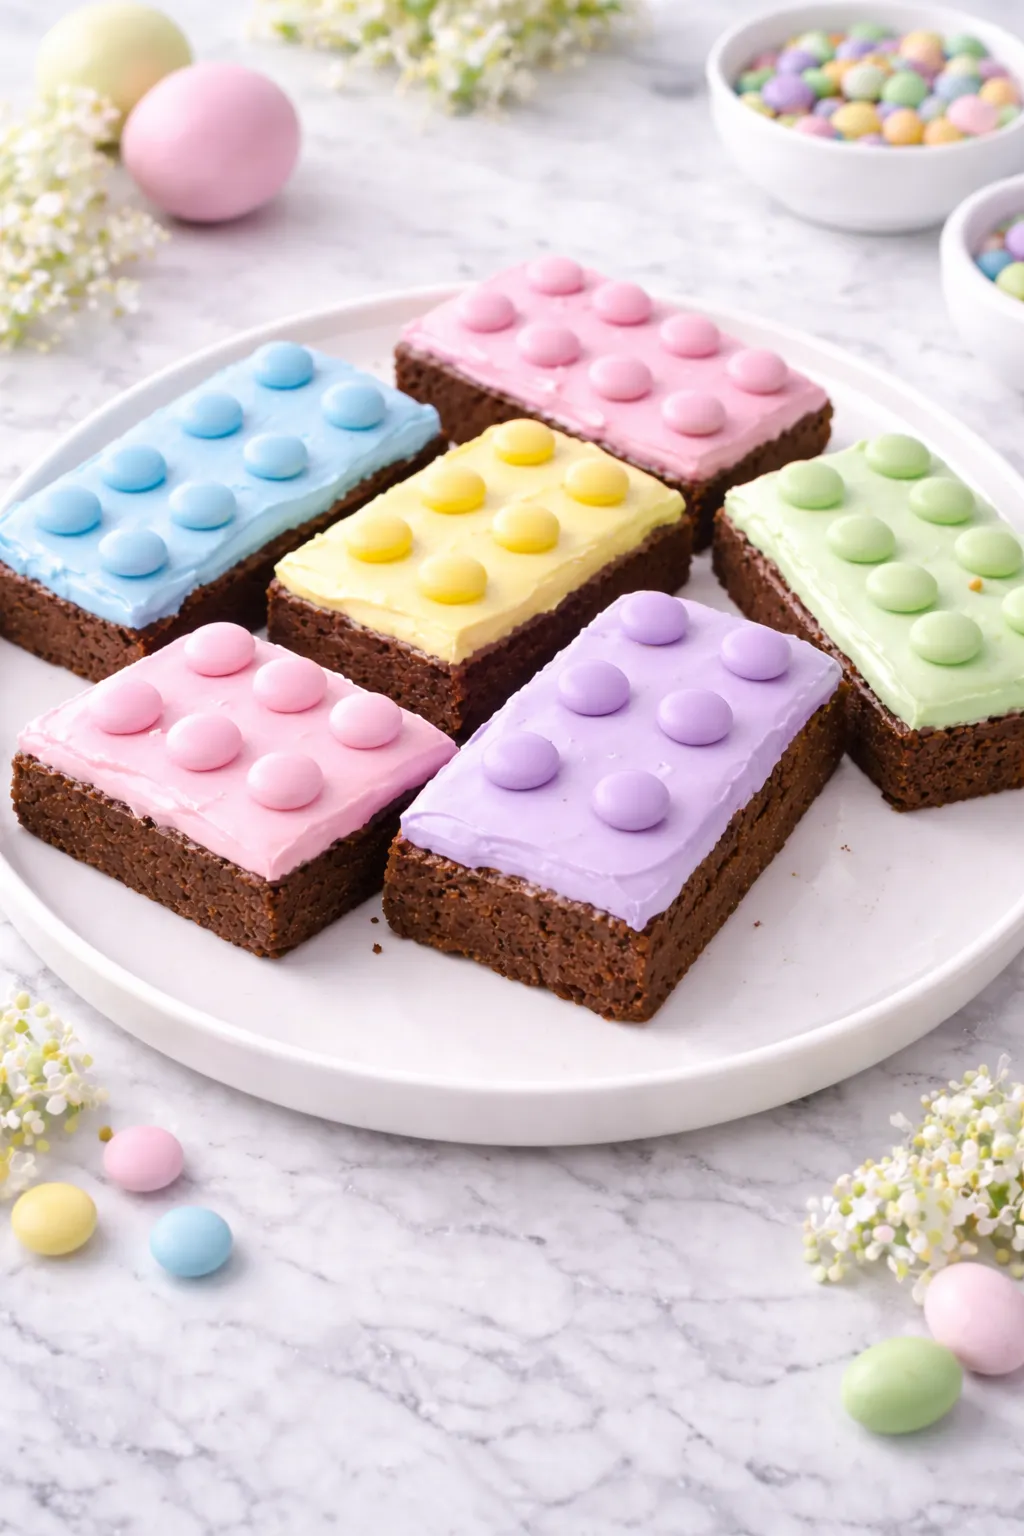
I’m just going to say it: the frosting needs to be bold. Not pastel (unless going for a Spring theme). Not whispery. And now, not “inspired by color.” These brownies look best when the blue is very blue, the green is almost cartoonish, and the yellow has that happy little school-bus energy.
Make a simple buttercream by beating the softened butter until creamy. Add the powdered sugar gradually, then the vanilla, then enough cream or milk to make it smooth and spreadable. Beat until fluffy. You want it thick enough to hold shape, but soft enough to spread without dragging the brownie surface into chaos.
Once the frosting is ready, divide it into three bowls. Tint one blue, one green, and one yellow with gel food coloring. Keep mixing until the color looks a little stronger than you think you need. Frosting always softens in tone once it’s spread.
Here’s the thing people assume wrong: brighter frosting does not automatically mean it will taste artificial. It only tastes off when the frosting itself isn’t balanced. This one has enough butter, vanilla, and salt-adjacent brownie underneath to keep the sweetness from getting too loud.
I also like to spread each color a little imperfectly. Not messy. Just not fussy. Those light swoops and tiny spatula marks actually help the brownies look more playful. A super-smooth finish can make them seem more like bakery petit fours than block brownies, and that’s not the vibe.
If you want more shades, go for it. Red and orange look cute too. But blue, green, and yellow really nail the toy-box look without needing an explanation. They’re cheerful immediately. No one has to study the tray.
That matters more than people admit.

How To Shape And Decorate Lego Brownies Without Losing Your Mind
Once the brownie slab is chilled, lift it out of the pan using the parchment overhang. Set it on a cutting board, and trim the outer edges if you want a cleaner look. I usually do, because edges have a habit of being delicious but a little ragged.
Then cut the brownies into rectangles. Don’t overthink the size. A good starting point is about 2 by 4 inches, though slight variation won’t hurt anything. Some toy bricks are longer anyway, so a little size mix can actually make the tray look more natural.
Now decorate:
- Spread one frosting color over each brownie rectangle.
- Use an offset spatula or butter knife for quick, even coverage.
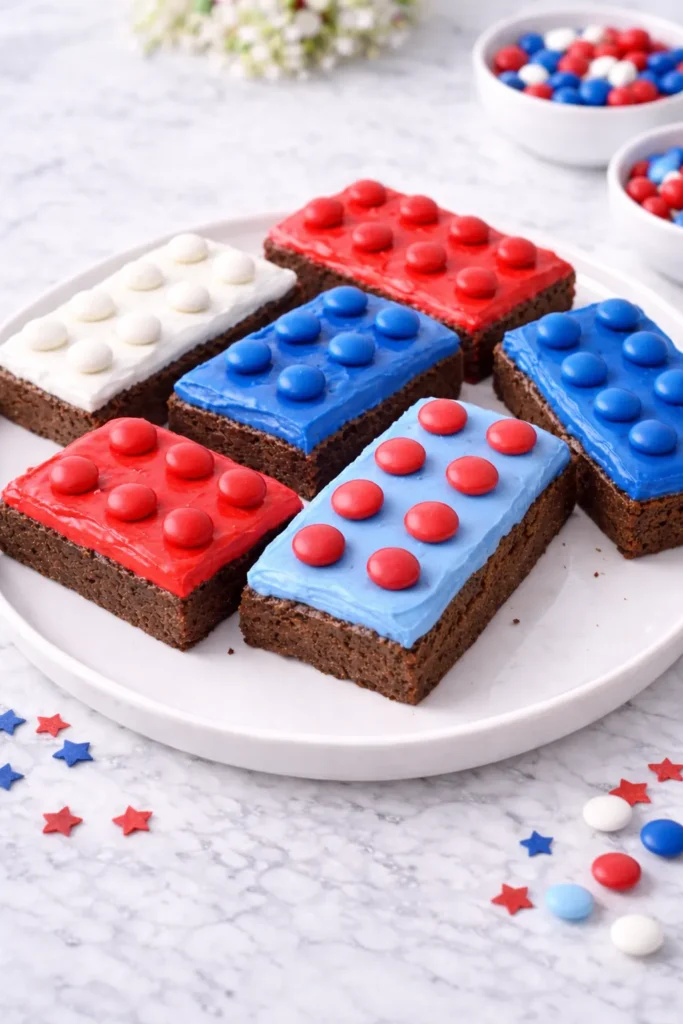
- Press 4 to 6 M&M’s on top in neat rows.
- Use matching candy colors when possible for the cleanest look.
- Chill the decorated brownies for 15 to 20 minutes to set the frosting.
That last chill is worth it. Otherwise, the frosting stays soft and the candy can slide if you stack or plate them too soon. Nothing dramatic, just enough movement to annoy you.
Here’s the part I’d skip before I’d skip anything else: trying to make every brownie identical. That way lies nonsense. Keep the rows straight-ish, keep the colors bright, and let the overall tray do the work. When they’re all together, the effect is much stronger than any single brownie on its own.
You can also make “double bricks” with four candies or “long bricks” with six. That variation looks especially cute on a platter. It breaks things up without asking more from you.
And yes, you can absolutely recruit kids to add the M&M’s. Just know what you’re signing up for. Helpful hands are wonderful. Helpful hands are also deeply committed to eating the blue ones.

The Smartest Tips For Better Lego Brownies Every Time
Cute desserts have a habit of making people skip the practical stuff. Then they wonder why the frosting slid, the brownies cracked, or the candy looked like it got placed during a mild earthquake. This is where a few tiny choices save the whole tray.
I’ve found that metal pans bake brownies more evenly than glass. Glass works, but it can push the edges too far before the center settles in. For a recipe like this, structure matters. You’re not scooping warm brownies into bowls with ice cream and calling it charm.
A few tips make a big difference:
- Let the brownies cool fully before frosting.
- Chill before cutting for cleaner edges.
- Wipe the knife between cuts.
- Use gel coloring for bright frosting without thinning it.
- Sort the M&M’s first, unless you enjoy scavenger hunts.
- Frost only the tops, not the sides.
- Store them in a single layer until the frosting sets.
Now for the sneaky one: don’t make the brownies too thick. Thick sounds luxurious, but for Lego brownies, too much height can throw off the toy-brick look. Medium thickness works better. You want sturdy rectangles, not chunky cake bars trying on a costume.
Another good trick is trimming just a sliver off each side before frosting. That exposes the clean brownie beneath and makes the final shape look sharper. It’s a small move with big visual payoff.
Also, resist overbaking because you’re afraid of fudgy centers. Fudgy is the goal. These brownies should be firm enough to cut, but still rich and soft when bitten. Dry brownies under buttercream are a hard sell, even when they’re adorable.
That’s the annoying truth. The cute factor gets attention. The texture gets remembered.

Lego Brownies Recipe Card And Step-By-Step Plan
Some people like a recipe to ramble. I do not. Once I’m actually baking, I want the whole thing laid out clearly, with no scavenger hunt through six paragraphs about cocoa powder and personal growth. So here it is, straight.
Brownie Batter Ingredients
- 1 cup unsalted butter
- 2 cups granulated sugar
- 1 cup packed light brown sugar
- 4 large eggs
- 1 tablespoon vanilla extract
- 1 cup unsweetened cocoa powder
- 1 teaspoon salt
- 1 teaspoon baking powder
- 1 cup all-purpose flour
- 1 cup semi-sweet chocolate chips
Frosting Ingredients
- 1 cup unsalted butter, softened
- 4 cups powdered sugar
- 2 to 3 tablespoons heavy cream or milk
- 1 teaspoon vanilla extract
- Gel food coloring
- Plain M&M’s
Instructions
- Preheat oven to 350°F.
- Line a 9×13-inch metal pan with parchment paper.
- Melt the butter, then whisk in both sugars.
- Add eggs one at a time.
- Stir in vanilla.
- Mix in cocoa powder, salt, and baking powder.
- Fold in flour, then chocolate chips.
- Spread batter in pan.
- Bake 28 to 34 minutes.
- Cool completely, then chill 45 minutes.
- Beat frosting ingredients until fluffy.
- Divide and color the frosting.
- Cut brownies into rectangles.
- Frost each piece.
- Add 4 to 6 M&M’s on top.
- Chill briefly to set.
Yield: About 12 to 16 brownies, depending on size.
Prep Time: 35 minutes
Bake Time: 28 to 34 minutes
Chill Time: About 1 hour
Total Time: Roughly 2 hours
That’s the full path. Nothing hidden. Nothing annoying. Just a brownie recipe with excellent party manners.

Questions People Always Ask About Lego Brownies
People usually have the same handful of questions, and they’re fair ones. Cute desserts can look like they need special tools or a suspicious amount of free time. These don’t. Still, a few details are worth clearing up before you start.
Can I use boxed brownie mix instead?
Yes, absolutely. Homemade tastes richer, but boxed mix works if time is tight. I’d pick a fudgy version, not a cakey one. The texture matters more than the shortcut.
Can I make Lego brownies ahead of time?
Yes. Bake the brownies one day ahead, then frost and decorate the next day. You can also finish them fully a day early and store them in a covered container once the frosting sets.
What candy works best on top?
Plain M&M’s are the easiest choice. They give that toy-brick look right away. Other round candies can work, but size matters. Too small looks fussy. Too large looks odd.
Do I have to match the candy color to the frosting?
No, but it looks cleaner if you do. Matching colors give the brownies that classic block style. Mixed colors make them more playful and a little less polished.
Can I freeze them?
You can freeze the unfrosted brownies very well. I’d wrap the slab tightly, then thaw and decorate later. Frosted ones can freeze, but the candy may lose some shine.
How do I get cleaner cuts?
Chill the brownies first and wipe your knife between cuts. That one habit changes everything. Warm brownies are delicious, but they are not interested in behaving.
Will kids like these?
Almost certainly. They’re brownies with bright frosting and candy on top. This is not a tough sell.
The real surprise is that adults like them too. Maybe even more than they expect.

Serve Lego Brownies Like You Knew They’d Steal The Show
Presentation matters more with these than with everyday brownies. Not because they’re delicate, but because half the fun is seeing the whole tray together. One brownie is cute. A platter of colorful Lego brownies looks like a tiny dessert parade.
I like serving them on a white tray, dark slate board, or simple cake stand so the colors pop. Busy plates compete with the frosting, and the frosting would like the spotlight. Frankly, it earned it.
A few serving ideas work especially well:
- Pair them with vanilla ice cream for birthdays.
- Add them to a dessert board with cookies and fruit.
- Pack them in treat boxes for party favors.
- Set them beside milk shooters for kids’ parties.
- Serve them with coffee for adults who “just want a bite.”
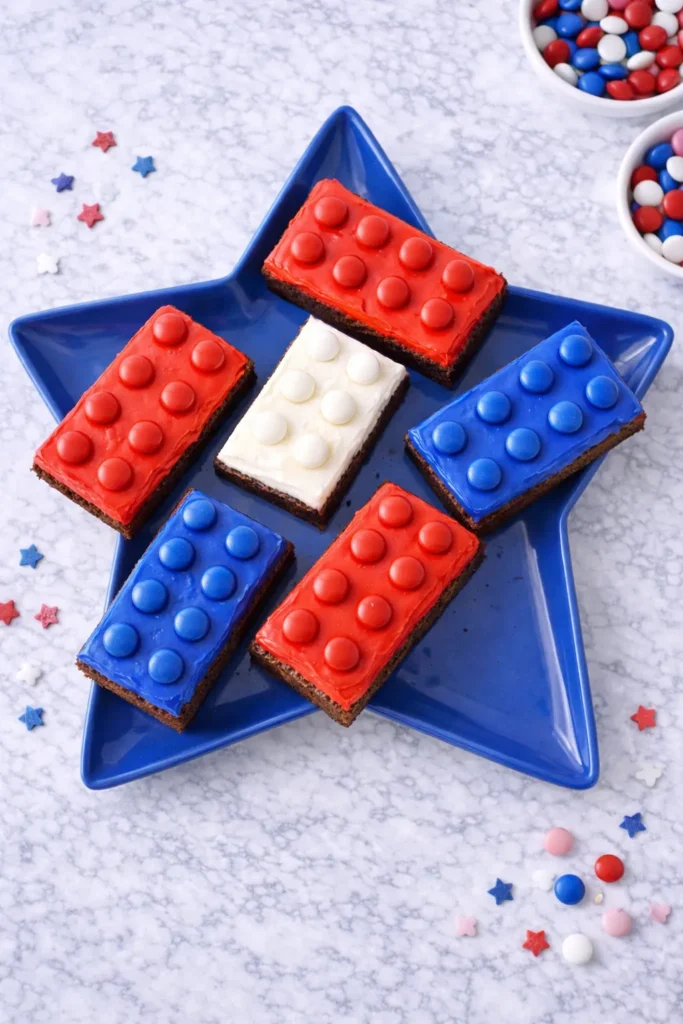
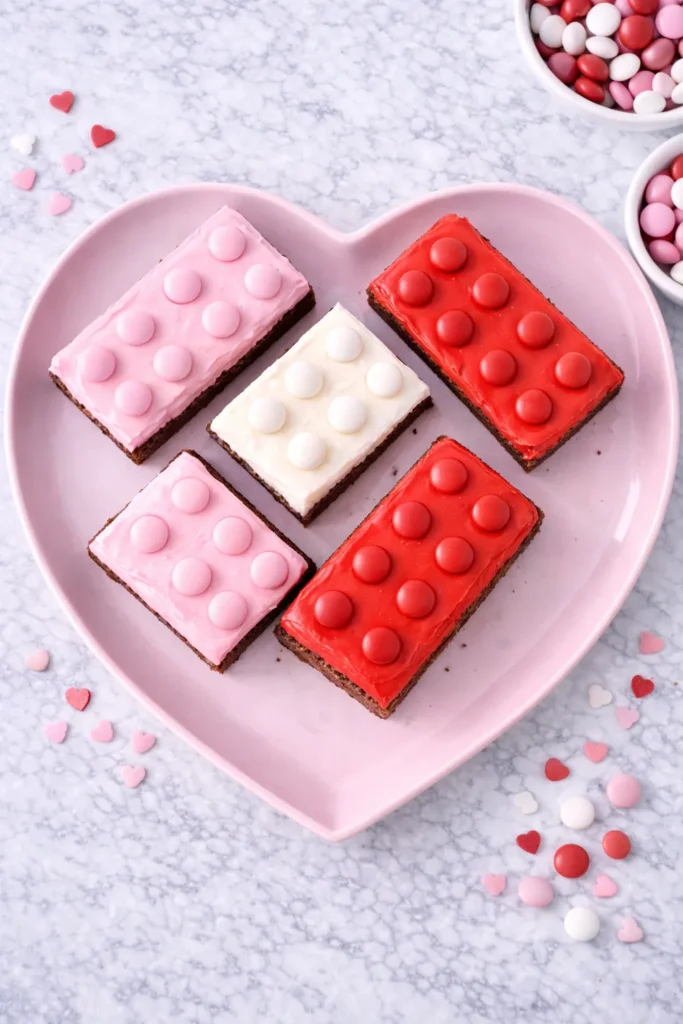
- Use color themes to match party decor.
That last one is especially fun. You can do team colors, birthday colors, or holiday shades without changing the brownie recipe itself. The base stays the same, and the frosting does the costume change. Efficient and dramatic. My favorite combination.
For storage, keep them in an airtight container at room temperature for up to two days, or refrigerate for up to five. If you refrigerate them, let them sit out a bit before serving. Cold brownies are firmer, which is great for neatness. Slightly softened brownies are better for eating.
Also, don’t stack them unless the frosting is fully set and you have parchment between layers. Stacked too soon, they turn into a colorful little mess. Still tasty. Less photogenic.
That’s the thing about this dessert. It’s cheerful enough for kids, but not childish. It’s playful, but still actually good. And that combo is rarer than it should be.
Lego Brownies
Ingredients
Method
- Preheat the oven to 350°F.
- Line a 9×13-inch metal pan with parchment paper.
- Melt the butter.
- Whisk the melted butter with the granulated sugar and brown sugar until glossy.
- Add the eggs one at a time, mixing well after each.
- Stir in 1 tablespoon vanilla extract.
- Mix in the cocoa powder, salt, and baking powder.
- Fold in the flour just until combined.
- Stir in the chocolate chips.
- Spread the batter evenly into the prepared pan.
- Bake for 28 to 34 minutes.
- Cool the brownies completely.
- Chill the brownies for 45 minutes.
- Beat 1 cup softened butter, powdered sugar, 2 to 3 tablespoons heavy cream or milk, and 1 teaspoon vanilla extract until fluffy.
- Divide the frosting and color it with gel food coloring.
- Lift the chilled brownies from the pan.
- Cut the brownies into rectangles.
- Frost each brownie rectangle.
- Add 4 to 6 M&M’s on top of each brownie in neat rows.
- Chill briefly to set.
Tried this recipe?
Let us know how it was!
These Brownies Know Exactly What They’re Doing
Some desserts are trying very hard to impress you. These aren’t. That’s part of why I like them so much. Lego brownies know they’re cute, know they’re easy to recognize, and know full well that bright frosting on chocolate is a winning personality trait.
I also think there’s something satisfying about making a dessert that doesn’t pretend to be elegant. Not every treat needs to whisper. Some should show up in full color, get compliments immediately, and make the whole table look more fun. That’s a real service.
As a mom, I’m always aware of which desserts get actual excitement and which ones get polite little nods. These are not polite little nod brownies. These are point-across-the-room brownies. They have energy. They have nerve. They’d probably do great on Pinterest, which tells you a lot.
What I appreciate most is that the payoff arrives in stages. First, they’re funny. Then they’re cute. Then someone takes a bite and realizes the brownie underneath is rich, soft, and worth making again. That delayed moment is my favorite part. The decoration gets them in the door, but the scratch-made brownie keeps them there.
So yes, they’re playful. Yes, they’re colorful. And yes, they’re a little ridiculous in the best way. Still, underneath all that frosting and candy, they’re just a very good excuse to make brownies and lean into the fun of it.
Sometimes that’s enough. Actually, for dessert, that’s more than enough.