I love recipes that work all year, not just one weekend. Marshmallow pops do exactly that, and that versatility matters. They start simple, yet they dress up fast. They also fit every season without feeling forced. I’ve found that treats on sticks instantly look intentional. They look planned, even when the steps stay easy. That balance keeps me coming back.
Marshmallow pops shine because they adapt. You can tint them spooky, cozy, sparkly, or sweet. They work for Halloween parties and Christmas trays alike. They slide easily into Valentine’s gifts or Easter baskets. And they even fit perfectly at baby showers. That range makes them reliable.
This recipe stays classic, but the styling changes with the calendar. I’m walking through the base recipe first. Then I’m sharing seasonal swaps that actually make sense. Nothing feels random or trendy for no reason. Each idea ties back to timing and mood.
I also appreciate how approachable this recipe stays. You do not need baking skills or fancy tools. You only need patience and a little counter space. That matters during busy seasons.
Living in Florida, I lean on no-bake treats often. Turning on the oven feels unnecessary most months. Marshmallow pops solve that problem while still looking festive.
This post keeps things practical, seasonal, and realistic. Every step stays clear. Every measurement stays exact. By the end, you will have a repeatable treat you can dress up endlessly.

Some of the links on this page are affiliate links, which means that if you click on them and buy something, I might get a small commission. But don’t worry; it never costs you more. You can peek at my full disclosure if you’re curious about the fine print.
Why Marshmallow Pops Work For Every Season
Marshmallow pops work because the base stays neutral. The flavor does not fight the toppings. That neutrality gives you freedom. You can lean spooky or romantic without confusion.
I’ve noticed that holidays crave color and texture. Marshmallow pops deliver both. The white base acts like a blank canvas. Meanwhile, coatings and sprinkles do the storytelling.
They also portion well. Each pop feels complete on its own. That matters for parties and gift boxes. People grab one without commitment.
Another reason they work is timing. You can make them ahead. They store well for several days. That flexibility reduces stress.
Seasonal reliability matters. These pops show up when time runs short. They also adapt to themes easily. For example:
- Halloween gets dark chocolate and candy eyes
- Thanksgiving leans caramel drizzle and fall sprinkles
- Christmas loves white chocolate and crushed peppermint
- Valentine’s Day wants pink coating and heart sprinkles
- Easter pairs pastels with sanding sugar
Each version starts the same way. That consistency builds confidence.
I’ve found marshmallow pops photograph well, too. They hold shape under lights. They also stand upright in jars. That makes them great for tables and photos.
Because they stay no-bake, they work year-round. You never worry about oven heat. You also skip cooling time.
Most importantly, marshmallow pops scale easily. Make twelve or make sixty. The process stays calm either way. That predictability makes them a seasonal staple.
Ingredients You Need
Before starting, gather everything. This recipe works best when you stay organized. Preparation saves time later.
Here is the full ingredient list with exact measurements:
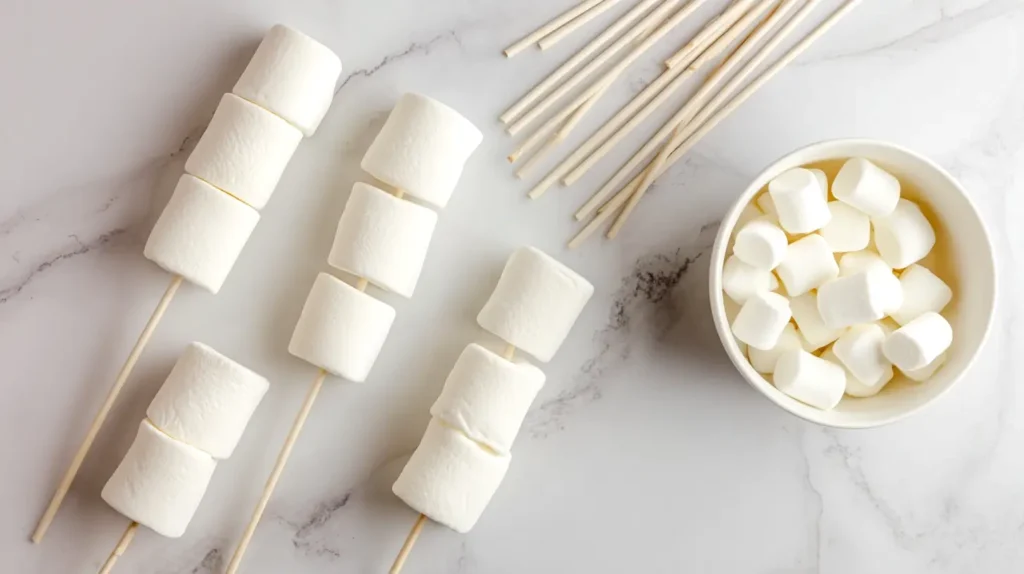
- 24 large marshmallows
- 24 paper lollipop sticks or wooden skewers
- 12 ounces candy melts or melting wafers
- 1 tablespoon coconut oil or vegetable shortening
- 1 cup assorted sprinkles, divided by theme
Optional seasonal add-ins include:
- Crushed candy canes for winter
- Mini chocolate chips for fall
- Sanding sugar for spring
- Heart sprinkles for Valentine’s Day
- Candy eyes for Halloween
I prefer candy melts because they stay smooth. However, chocolate chips work with oil added. That extra fat helps with thinning.
Choose sprinkles carefully. Some bleed color when wet. Test one if unsure.
I’ve found larger marshmallows hold best. Mini marshmallows slide off sticks. Jumbo ones overwhelm the coating. Large works perfectly.
Paper sticks feel lighter for kids. Wooden skewers feel sturdier for displays. Both work fine.
Measure everything before melting. That prevents rushing. It also avoids overheating chocolate.
This ingredient list stays flexible. Swap colors and textures, not structure. The base remains reliable.
Once everything sits ready, the process moves quickly. That speed helps during busy holiday prep.
Step-By-Step Instructions
Start by lining a baking sheet with parchment paper. This step prevents sticking later.
Insert one stick into each marshmallow center. Push gently until secure. Stop before piercing through.
Place prepared marshmallows on the parchment sheet. Set aside briefly.
Next, add candy melts and coconut oil to a microwave-safe bowl. Microwave in 30-second intervals. Stir after each round.
Continue heating until smooth. Do not rush this step. Overheating causes clumping.
Once melted, hold the marshmallow by the stick. Dip it fully into the coating. Rotate slowly for even coverage.
Lift the marshmallow and tap gently. Let excess drip back into the bowl. This keeps coatings neat.
Immediately add sprinkles while coating stays wet. Rotate again to cover evenly.
Place the finished pop back onto the parchment sheet. Repeat with remaining marshmallows.
Allow pops to set at room temperature for 20 minutes. Alternatively, refrigerate for 10 minutes.
Once set, check coating firmness. It should feel dry to the touch.
If adding drizzles, melt a contrasting color. Use a spoon to drizzle lightly. Let set again.
For faces or details, use a toothpick to position candies. Work while coating stays tacky.
Once fully set, marshmallow pops are ready to serve or store.
This method stays simple. However, patience during melting improves results. Smooth coating makes everything look polished.
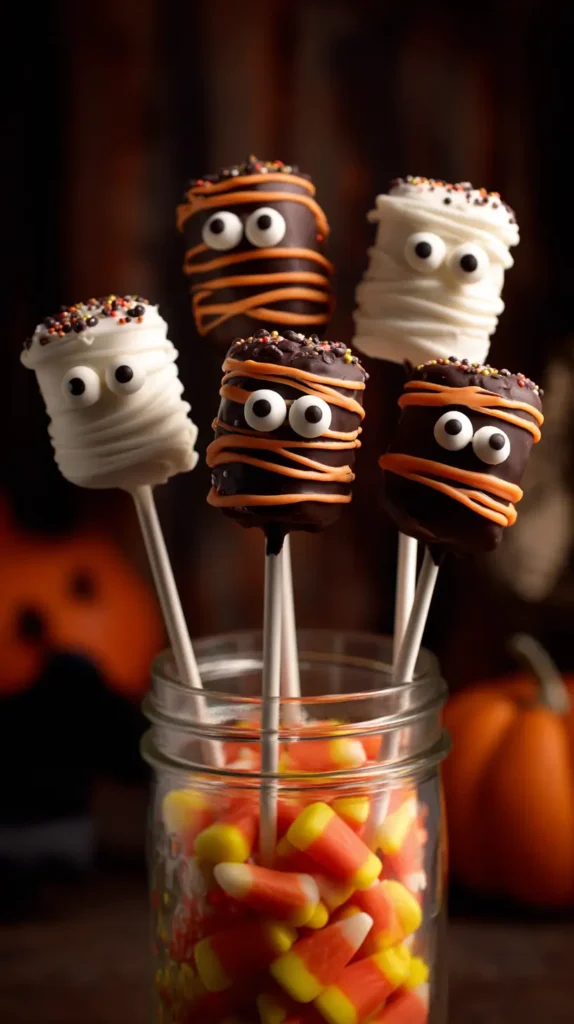
Halloween Marshmallow Pops With A Spooky Twist
Halloween marshmallow pops lean playful, not scary. That balance works for mixed ages.
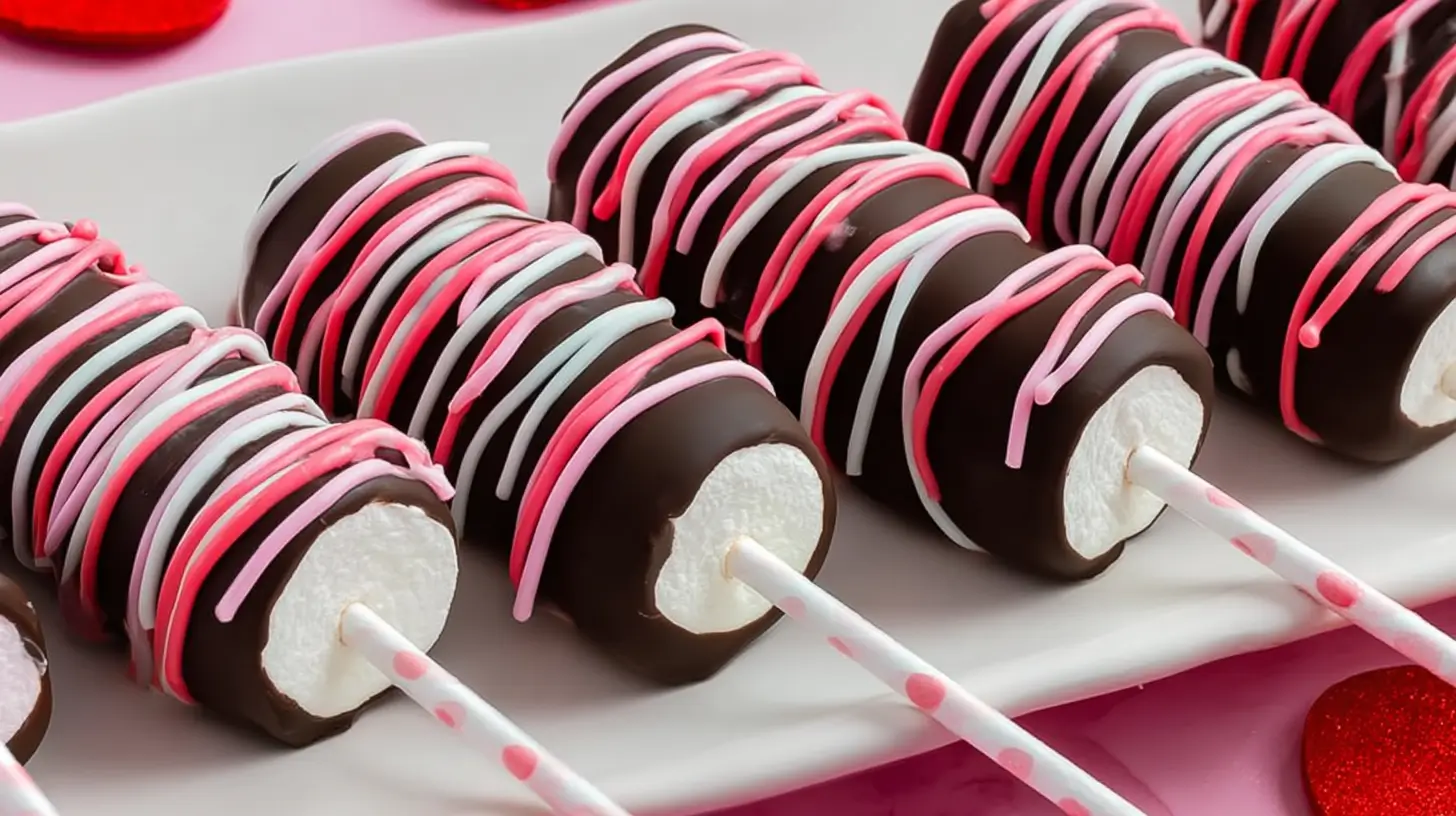
Start with dark chocolate or black candy melts. That sets the tone instantly.
After dipping, add candy eyes before setting. Place them unevenly for character.
You can also drizzle white coating for mummy-style wraps. Keep lines thin and irregular.
Another option uses orange melts with black sprinkles. That combo reads Halloween immediately.
I’ve found Halloween treats benefit from contrast. Dark bases with bright accents stand out.
Consider these Halloween sprinkle ideas:
- Black and orange nonpareils
- Purple sanding sugar
- Shaped bats or pumpkins
- Metallic black stars
Keep designs simple. Overloading details muddies the look.
Because Halloween parties move fast, serve pops upright. Place them in jars filled with candy corn.
Marshmallow pops also work for classroom treats. They avoid nut issues easily.
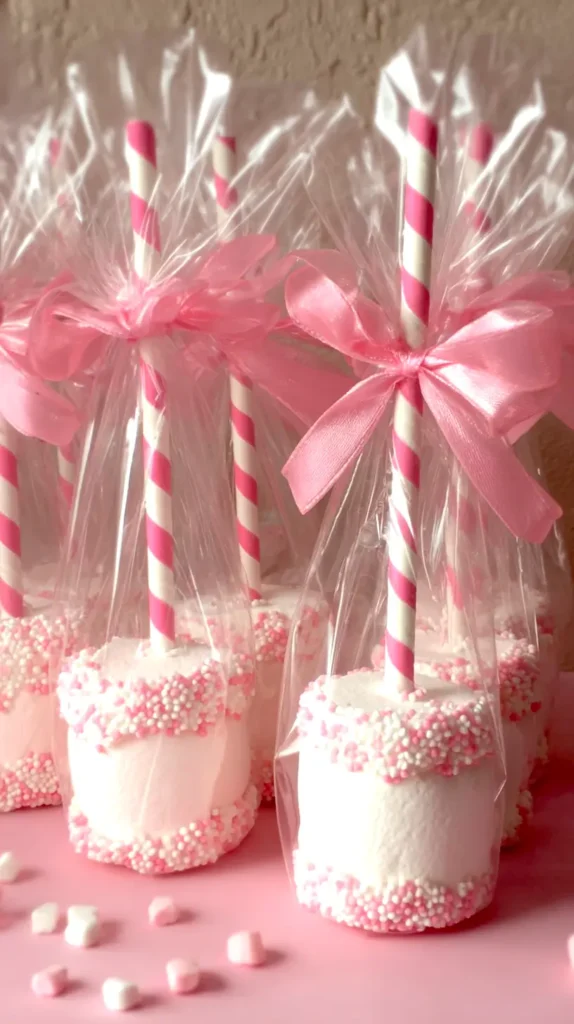
Wrap each pop in clear treat bags. Tie with orange ribbon. That keeps them clean.
Halloween marshmallow pops store well for several days. Keep them sealed and cool.
They also travel well. The coating protects the marshmallow inside.
This version proves how flexible marshmallow pops can be. A simple color swap changes everything.
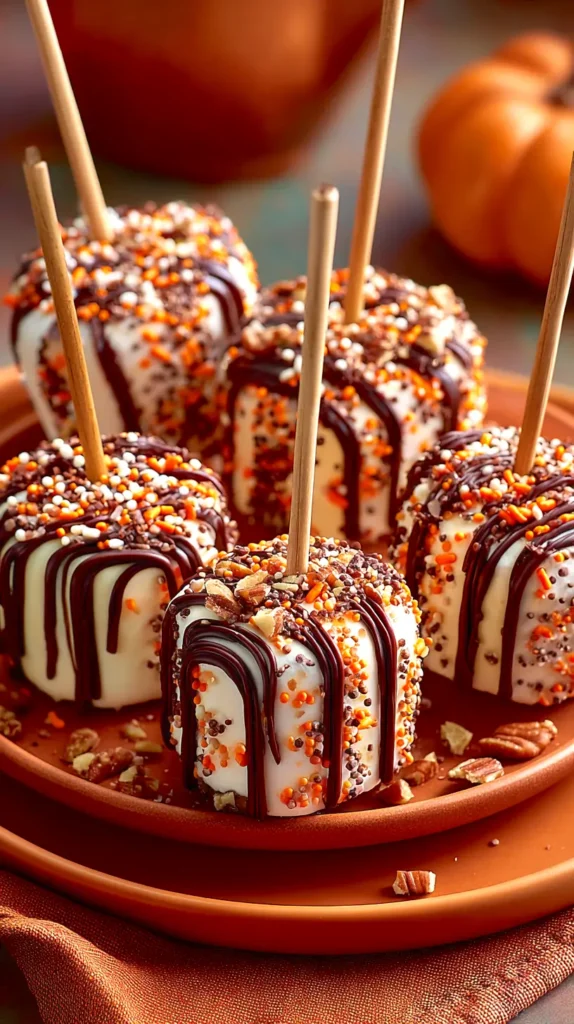
Cozy Thanksgiving Marshmallow Pops
Thanksgiving desserts lean warm and understated. Marshmallow pops can follow that vibe.
Use caramel-flavored candy melts or light chocolate. These tones match the season.
After dipping, sprinkle crushed pretzels lightly. That adds texture and balance.
Drizzle darker chocolate over the top. Keep lines loose and natural.
Thanksgiving marshmallow pops should look rustic. Perfection feels out of place here.
I prefer fall-colored sprinkles. Think amber, copper, and cream.
Optional topping ideas include:
- Chopped pecans
- Cinnamon sugar dust
- Mini chocolate chips
- Caramel drizzle
Avoid overly bright colors. Soft tones feel more appropriate.
These pops work well on dessert boards. Place them near pies and cookies.
Because Thanksgiving spreads get crowded, pops save space. They also add height visually.
Wrap leftovers individually. They stay fresh for three days.
I’ve found guests enjoy small treats after heavy meals. Marshmallow pops offer sweetness without heaviness.
They also photograph beautifully beside pumpkins and linens.
Thanksgiving marshmallow pops keep things festive yet restrained. That balance matters during cozy gatherings.
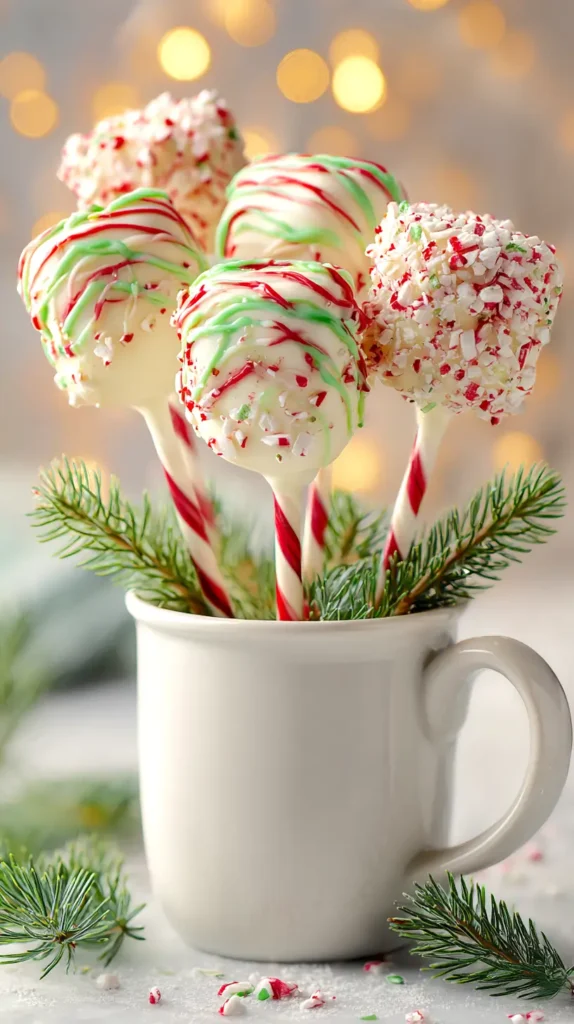
Christmas Marshmallow Pops That Feel Festive
Christmas marshmallow pops love contrast and sparkle. White chocolate makes an ideal base.
Dip marshmallows fully in white coating. Let excess drip cleanly.
Immediately roll edges in crushed peppermint. That scent sells the season.
Alternatively, drizzle red and green melts lightly. Keep lines thin.
For sparkle, use sanding sugar instead of sprinkles. It catches light beautifully.
Consider these Christmas topping ideas:
- Crushed candy canes
- Gold sugar crystals
- Red and green sprinkles
- Mini chocolate pearls
I’ve found symmetry works well here. Clean lines feel intentional.
Serve pops in mugs or jars. Add greenery for display.
Christmas marshmallow pops also make great gifts. Wrap in clear bags. Add gift tags.
Because they stay sturdy, they ship well locally.
Store them away from heat. Warm rooms soften coatings.
This version proves marshmallow pops can look elegant. They fit holiday tables without fuss.
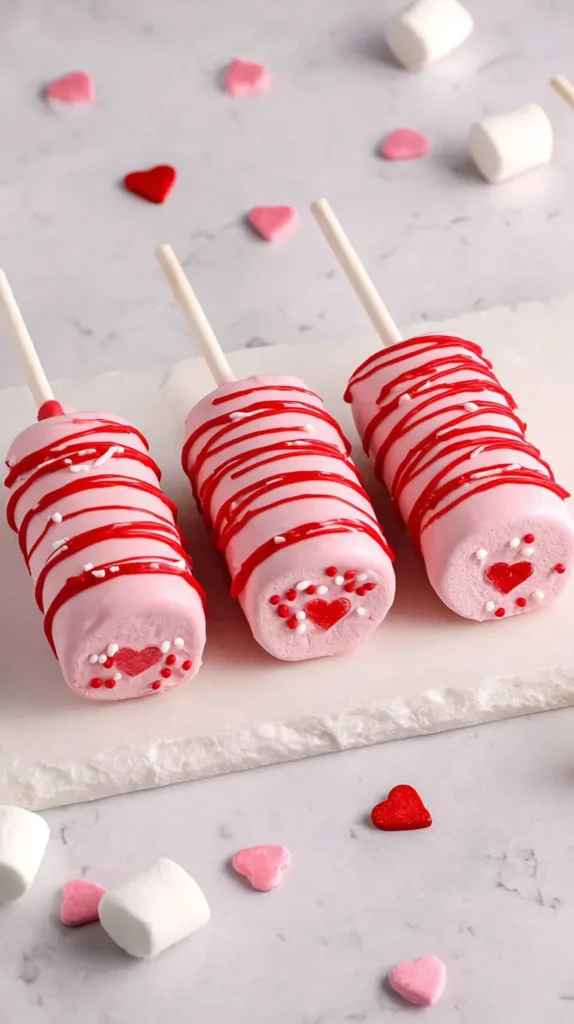
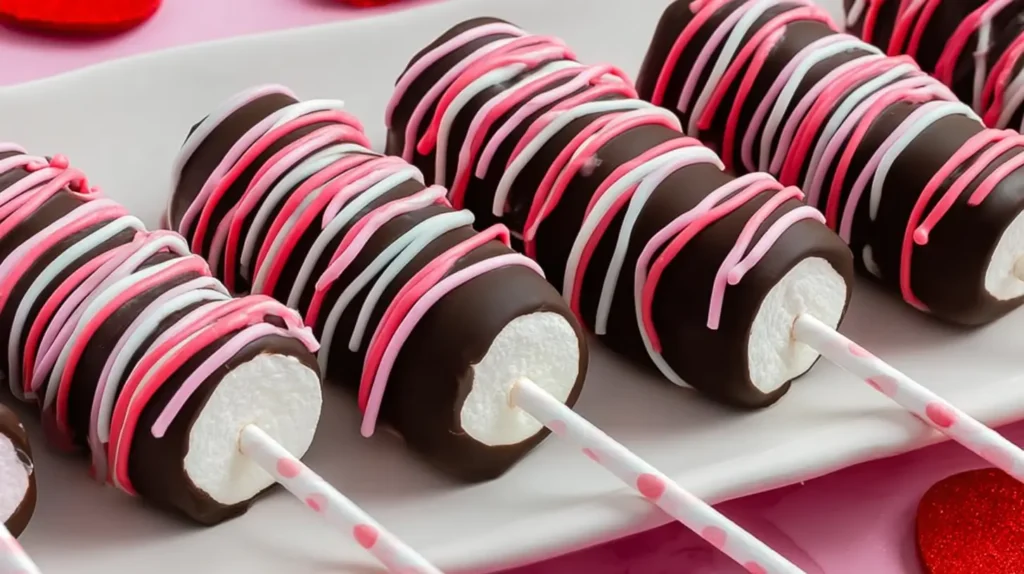
Valentine’s Day Marshmallow Pops With Sweet Style
Valentine’s marshmallow pops lean romantic but playful. Pink and red do the heavy lifting.
Use pink candy melts for the base. Add a touch of white drizzle.
Heart sprinkles work best sparingly. Too many overwhelm the look.
Another option uses white coating with pink accents. Both read Valentine’s clearly.
I’ve noticed Valentine’s treats benefit from shine. Glossy coatings look special.
Consider these topping combinations:
- Pink sanding sugar
- Red heart sprinkles
- Chocolate drizzle
- Pearlized sprinkles
Serve pops standing in a gift box. Add tissue paper underneath.
Valentine’s marshmallow pops work for friends, kids, or partners. They avoid awkward sizing.
Because they are single-serve, they feel thoughtful.
Wrap each pop individually. Add a short note if gifting.
These pops also photograph well for social sharing. Bright colors pop on camera.
Marshmallow pops shine during Valentine’s because they balance sweet and simple.
The Chill-And-Dip Marshmallow Pops Method
Most marshmallow pops get dipped at room temperature, and that works fine. However, I’ve found a small temperature shift changes everything. This method starts by chilling the marshmallows before dipping. Not frozen solid, just cold. Ten minutes in the fridge does the trick. That chill firms the surface slightly. As a result, the coating grabs faster and smoother.
Here’s why this matters. Warm marshmallows soften quickly when dipped. They can sag, spin, or slide on the stick. Chilled marshmallows hold their shape better. The coating sets faster, too. That means fewer drips and cleaner edges.
This method shines when making marshmallow pops in warm kitchens or busy seasons. It also helps when working with thinner candy melts. You get more control without changing ingredients.
The chill-and-dip approach also improves layering. After the first coat sets, you can dip again. That second layer looks thicker and more polished. It almost mimics bakery-style treats.
Another bonus shows up in decorating. Sprinkles stay where you place them. They don’t slide downward. Drizzles sit on top instead of sinking. Small details hold their shape.
This method works across seasons. Halloween designs stay crisp. Christmas pops look extra clean. Valentine’s styles gain that smooth candy-shop finish. Even pastel Easter versions benefit.
The best part is how practical this feels. You are not adding tools or steps. You are simply changing timing. That kind of tweak delivers real payoff.
Once you try this approach, regular dipping feels less satisfying. The difference shows immediately.
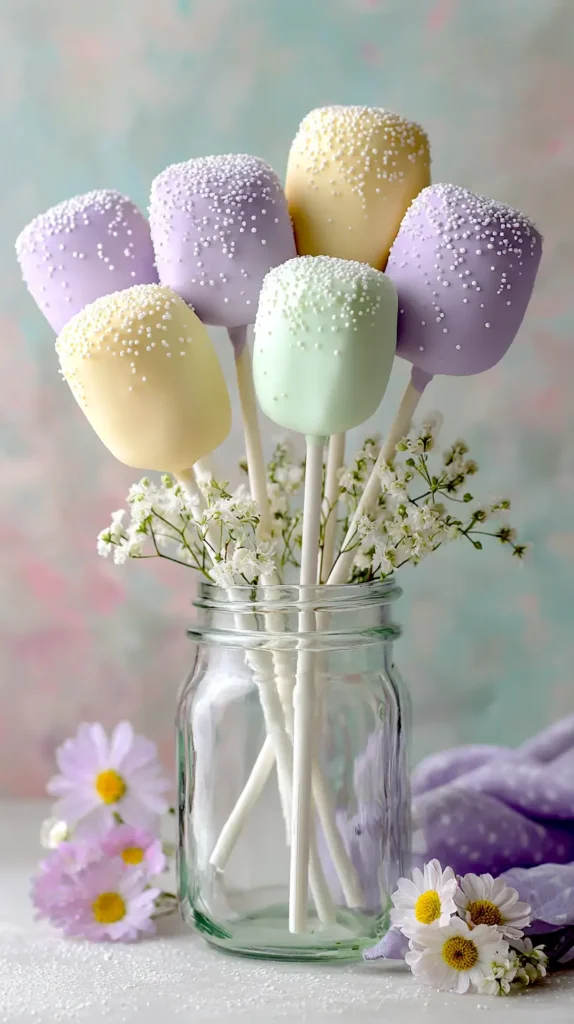
Easter Marshmallow Pops In Soft Pastels
Easter marshmallow pops lean light and airy. Pastels fit naturally here.
Use lavender, pale yellow, or mint coatings. Rotate colors for variety.
After dipping, sprinkle lightly with sanding sugar. That adds sparkle without weight.
You can also add small candy flowers. Place them gently before setting.
Avoid heavy drizzles for Easter. Clean looks feel fresher.
Consider these Easter topping ideas:
- Pastel nonpareils
- Edible pearls
- Shaped sugar flowers
- Light coconut flakes
Serve pops in jars filled with grass filler. That presentation feels seasonal.
Easter marshmallow pops work well in baskets. They fit without crumbling.
They also pair nicely with brunch spreads. Light sweetness complements savory dishes.
Because spring events feel casual, keep designs relaxed.
I’ve found pastel marshmallow pops appeal across ages. They feel cheerful without being childish.
This version highlights how marshmallow pops shift tone easily. Color alone changes the message.
Marshmallow Pops
Ingredients
Method
- Line a large baking sheet with parchment paper and set it aside.
- Insert one paper lollipop stick straight through the center of each marshmallow until secure, stopping before pushing through the top.
- Place the marshmallows on the prepared baking sheet and refrigerate for 10 minutes to firm slightly.
- Add the pink candy melts and coconut oil to a microwave-safe bowl.
- Microwave the candy melts for 30 seconds, then stir well.
- Continue microwaving in 15-second intervals, stirring after each, until the coating is completely smooth.
- Remove the marshmallows from the refrigerator.
- Hold one marshmallow by the stick and dip it fully into the pink candy coating, rotating slowly to coat all sides evenly.
- Lift the marshmallow from the coating and gently tap the stick against the bowl to remove excess candy.
- Place the coated marshmallow back onto the parchment-lined baking sheet.
- Repeat the dipping process with the remaining marshmallows.
- Allow the coated marshmallows to set at room temperature for 10 minutes.
- Add the red candy melts to a small microwave-safe bowl.
- Microwave the red candy melts in 15-second intervals, stirring until smooth.
- Use a spoon or piping bag to drizzle the red candy melt over each marshmallow pop.
- Immediately sprinkle heart-shaped sprinkles over the pops while the drizzle is still wet.
- Let the marshmallow pops set completely at room temperature for 20 minutes or until firm.
- Once set, the marshmallow pops are ready to serve or store.
Notes
Tried this recipe?
Let us know how it was!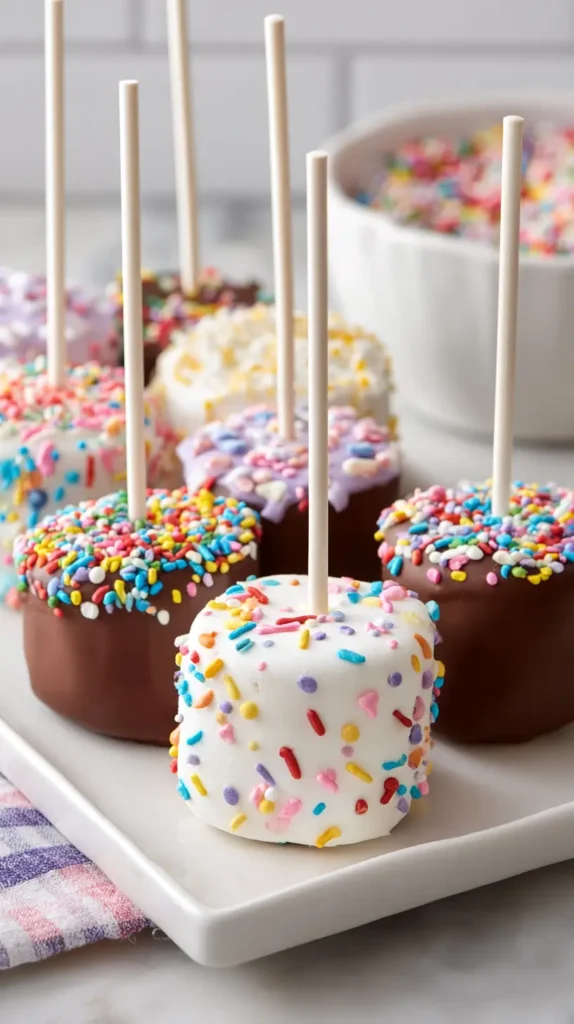
Last Few Thoughts
I appreciate recipes that grow with the calendar. Marshmallow pops do exactly that. They stay familiar while changing costumes. That flexibility keeps them relevant.
I’ve found repeating a base recipe builds confidence. Once you know the steps, creativity opens. You stop worrying about structure. You focus on styling.
Seasonal treats should simplify planning, not complicate it. Marshmallow pops reduce stress during busy months. They also look intentional without demanding time.
Living in Florida, I lean into no-bake treats often. Warm days call for smart shortcuts. These pops deliver charm without heat.
I also love how adaptable they are for sharing. They work for parties, gifts, and casual gatherings. They scale easily.
Because they store well, you can prep ahead. That matters during holidays.
Marshmallow pops also photograph beautifully. That makes them perfect for Pinterest inspiration boards. Visual treats drive seasonal excitement.
Most importantly, they invite creativity without pressure. You can keep them simple or go detailed. Both approaches work.
This recipe stays dependable. The seasons add personality. That combination keeps marshmallow pops on repeat.