Paint palette sugar cookies are the kind of treat that makes people stop scrolling and look twice. They’re cute, yes, but they also have that crafty little wink I always love. One glance and you already know what they are. That matters more than people admit.
I like desserts that look playful without turning into an all-day kitchen event. These do that beautifully. The shape is simple, the candy becomes instant paint, and the tiny pretzel brush sells the whole idea. Nothing here asks for royal icing skills or a bakery-level temper tantrum.
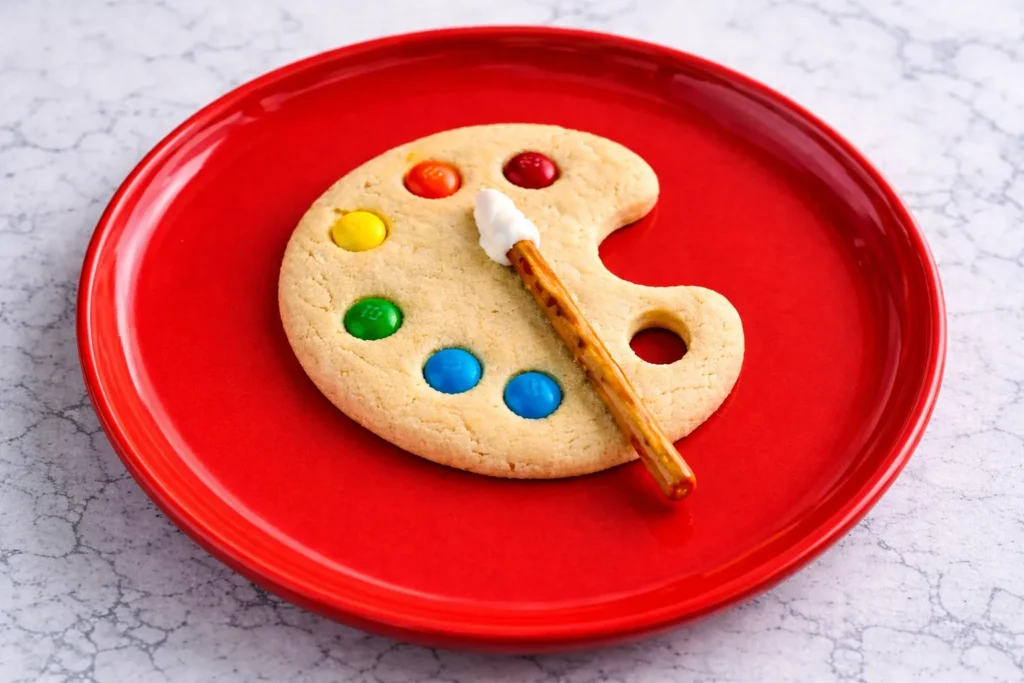
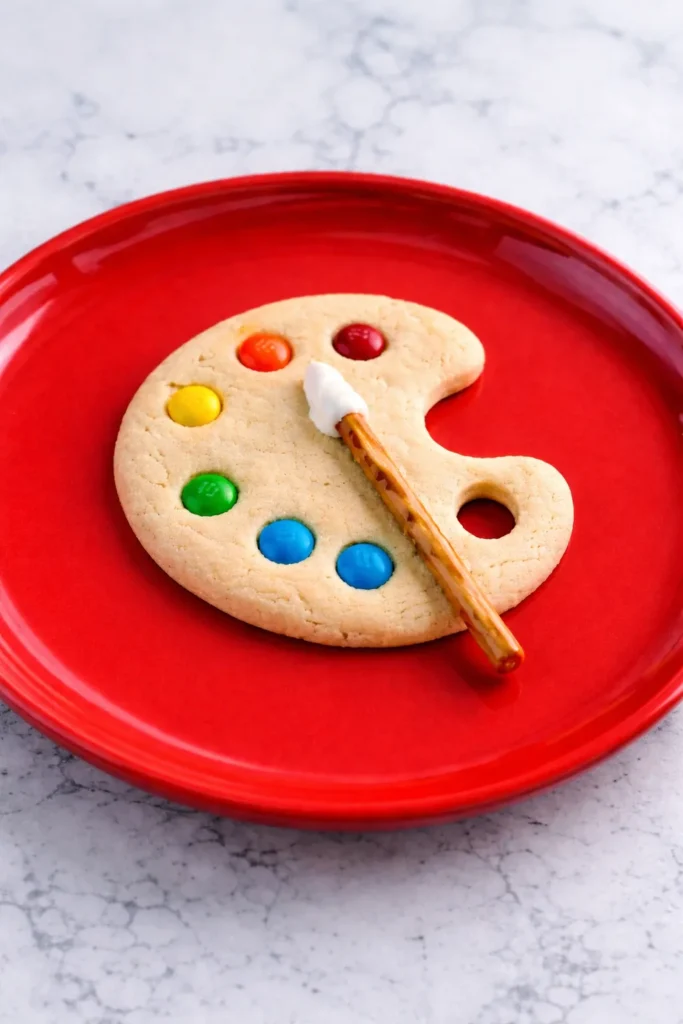
I’ve found that visual examples help a lot with these cookies. You want a soft sugar cookie shaped like a paint palette. Add a thumb notch or hole, a thin pretzel brush, and bright M&M’s. Suddenly, the whole thing makes sense.
That’s the charm. These cookies look thoughtful, but the pieces are basic. Sugar cookies, pretzel sticks, white icing, and candy. No mystery. No dramatic ingredient hunt. And no weird edible glitter emergency at 9:40 p.m!
As a mom in Orlando, I’m always drawn to treats that already look party-ready on the plate. These absolutely do. They’re cheerful, artsy, and just silly enough to be memorable. That last part counts, because cute party food can turn forgettable very fast.
The best part sneaks in later, though. Once you make one, the rest move quickly. Then people start noticing the tiny details, and that’s when these cookies really earn their moment.
A few links on this page are affiliate links, so if you click and buy, I might earn a small commission. It never costs you more, and it helps support the site. You can read my full disclosure if you’re into the fine print.
Why Paint Palette Sugar Cookies Get Attention Fast
Some cookies taste great but look plain. Others look adorable and taste like sweet cardboard. I want better behavior from a cookie, and thankfully, these deliver. Paint palette sugar cookies have a strong look, but they still taste buttery and soft.
The shape does most of the work. One little notch turns a round cookie into something instantly recognizable. Then the pretzel brush shows up and makes the whole thing click. It’s a tiny detail, but it carries a lot of charm.
I also like that these cookies don’t trap you in one event theme. They work for art parties, school treats, bake sales, showers, and birthdays. They even work for a casual dessert tray that just needs one playful option. That kind of flexibility is rare.
Here’s what surprised me, though. The inspiration photos work because they aren’t too perfect. The cookies look homemade in the best possible way. A slightly uneven edge actually helps. Perfect circles would almost make them less charming.
That’s good news for the rest of us. You do not need flawless outlines or ruler-level precision here. You need the general shape, the right candy placement, and a little confidence. The rest comes together very fast.
I’ve found that the tiny brush is what gets people. They notice the M&M’s first, then the pretzel, then the iced tip. That delayed little reveal is fun. It turns a cute cookie into a cookie people actually talk about.
And honestly, that’s a pretty great deal for something made from pantry basics. They also photograph beautifully, which never hurts when dessert is trying to earn extra attention.

What You Need Before You Even Preheat The Oven
Before I preheat anything, I like to get the whole cookie plan straight in my head. That keeps the process from turning chaotic later. Paint palette sugar cookies look detailed, but the shopping list stays refreshingly normal. That alone makes this recipe more appealing.
You only need three parts. First, the sugar cookie dough. Second, the tiny edible paintbrushes. Third, the candy paint dots. Once those parts click, the whole recipe stops looking fancy and starts looking very manageable.
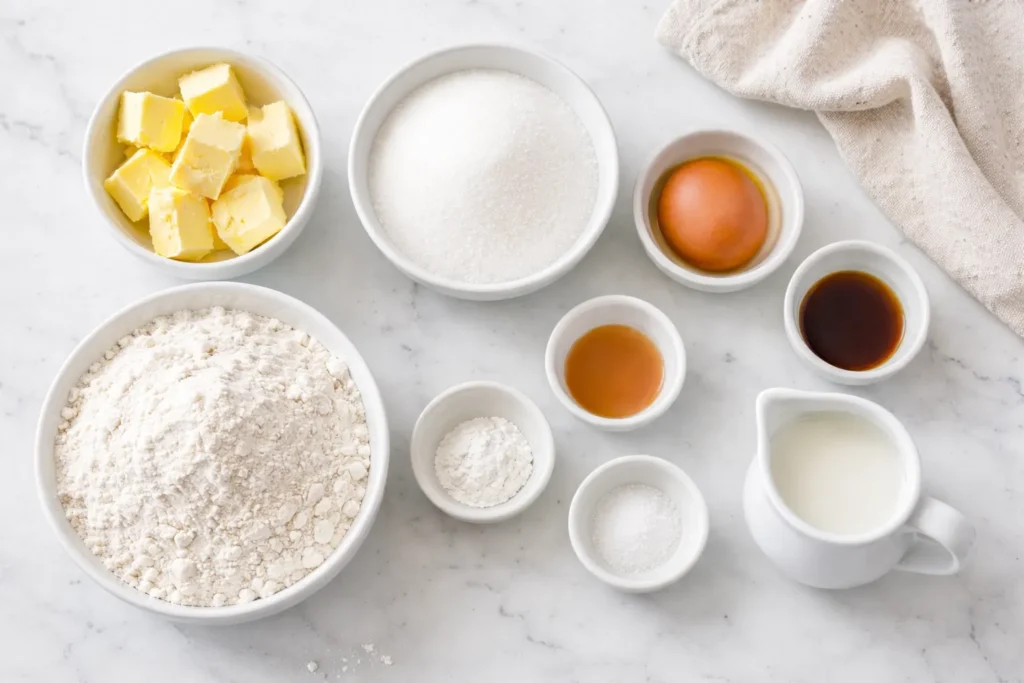
For the cookie dough, grab:
- 1 cup unsalted butter, softened
- 1 cup granulated sugar
- 1 large egg
- 1 1/2 teaspoons vanilla extract
- 1/4 teaspoon almond extract, optional
- 2 3/4 cups all-purpose flour
- 1/2 teaspoon baking powder
- 1/2 teaspoon fine salt
- 1 to 2 tablespoons milk, only if needed
For the decorations, grab:
- 18 thin pretzel sticks
- 1/2 cup white candy melts or thick white cookie icing
- 2 tablespoons black decorating gel or melted dark chocolate
- 3/4 cup plain or mini M&M’s
I tend to notice that plain M&M’s give the strongest paint-palette look. The colors read fast, and the size shows well. Minis still work, but the bigger candy has more presence. That matters once everything hits the tray.
Also, use thin pretzel sticks, not thick rods. Thick pretzels look clunky. Thin ones read like actual brushes. It’s a small switch, yet it changes everything. Parchment paper helps too, and a small round piping tip makes the thumb hole much easier. White candy melts set firmer than soft icing, so I reach for them first. That saves mess later.

Paint Palette Sugar Cookies Ingredient List
I’m picky about shaped sugar cookies because too many recipes act confident and then spread into nonsense. That’s rude behavior from dough. This version stays soft, keeps its edges, and still tastes like a real cookie. Paint palette sugar cookies need that balance or the whole look falls apart.
Here’s the full recipe for the cookies:
- 1 cup unsalted butter, softened
- 1 cup granulated sugar
- 1 large egg
- 1 1/2 teaspoons vanilla extract
- 1/4 teaspoon almond extract, optional
- 2 3/4 cups all-purpose flour
- 1/2 teaspoon baking powder
- 1/2 teaspoon fine salt
Here’s what you need for decorating:
- 1/2 cup white candy melts, melted
- 2 tablespoons black decorating gel or melted chocolate
- 18 thin pretzel sticks
- 3/4 cup M&M’s
This recipe makes about 18 medium cookies. You can make them smaller, but I don’t love that move. Smaller cookies lose the palette look fast. Bigger cookies give you room for the notch, the thumb hole, the brush, and the candy. That extra room helps a lot.
I’ve found that almond extract is optional but smart. It gives the dough that classic sugar-cookie bakery note. Not too much, though. A heavy hand makes the flavor taste oddly sharp, and nobody wants that surprise.
One more thing matters. Don’t keep adding flour just because the dough looks soft. Chilled dough firms up beautifully. Too much flour gives you a dry cookie, and dry cookies have terrible party manners.
So yes, the ingredient list is simple. Use room-temperature butter, though. That one detail helps the dough mix smoothly and bake more evenly. The payoff, however, looks much fancier.

How To Shape And Bake Them Without A Cookie Panic
This is the part where people start bracing for disaster, and I truly get it. A plain round cookie feels safe. A shaped cookie sounds like the exact moment things could get weird. Thankfully, paint palette sugar cookies are much more forgiving than they look.
Start by beating the butter and sugar until creamy. Add the egg, vanilla, and almond extract, if you want it. In another bowl, whisk the flour, baking powder, and salt. Then add the dry mixture to the butter mixture just until a dough forms. If it seems crumbly, add 1 tablespoon of milk. Add a second only if needed.
Now chill the dough for 45 to 60 minutes. I know chill time gets ignored a lot. Still, skipping it usually leads straight to regret. Cold dough keeps the palette shape cleaner, and cleaner shapes make decorating much easier later.
Once chilled, scoop about 2 tablespoons of dough for each cookie. Roll each portion into a ball, then flatten it into a thick round, about 3 inches wide. Press a curved notch into one side with your thumb or a spoon. Then cut a small thumb hole near the notch with a piping tip or tiny cutter.
You do not need matching cookies. In fact, a little unevenness helps. These should look playful, not machine-made. That homemade quirk is part of the appeal.
Bake at 350°F for 9 to 11 minutes. Pull them when the centers look set and the edges barely turn golden. Cool them on the pan for 5 minutes, then move them to a rack. At that point, they’re already halfway to adorable.


Decorating Paint Palette Sugar Cookies
Decorating sounds like the fussy part, but it really isn’t. Once the cookies cool, you’re mostly assembling a tiny edible craft. That’s a much better mood. Paint palette sugar cookies look detailed, yet the actual decorating moves are pretty simple.
Start with the little pretzel brushes:
- Break or cut the pretzel sticks so each one is about 2 1/2 inches long
- Dip one end into melted white candy melts
- Let the white tip set on parchment for about 10 minutes
- Add a tiny black band below the white tip with gel or melted chocolate
- Let the brush pieces set fully before using them
Then decorate each cookie:
- Add a small dab of melted white candy or thick icing where the brush will sit
- Press one pretzel brush onto the cookie at an angle
- Place 4 to 6 M&M’s around the upper half like paint blobs
- Leave open cookie space so the palette shape still shows
- Let the cookies sit until everything firms up
Here’s the little decorating opinion I stand by. Odd numbers of candy pieces usually look better. A loose curve also looks nicer than a perfect circle. Slightly crooked can still be extremely cute. Sometimes it’s even cuter.
I also like the brush placed off-center. Straight down the middle looks stiff to me. A soft angle gives the cookie more personality. Funny how such a tiny adjustment changes the whole vibe.
Once you finish the first one, the rest move faster. That’s when this recipe really starts feeling fun. I like lining up all the candy first, because the decorating rhythm gets much smoother.


Paint Palette Sugar Cookies FAQ For The Slightly Curious
This is where the little questions start sneaking in. Not huge problems. Just the kind of things that can make a cute recipe wobble if nobody says them out loud. Paint palette sugar cookies are easy, but a few quick answers make them much smoother.
- Can I make the dough ahead of time?
Yes. Wrap it tightly and chill it for up to 2 days. You can also freeze it for 2 months. - Can I use store-bought sugar cookie dough?
Yes, but chill it first. Store-bought dough often spreads more, so the shapes may look softer. - Do I need royal icing?
No. Melted white candy melts or thick cookie icing work beautifully here. - What can I use instead of M&M’s?
Try Sixlets, chocolate candies, or little dots of colored icing. - How do I store them?
Keep them in an airtight container at room temperature for 3 days. Separate layers with parchment. - Can I make the pretzel brushes ahead?
Absolutely. Make them a day early and keep them dry until decorating time.
I tend to notice that most people worry about the shape more than anything else. That makes sense. Still, these cookies are sturdier than they look. A slightly quirky outline often looks more charming anyway.
That’s the nice surprise here. You do not need bakery precision for these to work. You just need the general palette shape, the angled brush, and a few bright color dots. The rest reads itself almost immediately. If you need to freeze them, freeze the plain baked cookies first, then decorate after thawing. That keeps the candy colors brighter and the brush pieces more secure.

The Best Ways To Serve Them Without Losing The Cute Factor
Once the cookies are done, the next question arrives fast. How do you serve them without knocking off the brushes or making the tray look messy? Fair concern. These cookies deserve better than getting tossed onto a random plate beside tired napkins and melting ice.
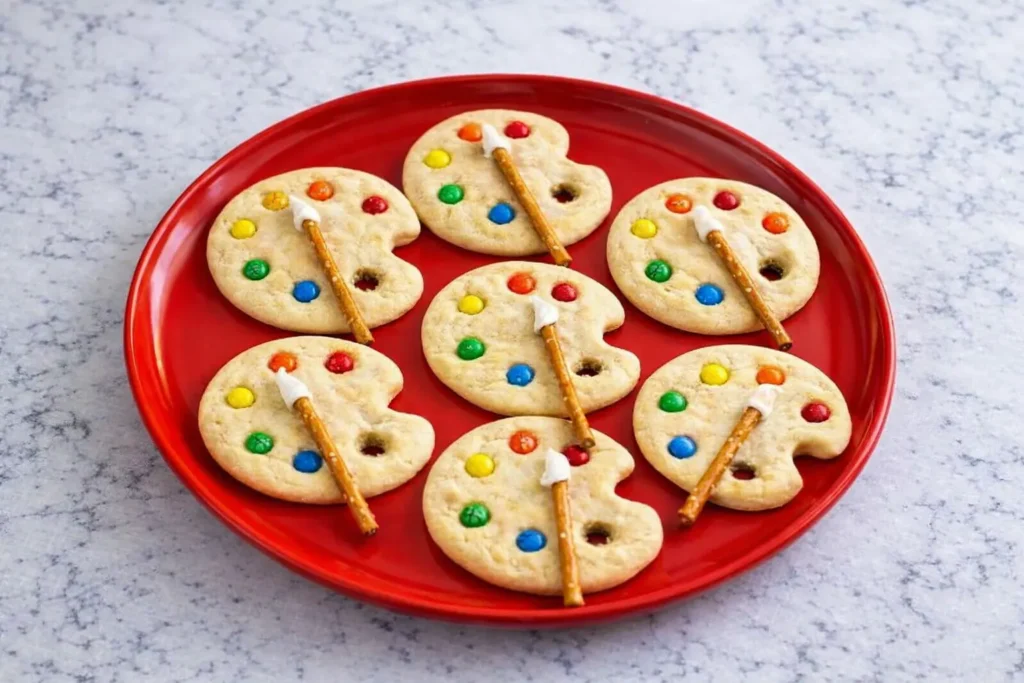
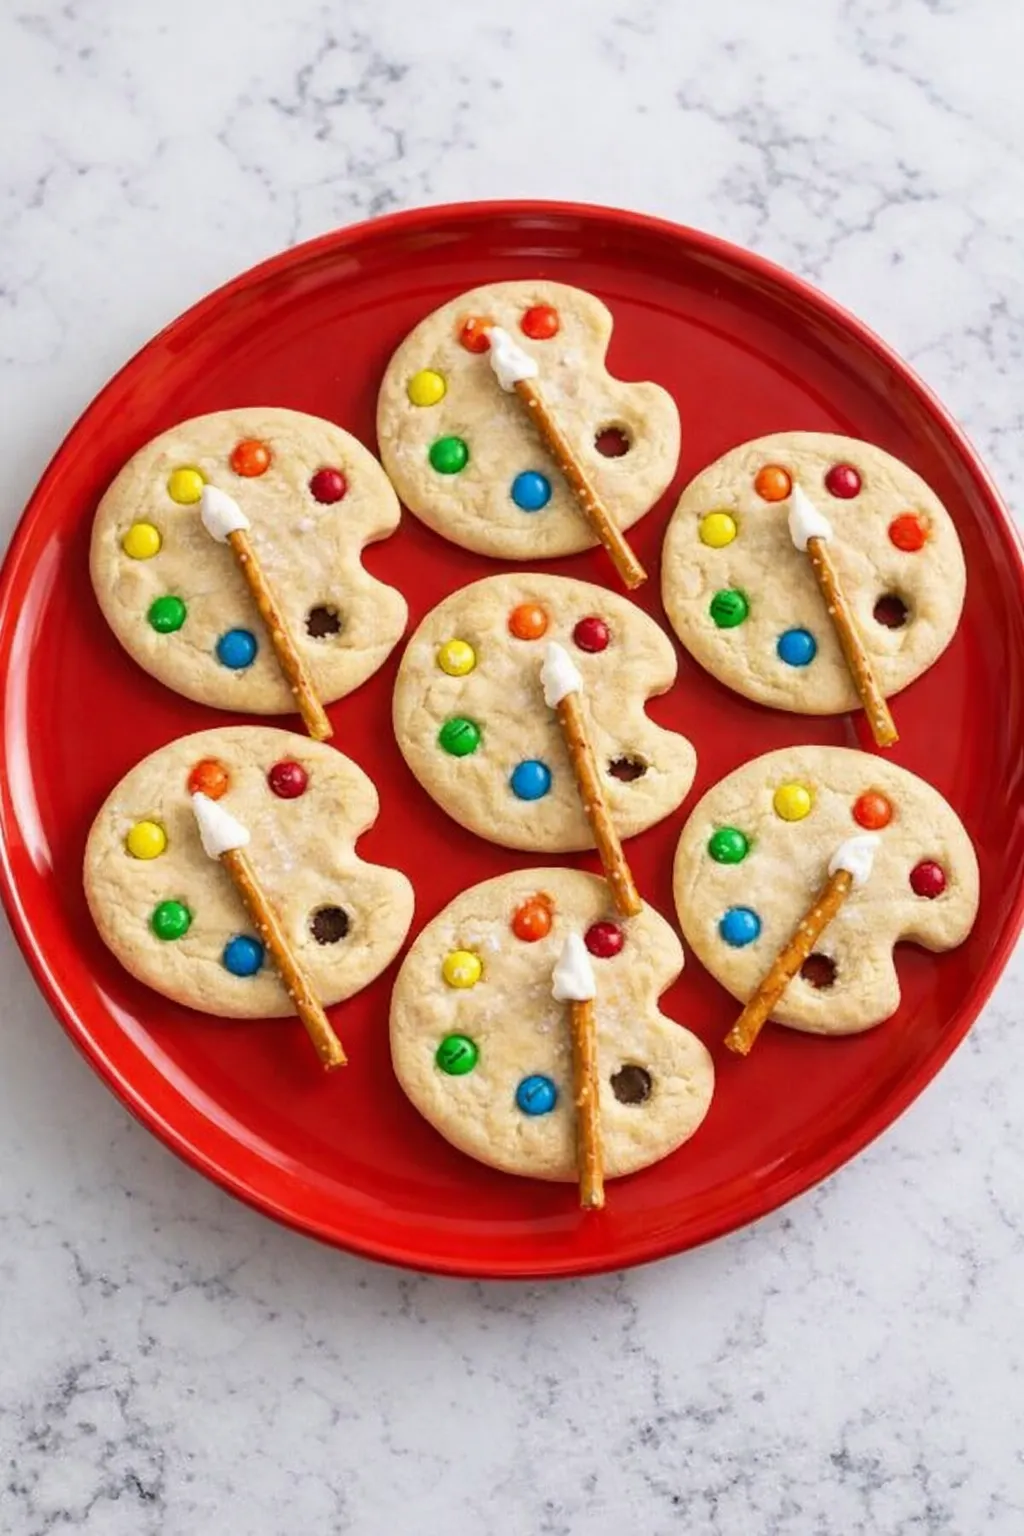
For a party table, I like a white platter or simple tray. Bright candy colors pop better against a clean background. That matters, because the cookie shape reads faster when nothing around it competes. Cute desserts should not need a long explanation.
If you’re making paint palette sugar cookies for a birthday, keep the rest of the setup simple. Bright napkins, a cake stand, and maybe a few extra candies nearby are enough. More themed clutter can actually make the cookies disappear. That’s the opposite of what you want.
These also work well in clear treat bags with ribbon. Just let the candy set fully first. Once firm, the cookies travel better than you’d think. That makes them great for school events, teacher gifts, party favors, and bake sale tables.
I’ve found that arrangement matters more than people expect. Angle the brushes a little differently on the serving tray. Stack nothing. Give each cookie a bit of breathing room. That tiny bit of spacing makes the tray look thoughtful instead of rushed.
They also pair nicely with simple desserts. Vanilla cupcakes, pastel popcorn, or rice cereal treats all play well here. Still, let’s be honest. These are the cookies people will photograph first.
And yes, that is part of the fun. They also look adorable beside little cups of milk or iced coffee at a casual party setup.
When You Want Them Extra Cute, Not Extra Complicated
Some themed desserts start cute, then become wildly demanding halfway through. Suddenly you need special tools, ten piping bags, and a fresh personality. I’m not interested in that kind of kitchen plot twist. Paint palette sugar cookies stay playful without becoming exhausting.
If you want them extra cute, focus on contrast. Use bright candy against a pale cookie. Keep the brush tip white and the ferrule dark. Leave some open cookie space. More decoration is not always better. Sometimes more decoration just turns into visual noise.
I also think restraint makes the whole tray look nicer. Four or five paint dots usually beat seven. One brush beats extra drizzle. A smooth cookie surface beats heavy icing. There’s a point where cute turns cluttered, and these can hit it fast if you let them.
Here’s another smart move. Bake the cookies one day, then decorate them the next. That split makes the recipe seem easier because it actually is easier. Fully cooled cookies are calmer to work with. So are people who didn’t cram every step into one frantic hour.
If a cookie cracks a bit near the notch, don’t panic. Place the brush across that area and keep going. Tiny flaws disappear once the decorations land. That’s not cheating. That’s strategy, and I support it completely.
I’ve found that confidence helps more than perfection here. Shape them, bake them, decorate them, and trust the final look. It usually comes together beautifully. Then everyone assumes you worked much harder than you actually did.
That’s my favorite kind of recipe. Seasonal M&M’s work nicely too, but I still think rainbow colors give the strongest artist-palette effect.
Paint Palette Sugar Cookies
Ingredients
Method
- Beat the butter and sugar together until smooth and creamy.
- Add the egg, vanilla extract, and almond extract, then mix until combined.
- In a separate bowl, whisk together the flour, baking powder, and salt.
- Gradually add the dry ingredients to the wet mixture and mix until a dough forms.
- Add 1 tablespoon of milk if the dough is crumbly, and add a second tablespoon only if needed.
- Chill the dough for 45 to 60 minutes.
- Preheat the oven to 350°F.
- Scoop about 2 tablespoons of dough and roll into a ball.
- Flatten each dough ball into a thick round about 3 inches wide.
- Press a curved notch into one side of each cookie.
- Cut a small thumb hole near the notch using a piping tip or small cutter.
- Place cookies on a lined baking sheet.
- Bake for 9 to 11 minutes until centers are set and edges are lightly golden.
- Let cookies cool on the pan for 5 minutes, then transfer to a rack to cool completely.
- Break or cut pretzel sticks to about 2 1/2 inches long.
- Dip one end of each pretzel stick into melted white candy melts.
- Let the white tip set on parchment for about 10 minutes.
- Add a small black band below the white tip using decorating gel or melted chocolate.
- Let the pretzel brushes set fully.
- Add a small dab of melted white candy or icing to each cookie.
- Place one pretzel brush onto each cookie at an angle.
- Arrange 4 to 6 M&M’s on each cookie to resemble paint.
- Leave some open cookie space to keep the palette shape visible.
- Allow decorations to set before serving.
Tried this recipe?
Let us know how it was!The Cookie That Quietly Steals The Whole Table
I love a dessert that knows exactly what it’s doing. Paint palette sugar cookies are not trying to be elegant tea cookies or serious bakery showpieces. They’re cheerful, artsy, and a little cheeky. Honestly, that’s a great lane for a cookie.
What wins me over most is the balance. The recipe feels playful, but it doesn’t waste your time. The decorations look special, but they don’t demand expert skills. Even the tiny pretzel brush lands in that sweet spot between silly and smart. It’s just a very good idea.
As a mom in Orlando, I’m always watching for desserts that can handle a party table and still look fun in photos. Pinterest clearly loves a treat with personality, and these have plenty. They also have that rare little spark that makes people smile before they even take a bite.
That matters. Cute desserts come and go, but the memorable ones usually have a clear hook. This one has several. The shape is clever. The candy colors pop. The brush detail gets people every time.
I’ve found that the best baking ideas usually carry a bit of mischief. Not chaos. Just enough charm to make someone stop and grin. These do exactly that.
And really, if a cookie can be cute, tasty, memorable, and surprisingly manageable, it has earned its applause. That’s a strong little flex for butter, sugar, pretzels, and candy. I respect a dessert that knows how to charm a room.