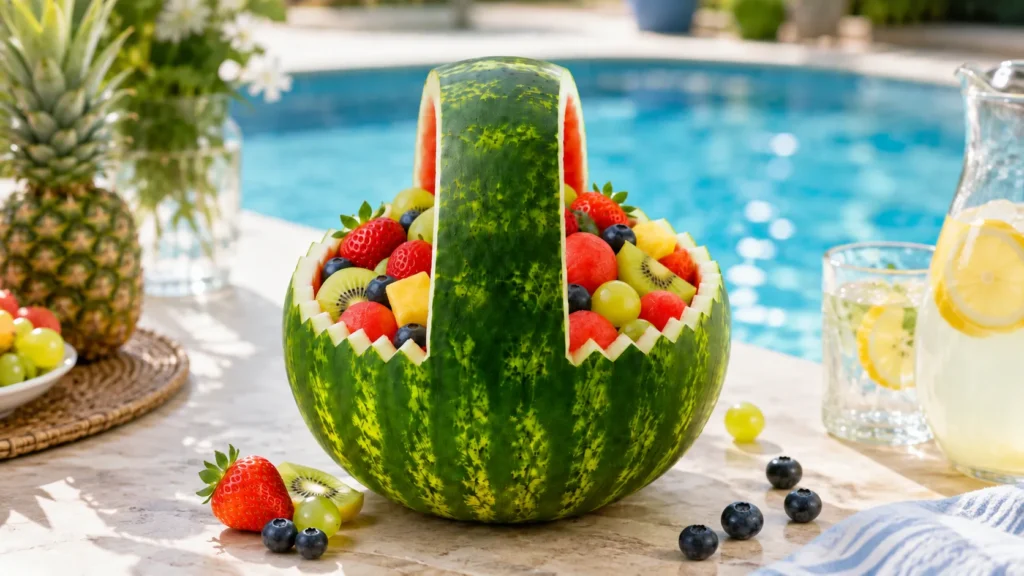
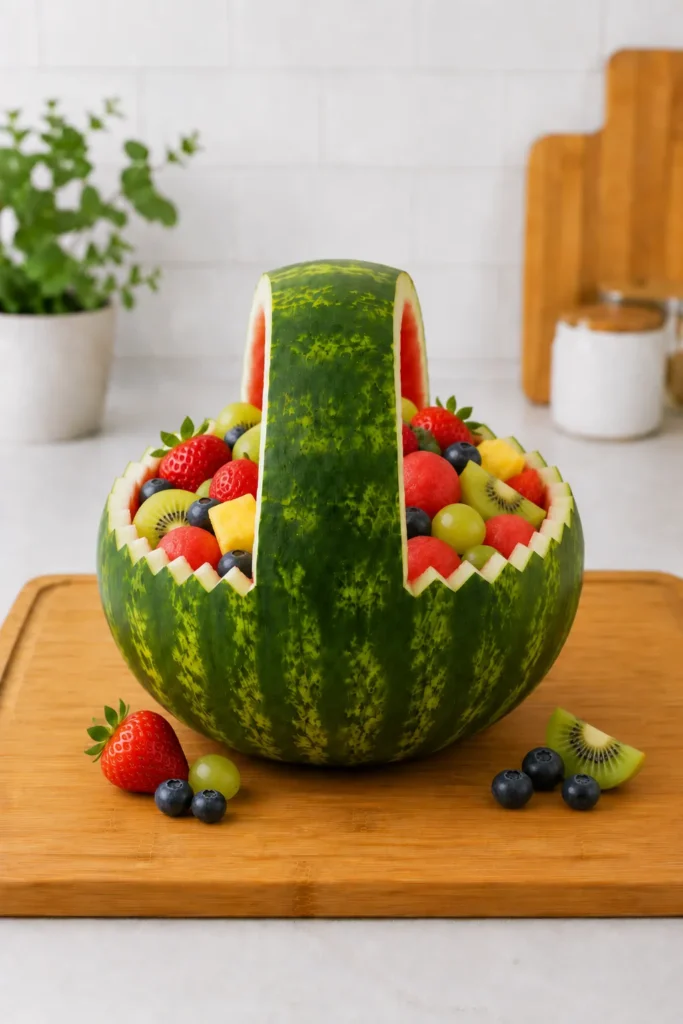
There’s a moment at every summer gathering when the table looks fine, but not quite memorable. That’s where a watermelon fruit basket quietly steals the whole scene. It looks fancy, tastes fresh, and makes people assume you planned everything days ago.
Meanwhile, you may be standing there with a melon, a knife, and very questionable confidence. I get it. Carving fruit can sound like a craft project with snacks attached. However, this version stays simple, forgiving, and far less dramatic than it appears.
As a mom in Orlando, I know summer food must handle heat, hungry people, and sudden changes. A chilled fruit basket handles all three without needing frosting, burners, or tiny decorative tweezers. That alone earns it a spot on my table.
Still, the best part isn’t the pretty handle or the bright fruit. It’s the moment you realize the whole thing started with one basic watermelon. No specialty pan. Nothing mysterious. Certainly no culinary degree hiding in the pantry.
I’ll walk through the carving, the fruit mixture, and every measurement. We’ll also cover timing, storage, serving, and the small mistakes that cause soggy fruit. Because yes, there’s one step that matters more than the fancy cutting.
The finished basket works for birthdays, baby showers, pool parties, picnics, and Fourth of July tables. It also photographs beautifully, which matters when Pinterest enters the chat. That choice sounds simple, but it controls everything that follows. Yet before we get to the pretty part, we need to choose the right melon.
A few links on this page are affiliate links, so if you click and buy, I might earn a small commission. It never costs you more, and it helps support the site. You can read my full disclosure if you’re into the fine print.
Choosing the Right Watermelon Fruit Basket Base
The best basket starts before any knife touches the rind. I’ve found that a medium seedless watermelon gives the easiest shape. It should weigh about 10 to 12 pounds and sit firmly on one side.
Look for a creamy yellow field spot underneath. That mark shows where the melon rested while ripening. A white spot often means the fruit needed more time, despite looking perfectly respectable.
Next, tap the rind with your knuckles. A deep, hollow sound usually signals a juicy center. By contrast, a flat sound may mean the flesh has softened too much. This isn’t a talent show, though. You’re listening for a clear difference, not auditioning for a produce orchestra.
Shape matters more than people expect. A long melon creates a wide serving bowl, while a round one makes a taller basket. Either works, but an oval melon offers more room for fruit.
Now check the skin for cuts, bruises, or soft patches. Small scratches won’t hurt anything. However, deep damage can weaken the shell once you carve it.
A heavy melon usually holds more water and firmer flesh. Compare two similar sizes, then choose the heavier one. That simple trick saves more disappointment than fancy produce advice.
Wash the entire watermelon under cool water before cutting. Dry it well, since a slippery rind and sharp knife make a terrible team. I also like to place a damp towel under the cutting board.
Here’s the surprising part: the prettiest watermelon fruit basket doesn’t require the most perfect melon. It needs a stable base, firm flesh, and enough space for the handle. Once those three things line up, the fun part gets much easier overall.

Tools and Ingredients You’ll Need
You don’t need a drawer full of carving tools. In fact, too many gadgets can make this project harder. A few sharp basics give you better control and cleaner cuts.
Start with a large cutting board and a chef’s knife. Add a small paring knife for the handle details. A melon baller creates neat pieces, but a sturdy spoon works too. Gather these items before cutting:
- 1 seedless watermelon, about 10 to 12 pounds
- 1 large cutting board
- 1 sharp chef’s knife
- 1 small paring knife
- 1 large metal spoon
- 1 melon baller, optional
- 1 washable marker
- 1 ruler or flexible measuring tape
- 1 large mixing bowl
- 1 colander
- Paper towels
- 1 damp kitchen towel for stability
- 1 large serving tray
- Plastic wrap
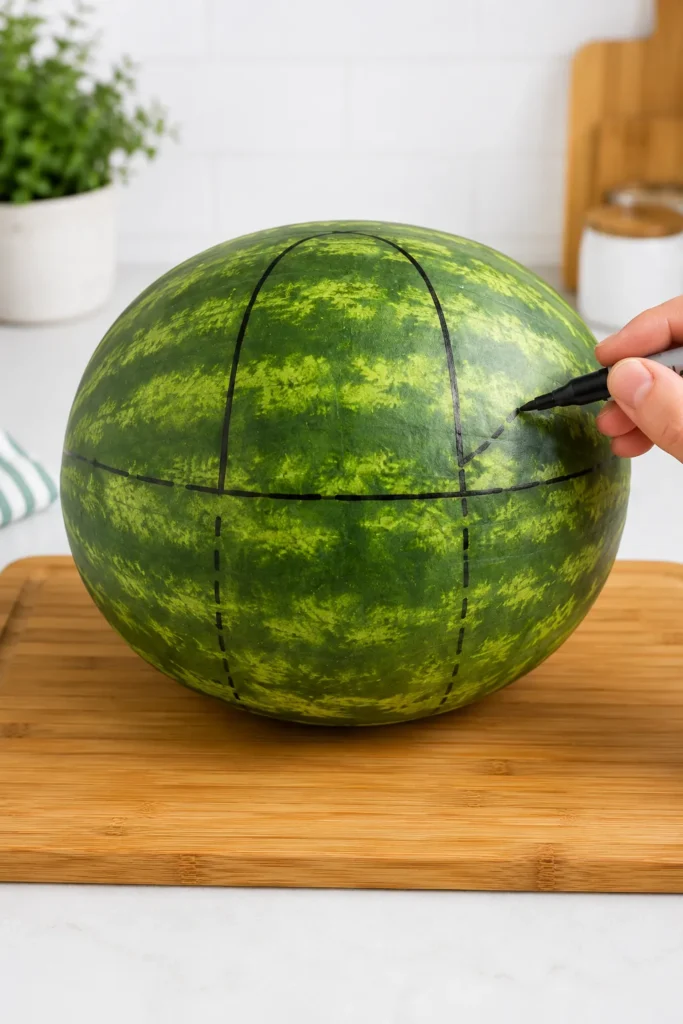
The washable marker deserves special attention. It lets you sketch the handle before cutting. That tiny guide keeps both sides even and prevents the “why is this leaning?” moment.
Choose a board larger than the watermelon. You need room for the removed rind, loose juice, and your hands. Crowded carving gets awkward quickly, especially once the melon starts sliding.
Keep a large bowl beside the board. Drop usable watermelon pieces into it as you work. Place scraps in another bowl, so you won’t sort through wet rind later.
The damp towel goes beneath the cutting board, not beneath the watermelon. It stops the board from shifting while you cut. That small safety step matters more than any decorative edge.
Finally, chill the watermelon before starting. Cold flesh cuts more cleanly and releases less juice. Your watermelon fruit basket will also hold its shape better during the carving stage.
One opinionated note: skip tiny novelty knives. They look clever, but sharp kitchen tools give you much better control.

How to Carve a Watermelon Fruit Basket
Carving looks intimidating until you break it into small cuts. The handle creates the illusion of difficulty. However, the basic shape uses straight lines and one careful scoop.
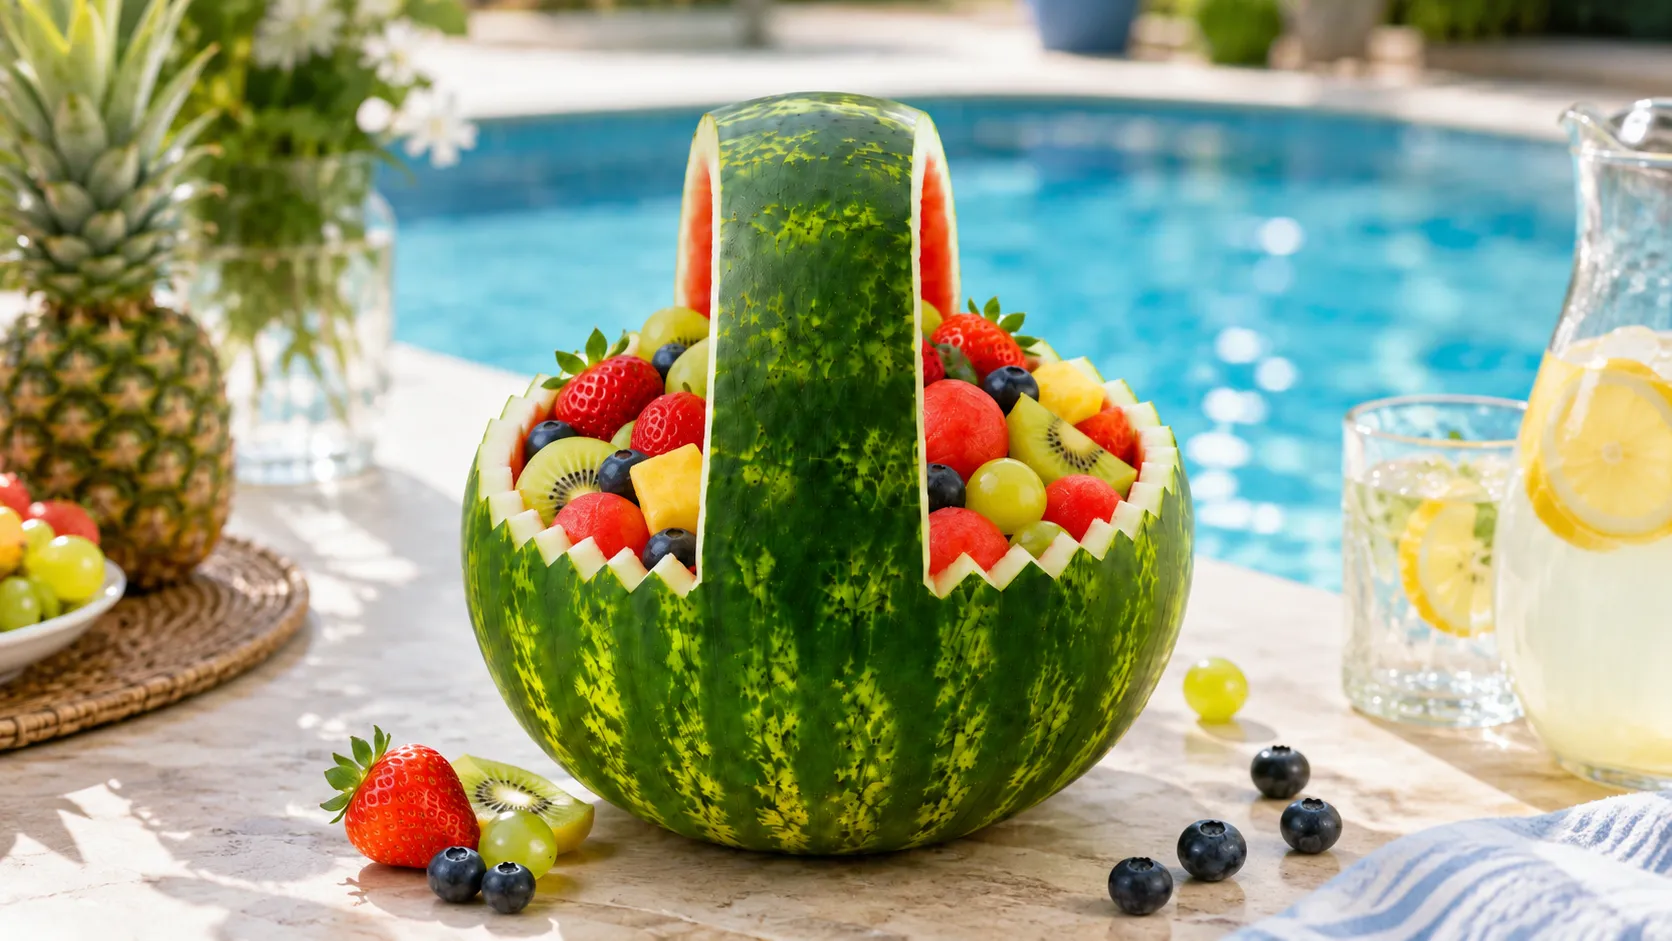
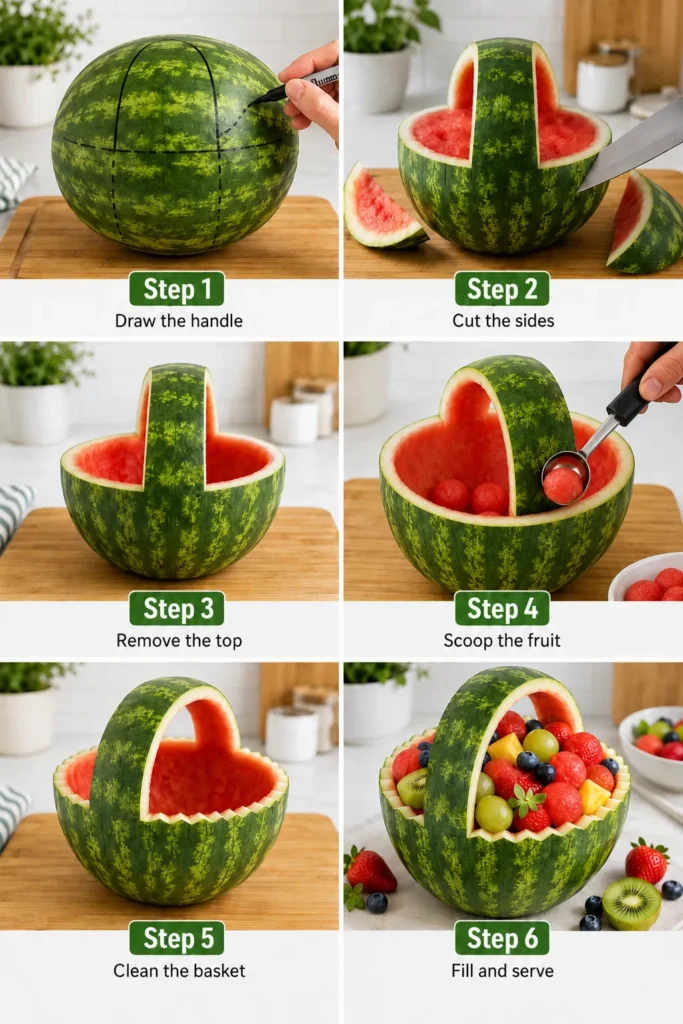
First, place the watermelon on its most stable side. Trim a very thin slice from the bottom if needed. Never cut deeply, since you could puncture the inner bowl. Then follow these steps:
- Measure a two-inch-wide strip across the top center.
- Draw two parallel lines from end to end.
- Mark a horizontal cut line halfway down each side.
- Leave the center strip untouched for the handle.
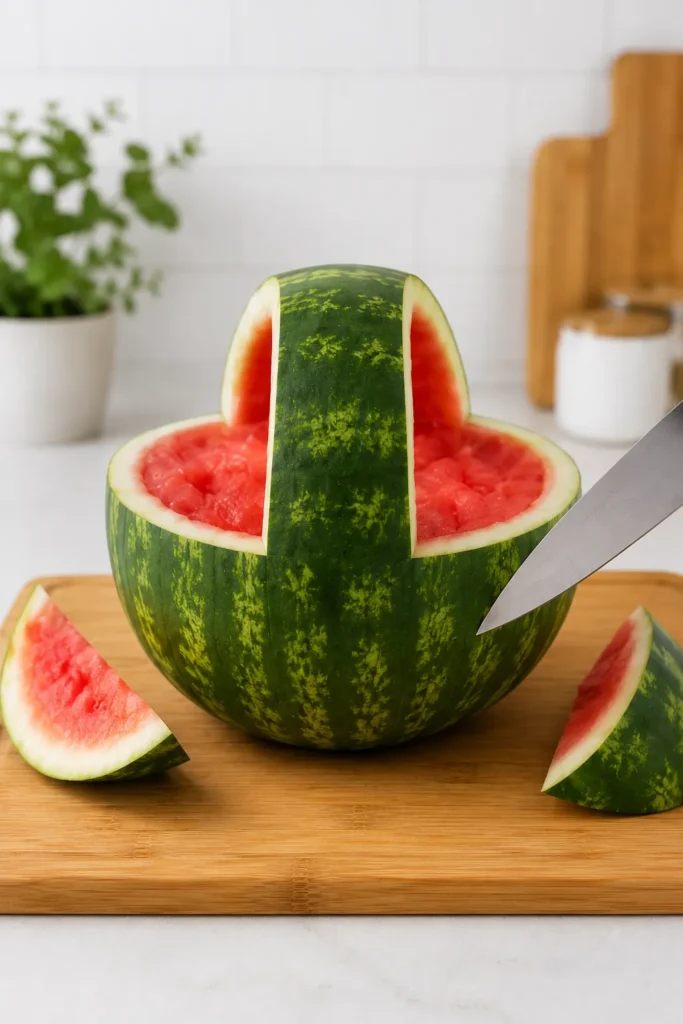
- Cut along one horizontal line toward the handle.
- Repeat on the opposite side.
- Lift away both top sections carefully.
- Trim the handle edges with a paring knife.
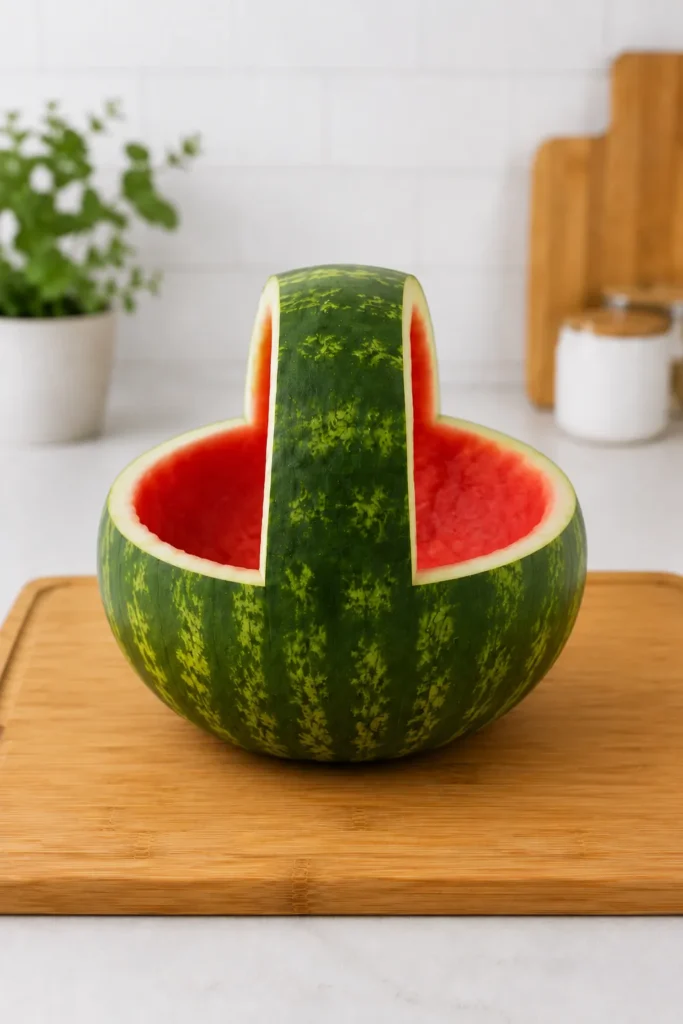
- Scoop out the visible watermelon flesh.
- Leave about one inch of flesh near the rind.
Take your time near the handle base. That area carries the weight and can crack. Short, shallow cuts give you more control than one bold slice.
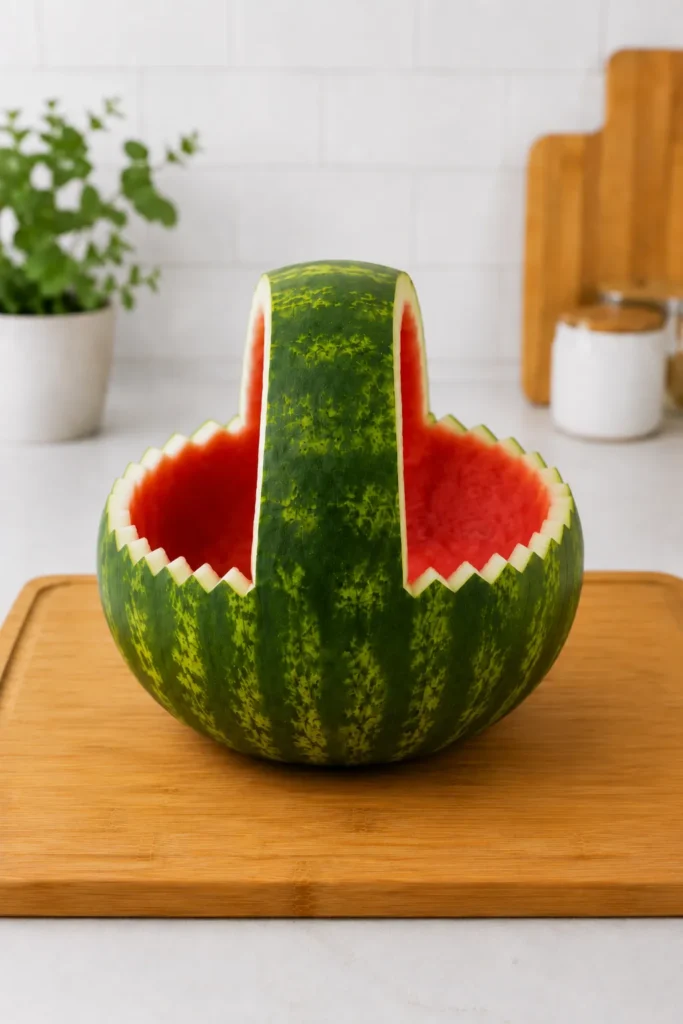
Once the large pieces come away, smooth the rim. You can leave it straight or cut small triangles for a zigzag edge. The decorative edge looks charming, but it adds no structural strength.
Now comes the reset. Your watermelon fruit basket may look rough at this stage. That’s normal. The filling hides minor uneven spots, and the bright colors pull attention upward.
Wipe the inside with paper towels after scooping. Remove loose seeds and excess juice. A dry shell keeps the fruit mixture fresher and reduces pooling.
Finally, place the basket in the refrigerator while you prepare the filling. Chilling firms the rind and helps the handle stay strong.

Scooping the Fruit Without Making a Mess
The scooping stage can turn your counter into a pink splash zone. Thankfully, a wide bowl and slower movements keep things manageable. I tend to notice that rushing creates more waste than speed.
Start with the two top sections you removed. Cut the flesh away from the rind, then cube it. Those pieces usually look cleaner than the flesh inside the basket.
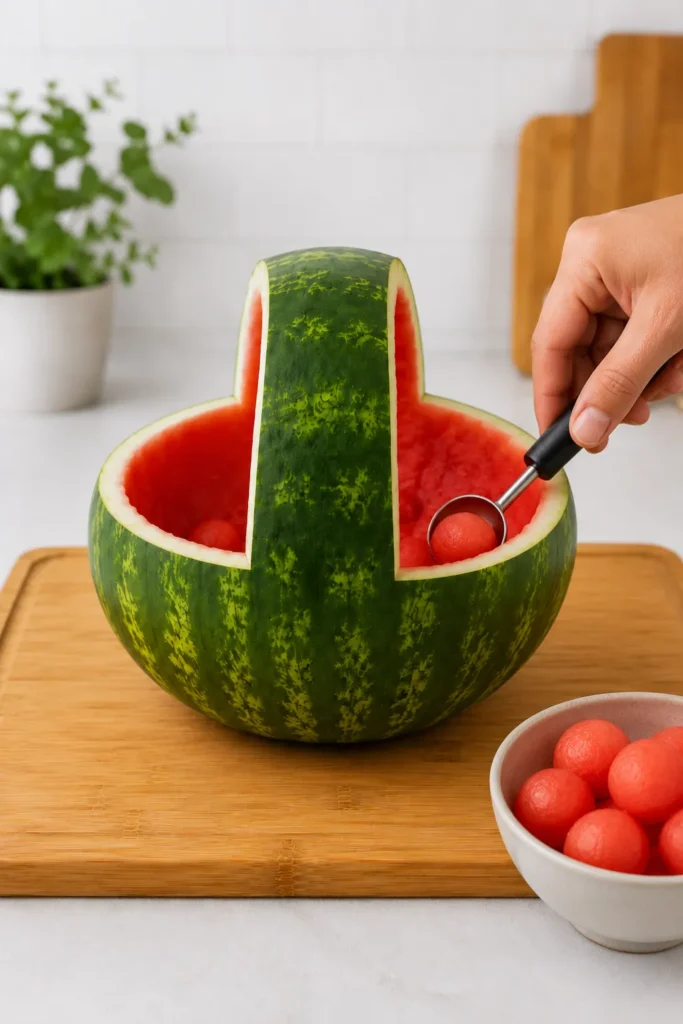
Next, use a melon baller around the inner walls. Rotate the tool instead of digging straight down. That motion creates round pieces and protects the rind.
When the center gets soft, switch to a large spoon. Scoop the remaining flesh into a separate bowl. Some pieces will look uneven, which is fine. Use the prettiest pieces for serving and save the softer ones for drinks.
Don’t scrape the rind until it turns pale and thin. Leave about one inch of flesh inside. That layer supports the basket and keeps the shell from cracking.
Now drain the watermelon pieces in a colander for five minutes. This step seems fussy, but it changes everything. Extra juice collects at the bottom and makes berries soften quickly.
Pat the fruit gently with paper towels after draining. You don’t need it completely dry. Still, removing surface moisture helps the lime dressing cling better.
Save any extra watermelon juice in a sealed jar. Mix it with sparkling water, lime, or lemonade later. Nothing needs to go to waste, and summer drinks appreciate a shortcut.
The watermelon fruit basket should now feel cool, sturdy, and mostly dry inside. That’s the point where it stops looking like a carving project. It starts looking like the centerpiece everyone will ask about soon.
Watermelon Fruit Basket Recipe and Fruit Mix
The fruit mixture should taste bright, not syrupy. Watermelon already brings plenty of sweetness. Therefore, the dressing needs just enough lime to sharpen the flavors.
This recipe fills one medium watermelon fruit basket. Prep takes 35 minutes, and chilling takes 30 minutes. Plan on 1 hour and 5 minutes total. It serves 12 to 16 people. Here’s what goes into the filling:
- 2 cups watermelon balls or one-inch cubes
- 2 cups strawberries, hulled and halved
- 1 1/2 cups seedless green grapes
- 1 1/2 cups fresh blueberries
- 1 cup pineapple chunks
- 2 kiwis, peeled and sliced
- 2 tablespoons fresh lime juice
- 1 tablespoon honey, optional
- 1 tablespoon chopped fresh mint, optional
Add the watermelon, strawberries, grapes, blueberries, pineapple, and kiwi to a large bowl. Toss very gently with clean hands or a wide spoon. Smaller utensils can crush the berries.
Whisk the lime juice and honey in a small cup. Drizzle it over the fruit, then toss again. Add mint only when you enjoy the flavor, since it can take over quickly.
Here’s my unpopular fruit salad opinion: more ingredients don’t always make it better. Five or six fruits create clearer flavor and better texture. Twelve fruits can taste like a busy hotel buffet.
Use firm fruit that’s fully ripe but not soft. Frozen fruit won’t work here because it releases too much liquid. Canned pineapple also adds extra syrup unless you drain it extremely well.
Taste one spoonful before filling the basket. Add another teaspoon of lime juice if needed. However, avoid adding more honey until the fruit chills.
Cold fruit tastes less sweet than room-temperature fruit. That delayed change matters. Give the mixture ten minutes in the refrigerator, then taste again before adjusting anything.
Building the Basket So It Holds Up
Now the carved shell and fruit finally meet. This part moves quickly, but placement still matters. A little patience creates height without stressing the handle.
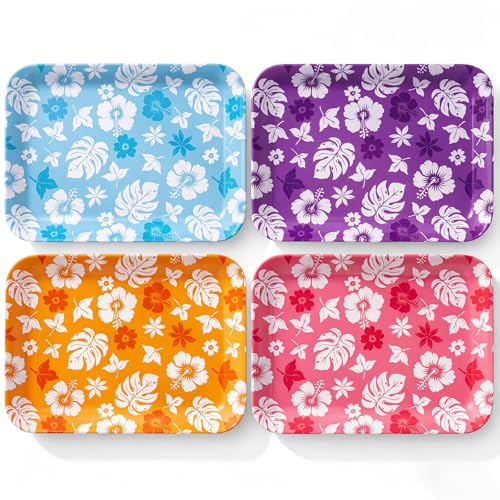
Set the chilled basket on its serving tray first. Moving it after filling adds unnecessary risk. I prefer a tray with a shallow rim, since it catches stray juice.
Line the bottom with a few firm pineapple chunks and grapes. Those pieces create a stable layer. Then add the softer berries and watermelon over them.
Don’t press the fruit down. Gentle piling keeps the berries intact and gives the basket a fuller look. Stop filling just below the handle.
Next, place brighter pieces near the top. Strawberries, kiwi, and blueberries add contrast against the red watermelon. This isn’t perfectionism. It’s five seconds of arranging with a very good payoff.
Keep the handle mostly clear. Fruit touching the handle can create pressure and moisture. Both can weaken the narrow rind near the base.
At this stage, the watermelon fruit basket should look abundant, not crammed. That difference matters. An overfilled basket spills during serving and hides the carved edge.
Cover the filled basket loosely with plastic wrap. Refrigerate it for up to four hours before serving. Longer chilling can make the fruit release more juice.
If you need more time, carve the shell one day ahead. Wrap it well and store it empty. Mix the fruit separately, then assemble closer to serving.
Here’s the assumption worth dropping: the basket doesn’t need to hold every piece of fruit. Serve extra fruit in a chilled bowl nearby. Refill the basket as guests eat, and the centerpiece stays fresh longer.
That quiet little refill trick is the one most people never consider.
Smart Tips for a Better Watermelon Fruit Basket
Small choices make the basket easier to carve and nicer to serve. None require special talent. They simply prevent the problems that show up later. Use these tips before the party starts:
- Chill the watermelon before carving for firmer flesh.
- Keep the handle at least two inches wide.
- Leave one inch of flesh inside the rind.
- Drain cut watermelon before mixing.
- Add berries close to serving time.
- Place the basket on its final tray before filling.
- Keep extra fruit cold for easy refills.
- Use a large serving spoon with a shallow bowl.
One practical note matters more than decoration. Don’t carry the filled basket by its handle. The handle looks useful, but it’s decorative. Lift the tray instead.
For sharper edges, wipe the knife between cuts. Watermelon juice makes the blade slippery and stains the rind. Clean cuts also help the basket photograph better.
If the basket leans, don’t panic. Remove the fruit, then trim a paper-thin slice from the bottom. Test the base before refilling.
A zigzag rim can hide uneven cuts. However, a straight rim looks cleaner and takes less time. Choose the option that matches your patience level that day.
The best watermelon fruit basket also avoids watery add-ins. Skip oranges, canned peaches, and very ripe raspberries. Those fruits release juice quickly and shorten the serving window.
For outdoor parties, nest the serving tray over a larger tray of ice. Keep the ice below the basket, not around it. Direct water can soften the rind.
Finally, set the basket out for no more than two hours. On very hot days, shorten that window. Beautiful fruit still follows basic food safety, even when it looks ready for a magazine cover.
FAQs About Carving and Serving
Can I make the basket the day before? Yes, but keep the carved shell empty. Wrap it tightly and refrigerate it. Add the fruit within four hours of serving.
How long does the finished basket stay fresh? The filled basket tastes best the same day. Leftover fruit usually keeps two days in a sealed container. The rind may soften sooner.
What can I use without a melon baller? A teaspoon works well for small scoops. You can also cut the flesh into cubes. Neat shapes look lovely, but flavor wins every time.
How wide should the handle be? Aim for two inches at minimum. A wider handle gives more strength and forgives uneven cuts. Thin handles can crack near the base.
Can I use other fruit? Absolutely, though firm fruit works best. Try blackberries, mango, cantaloupe, honeydew, or cherries. Avoid soft pears and sliced bananas.
How do I stop juice from pooling? Drain the watermelon pieces before mixing. Dry the shell with paper towels. Also, avoid filling the basket too early.
What should I serve with it? Offer vanilla yogurt dip, whipped cream cheese dip, or fruit skewers. For brunch, pair it with muffins, mini sandwiches, and iced tea. At cookouts, serve it beside burgers, grilled chicken, and cold pasta salad.
Can kids help? Children can wash fruit, remove grapes, and add berries. Adults should handle every carving step and sharp tool. That division keeps the project fun.
How do I store leftovers? Move all fruit into an airtight container. Don’t store it inside the carved rind overnight. The shell holds moisture and speeds softening.
Can I freeze the extra watermelon? Yes, freeze cubes for smoothies or slushies. Thawed watermelon turns soft, so don’t return it to the basket.
The Centerpiece That Earns Its Space
There’s something deeply satisfying about turning one watermelon into the thing everyone notices first. Maybe it’s the contrast. The ingredients stay simple, yet the finished basket looks wonderfully extra.
I like projects that give a big visual payoff without requiring tiny tools or perfect hands. This one does exactly that. A slightly uneven edge still looks charming once the fruit goes in.
As a mom in Orlando, I also appreciate food that cools people down without heating the kitchen. Summer already brings enough drama. The oven doesn’t need an invitation.
A watermelon fruit basket works because it sits between practical and playful. Guests can eat it, kids recognize it, and adults still reach for their phones. That combination rarely happens with one bowl.
You can keep the fruit mix classic or change the colors for the event. Add blackberries for deeper contrast. Use star-shaped pineapple for July. Tuck in mint when you want a greener finish.
Then take the photo before everyone starts serving. I say this with affection because Pinterest-worthy moments have a very short life. One eager spoon can change the whole arrangement.
Still, don’t guard it like museum art. The point is to let people dig in, refill their plates, and ask how you made it. That conversation becomes part of the fun.
By the end, you’ll have a sticky knife and extra watermelon juice. You’ll also have a tray that looks far more impressive than expected. Not bad for one melon and a little nerve.
Sometimes the smartest party move is also the one shaped like a basket.